MTD AC3 User Manual
Page 61
Engine Assembly
57
IMPORTANT: Check parts price and availability
before doing any internal engine repairs.
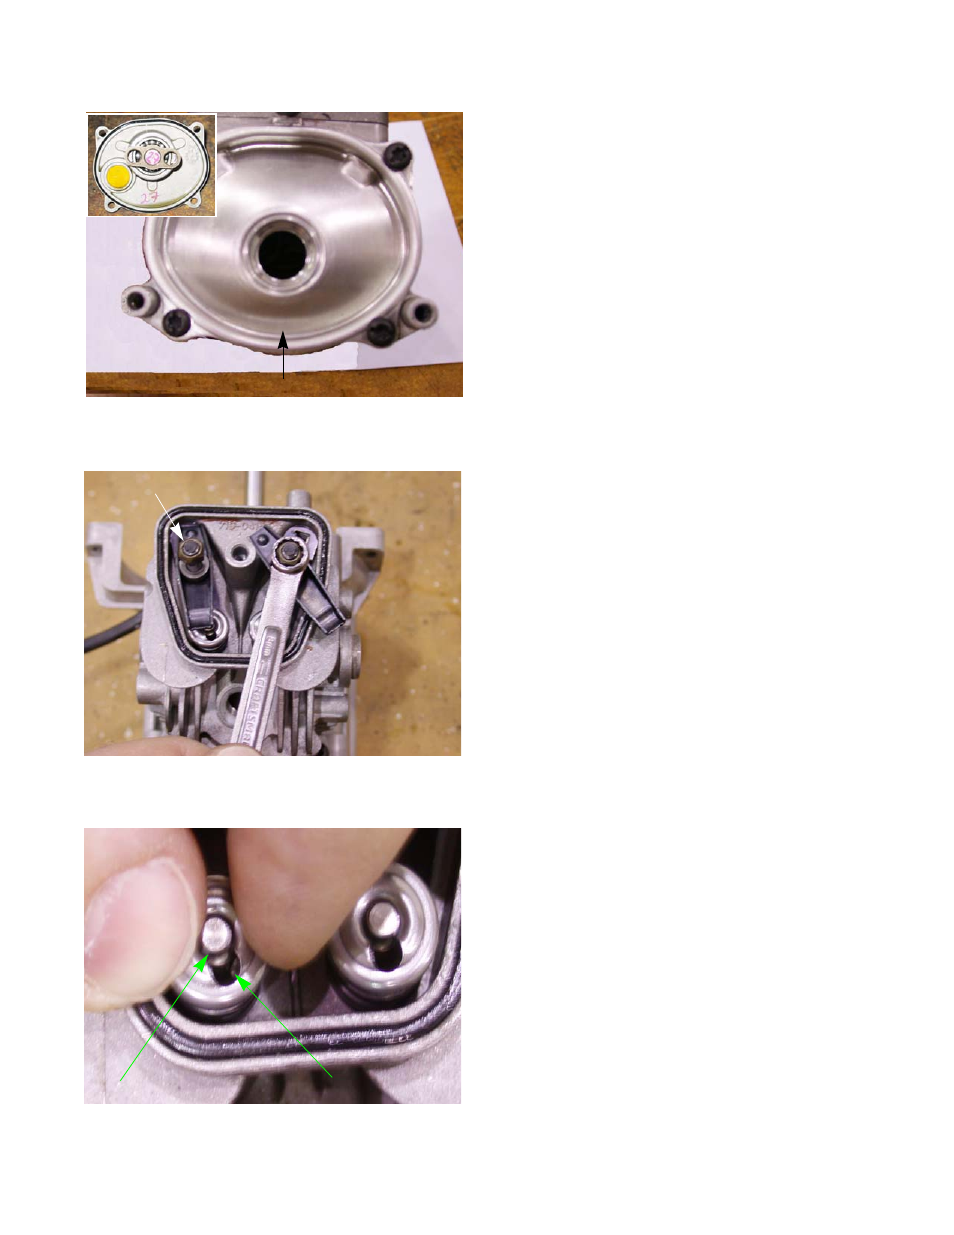
18.
Remove the four screws that secure the crankcase
cover to the block using a T-20 torx driver.
See Figure 8.10.
NOTE: On engines equipped with the electric start feature,
there is a coupler in the sump cover that slides
onto the crank pin. See Figure 8.10. inset.
19.
Remove the valve cover using a T-25 torx driver.
20.
Loosen the rocker arm fulcrum nut with an 8mm
wrench.
21.
Pivot the rocker arms away from the valves and
remove the push rods. See Figure 8.11.
22.
Remove the 4 screws that fasten the cylinder to the
crankcase using a T-25 torx driver.
23.
Slide the cylinder off of the piston and connecting
rod.
24.
Press down on the valve keepers and slide the
keeper off.
25.
Remove the valve springs and keepers.
26.
As each valve spring is removed, the valve will fall
freely out of the valve guide
NOTE: The valves and valve seats can be cleaned of car-
bon build-up and inspected. Neither the valves nor
the seats can be effectively machined in the field. If
a valve is worn or damaged, but the seat is good,
replace the valve. If the valve seat is worn or dam-
aged, replace the short block. The cylinder is not
available as a service part, and it is not likely to
become available at a price that makes cylinder
replacement economically feasible.
Figure 8.10
Crankcase cover
Figure 8.11
Fulcrum nut
Figure 23.0
Press down and
Grove on valve stem
Slot in keeper
slide back