Meade Instruments 60AZ-A2 User Manual
Page 6
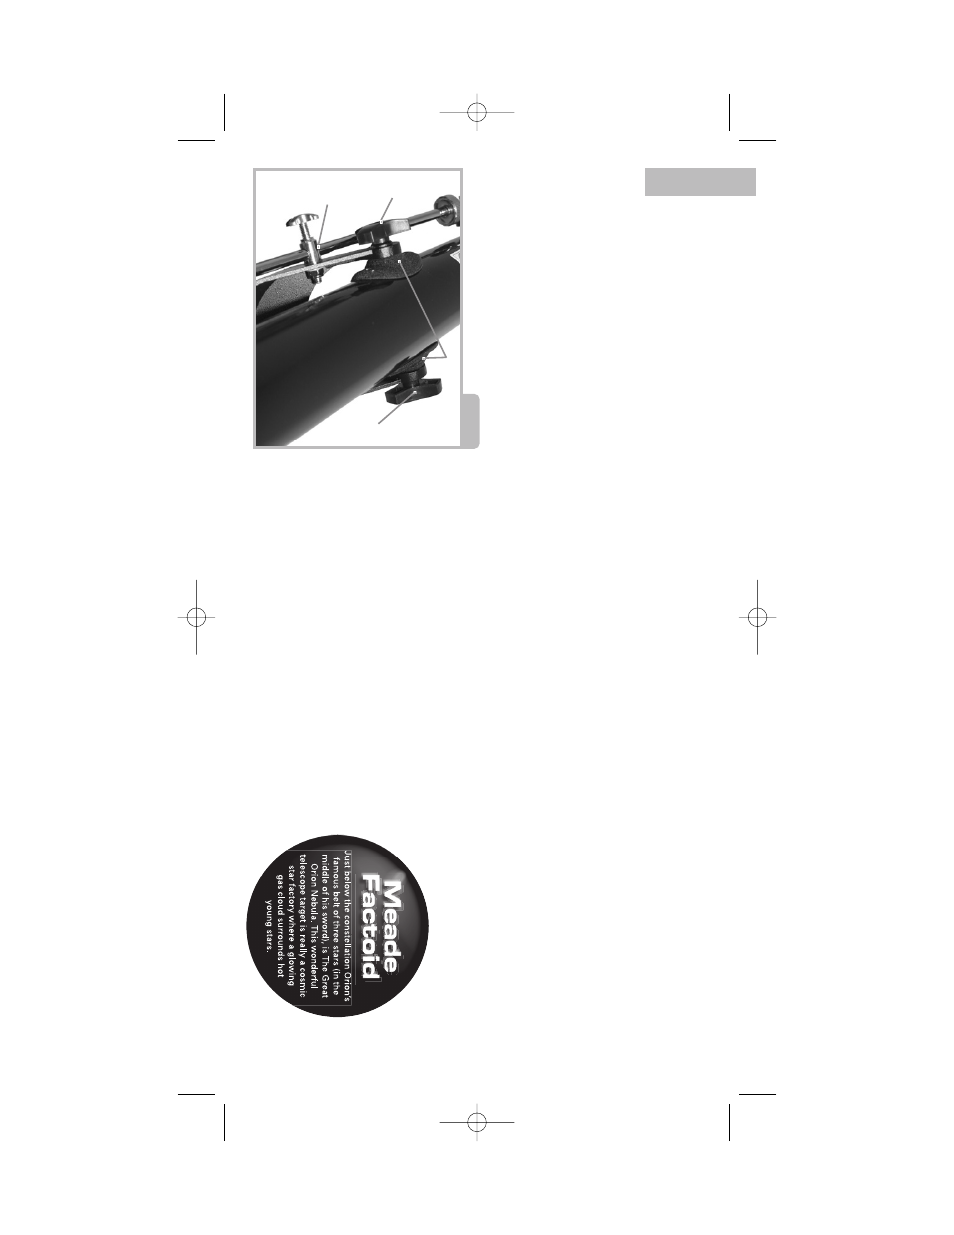
Fig. 4
ont
o two bolts on the optic
al tube.
Remo
ve
the thumbscr
e
ws fr
om the tube.
2.
Line up the two hol
es on the viewfinder
br
ack
et o
ver the two bolts. Slide the
br
ack
et o
ver the bolts. See
Fig. 1, inset C
.
3.
Replac
e the thumbscr
e
ws ont
o the bolts
and tight
en t
o
a firm f
eel.
A
T
T
A
CH THE DIA
GONAL MIRROR AND
EYEPIECE
The diagonal mirr
or r
efl
ects the light fr
om
the optic
al tube t
o
a mor
e c
omf
ort
abl
e
viewing position.
1.
Slide the diagonal mirr
or (13) int
o the
focuser dr
awtube(15).
2.
Tight
en the dr
awtube thumbscr
e
w
t
o
hold
the diagonal mirr
or secur
el
y.
3.
Slide the MA 25mm e
yepiec
e (1) int
o
diagonal mirr
or
.
4.
Tight
en the diagonal mirr
or thumbscr
e
w
to
hold the e
yepiec
e secur
el
y.
ALIGN THE VIEWFINDER
P
erf
orm the fir
s
t part of this pr
oc
edur
e
during the daytime and the las
t s
tep at night.
1.
P
oint the t
e
lesc
ope at an easy-t
o-find
land object such as the t
op of a t
e
lephone
4.
Thr
ead a l
ock knob (5) thr
ough each
of the hol
es in the f
orks of the mount
and tight
en t
o
a firm f
eel.
A
T
T
A
CH THE VIEWFINDER
An e
yepiec
e
(1) has a narr
o
w
field of view
. A
viewfinder (2) has a wider field of view,
which mak
es it easier t
o
l
o
c
a
te
objects. The
5x24mm viewfinder has cr
os
shair
s t
o
mak
e
it easier t
o
line up mor
e pr
ecisel
y with a
ta
rget.
1.
Not
e the two thumbscr
e
ws (25) thr
eaded
4
slide r
o
d
thr
ough
hol
e
lock
knob
lock
knob
plac
e tube between
forks
pol
e or a dis
tant mount
ain or t
o
wer
. Look
thr
ough the e
yepiec
e
in the diagonal
mirr
or and turn the f
ocuser knob (23)
until the image is sharpl
y f
ocused. Cent
er
the object pr
ecisel
y in the e
yepiec
e
’s
field
of view
.
2.
Look thr
ough the viewfinder
. T
urn one or
mor
e of the viewfinder’
s alignment
scr
e
ws (3) until the cr
os
shair
s ar
e
pr
ecisel
y o
ver the same object as y
o
u
c
ent
er
ed in the e
yepiec
e.
3.
Check this alignment at night on a
c
e
le
s
tial object, such as the Moon or a
bright s
tar, and use the viewfinder’
s
alignment scr
e
ws t
o
mak
e any nec
es
sary
refinements.
40-04135 8 Page Manual Template 6/29/05 10:54 AM Page 6