Table (c) – Makita LS1030N User Manual
Page 10
10
CONTACT EDGE against the crown molding stop-
pers as shown in the figure. Adjust the crown mold-
ing stoppers according to the size of the crown
molding. Tighten the screws to secure the crown
molding stoppers. Refer to the table (C) for the
miter angle.
4.
Cutting aluminum extrusion
When securing aluminum extrusions, use spacer
blocks or pieces of scrap as shown in the figure to
prevent deformation of the aluminum. Use a cutting
lubricant when cutting the aluminum extrusion to
prevent build-up of the aluminum material on the
blade.
CAUTION:
•
Never attempt to cut thick or round aluminum
extrusions. Thick aluminum extrusions may come
loose during operation and round aluminum
extrusions cannot be secured firmly with this tool.
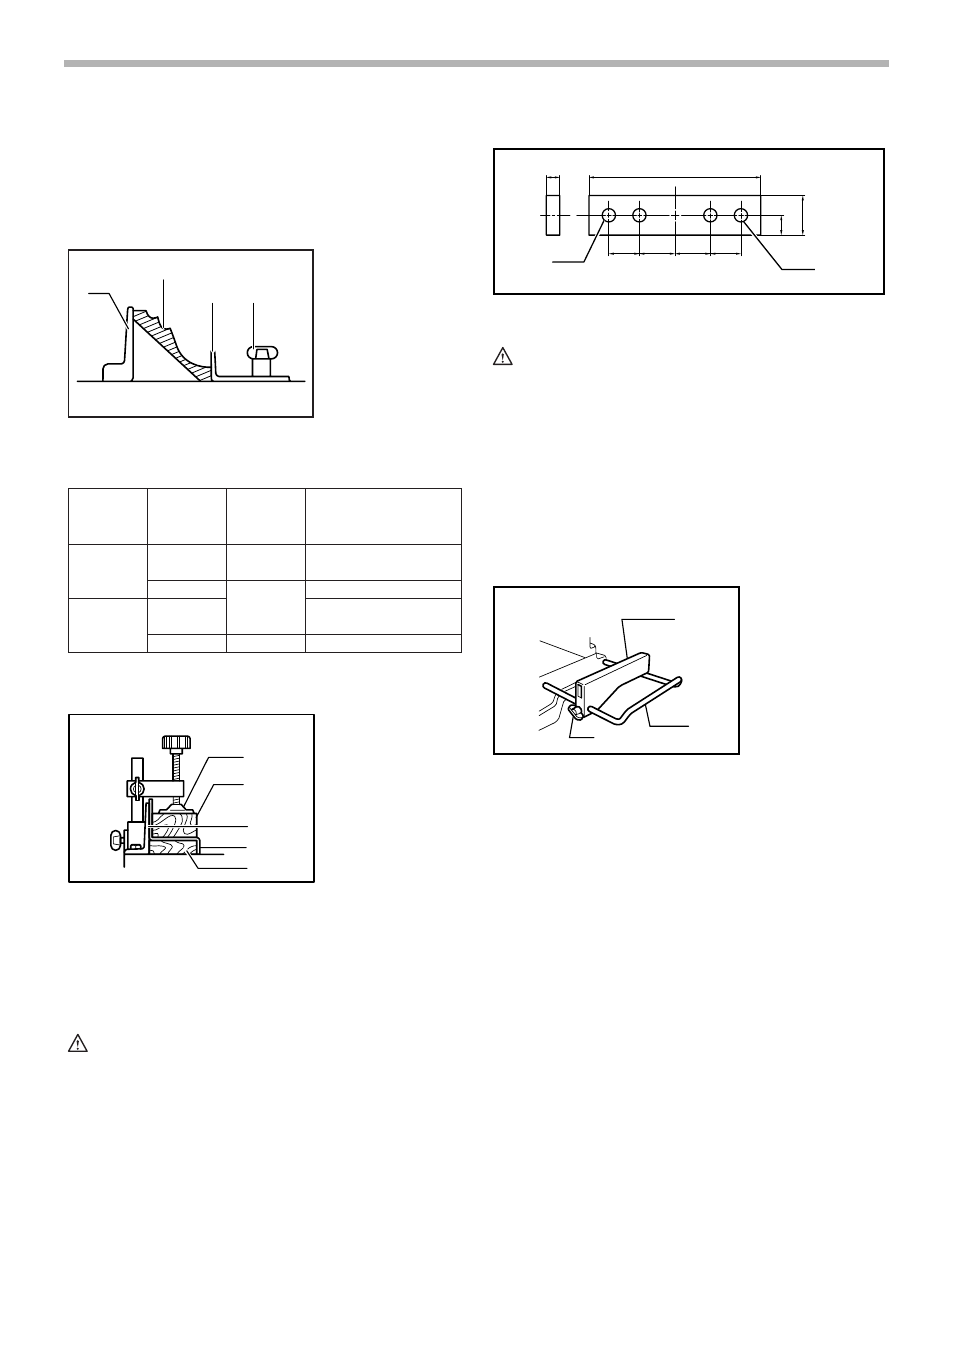
5.
Wood facing
Use of wood facing helps to assure splinter-free
cuts in workpieces. Attach a wood facing to the
guide fence using the holes in the guide fence.
See the figure concerning the dimensions for a sug-
gested wood facing.
CAUTION:
•
Use straight wood of even thickness as the wood
facing.
•
Use screws to attach the wood facing to the guide
fence. The screws should be installed so that the
screw heads are below the surface of the wood
facing.
•
When the wood facing is attached, do not turn the
turn base with the handle lowered. The blade and/
or the wood facing will be damaged.
6.
Cutting repetitive lengths
When cutting several pieces of stock to the same
length, ranging from 240 mm (9-29/64”) to 400 mm
(15-3/4”), use of the set plate (optional accessory)
will facilitate more efficient operation. Install the set
plate on the holder (optional accessory) as shown
in the figure.
Align the cutting line on your workpiece with either
the left or right side of the groove in the kerf board,
and while holding the workpiece from moving, move
the set plate flush against the end of the workpiece.
Then secure the set plate with the screw. When the
set plate is not used, loosen the screw and turn the
set plate out of the way.
NOTE:
•
Use of the holder-rod assembly (optional
accessory) allows cutting repetitive lengths up to
2,200 mm (7.2 ft.) approximately.
1. Guide fence
2. Crown molding
3. Crown molding
stopper
4. Screw
1. Vise
2. Spacer block
3. Guide fence
4. Aluminum extru-
sion
5. Spacer block
1
2
3
4
001560
Position in
Fig.A
Miter angle
Finished piece
(1)
Right 45˚
Save the right side of blade
(2)
Save the left side of blade
(3)
Save the right side of blade
(4)
Right 45˚
Save the left side of blade
Left 45˚
For inside
corner
For outside
corner
Table (C)
006365
1
2
3
4
5
001844
1. Hole
1. Set plate
2. Holder
3. Screw
001779
Over 10mm (3/8”)
Over 460mm (18-1/8”)
1
1
90mm
(3-9/16”)
40mm (1-9/16”)
137mm
(5-3/8”)
70mm
(2-3/4”)
137mm
(5-3/8”)
70mm
(2-3/4”)
1
2
3
001846