Installing the appliance – Miele K1801SF User Manual
Page 50
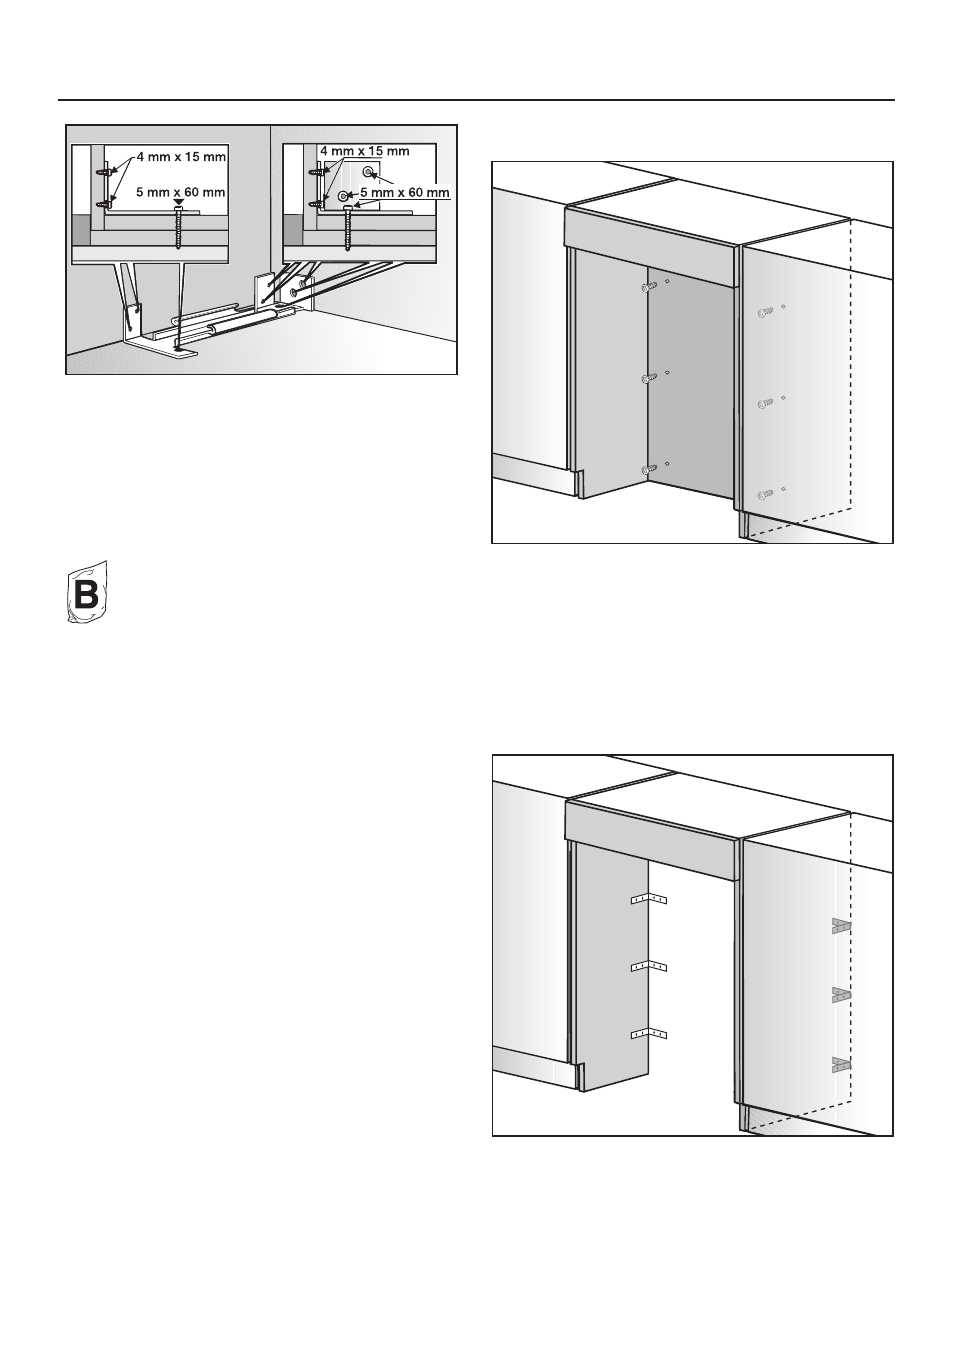
^ Drill pilot holes:
–
1
/
8
" (3 mm) for the 5 x 60 mm wood
screws
–
1
/
16
" (2 mm) for the 4 x 15 mm wood
screws.
^ Tightly secure the anti-tip brackets in
the niche.
Be certain the screws penetrate
through the flooring and into the wall
plate a minimum of
3
/
4
" (19 mm).
If the included anti-tip brackets cannot
be secured in the niche, the built-in
cabinet must be secured to the wall
behind it with several screws. Only in
this way can the appliance later
secured in the built-in cabinet be
prevented from tipping.
In a cabinet with a back wall
^ screw the back wall of the cabinet in
several places directly to the wall
behind it.
For this, use suitable plugs/screws
depending on the type of wall.
In a cabinet without a back wall
screw the cabinet to the wall behind it
in several places using suitable
mounting brackets.
For this, use suitable plugs/screws
depending on the type of wall.
Installing the appliance
50