Monte Carlo Fan Company 5CO52 User Manual
Page 4
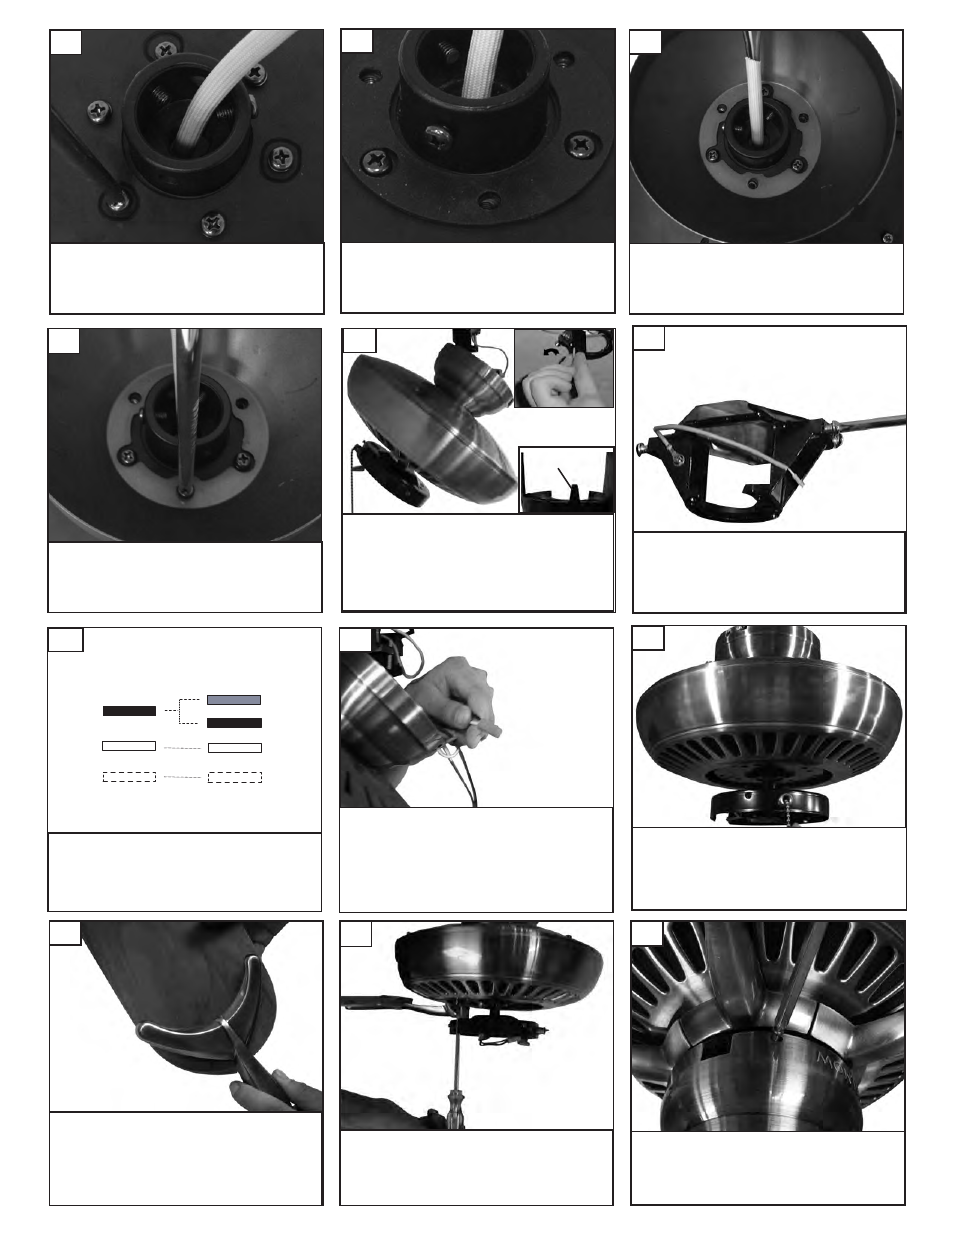
Place blade holders onto blades aligning holes
in blade holder with holes in blade. Make sure
that the side of the blade you select is facing
downward. Install 3 screws and fiber wash-
ers to back side of blade as shown. Tighten
screws securely. Repeat this process 4 more
times until all blades are assembled.
Install blades to motor using the 10
motor screws provided. Tighten
screws securely.
28
29
Lift fan to mounting bracket, aligning the “L”
shape holes on the canopy with the screws
on the mounting bracket. Turn the fan
clockwise to lock in position. Re-install the
screws removed in the previous step and
tighten securely.
27
Install switch cap to fan using the 3
screws provided. Tighten securely.
30
Make wire connections to power source using wire nuts
provided. Make sure that no filiments are outside of
the wirenut. After making the wire connections, the
wires should be spread apart with the grounded con-
ductor and the equipment-grounding conductor on one
side of the outlet box and ungrounded conductor on
the other side of the outlet box.
26
Connect black and blue wire from fan to Black or (Hot)
wire from house. Connect White wire from Fan to
White (Neutral) wire from house. Connect Ground
leads from mounting bracket and downrod to Ground
lead from house. Refer to Safety Tips section of
manual.
25
House
Fan
Blue
Black
White
Green
Black
White
Ground
Remove the all thread studs from the
lower part of the mounting bracket. Hang
fan from mounting bracket by the
hands free hook into a closed hole
on the edge of the Canopy. Note:
For Canadian mounting refer to Step
#8.
23
Hands free hook
Take 4 screws from hardware pack
and insert 2 one on each side of
bracket to match the L slot screw
holes in canopy. Keep 2 screws for
later use.
24
Install rubber pad between fan
body and canopy.
20
Remove every other screw as circled
and save for later use.
19
Place canopy over fan body
aligning holes.
21
Replace the 3 screws removed and
tighten securely. Check motor for
shipping stabilizers and remove if
present.
22