Appendix b: hms-10 cable assembly, Assembling phoenix-to-phoenix loudspeaker cables – Meyer Sound HMS-10TM User Manual
Page 19
19
APPENDIX B: HMS-10 CABLE ASSEMBLY
CAUTION:
When wiring HMS-10 loudspeaker cables, it is extremely important that each pin be wired correctly.
Make sure the 48 V DC from the external power supply is wired directly (and only) to the 48 V DC pins on the
HMS-10 loudspeaker connector, and that the polarity is observed (negative to negative, positive to positive) to avoid
damage to the loudspeaker. In addition, make sure that audio pins are wired correctly; polarity reversals for audio sig-
nals affect system performance.
ASSEMBLING PHOENIX-TO-PHOENIX LOUDSPEAKER CABLES
To connect the HMS-10 loudspeaker directly to the MPS-488HPp power supply, you need a Phoenix 5-pin female to
Phoenix 5-pin female cable. The following procedure documents how to assemble this cable.
To assemble a Phoenix-to-Phoenix cable:
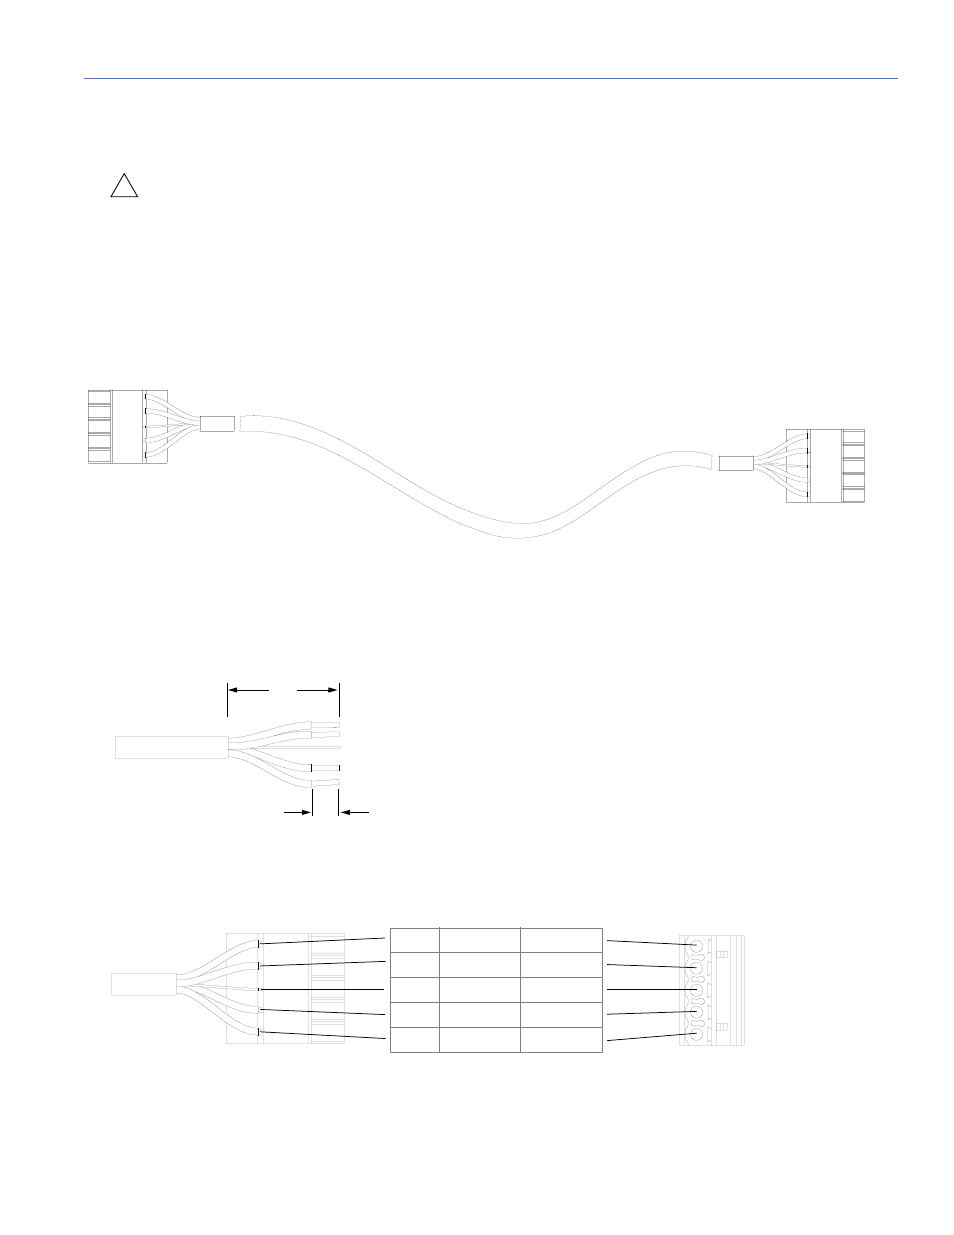
1. If the cable has not yet been stripped, strip one end of the cable. Strip the outer shielding 1 inch and then strip the black,
red, blue, and white wires .275 inch.
2. Insert the five exposed conductors, from one end of the cable, into the five cable holes in one of the Phoenix connectors.
Use the following wiring scheme.
Assembled Phoenix-to-Phoenix Cable
Phoenix 5-Pin Female Cable Mount Connector
!
1”
0.275”
Pin #1 Black
48 V DC (–)
Pin #2 Red
48 V DC (+)
Pin #3 Shield
Audio shield
Pin #4 Blue
Audio (–)
Pin #5 White
Audio (+)
Connector side up
Side (cable attached)