MITSUBISHI ELECTRIC Pro 930SB User Manual
Page 4
4
English
WARNING
TO PREVENT FIRE OR SHOCK HAZARDS, DO NOT EXPOSE THIS UNIT TO
RAIN OR MOISTURE. ALSO, DO NOT USE THIS UNIT'S POLARIZED PLUG
WITH AN EXTENSION CORD RECEPTACLE OR OTHER OUTLETS UNLESS
THE PRONGS CAN BE FULLY INSERTED.
REFRAIN FROM OPENING THE CABINET AS THERE ARE HIGH VOLTAGE
COMPONENTS INSIDE. REFER SERVICING TO QUALIFIED SERVICE
PERSONNEL.
CAUTION
CAUTION: TO REDUCE THE RISK OF ELECTRIC SHOCK, DO NOT REMOVE
COVER (OR BACK). NO USER SERVICEABLE PARTS INSIDE. REFER
SERVICING TO QUALIFIED SERVICE PERSONNEL.
This symbol warns user that uninsulated voltage within the unit may have
sufficient magnitude to cause electric shock. Therefore, it is dangerous to
make any kind of contact with any part inside this unit.
This symbol alerts the user that important literature concerning the operation
and maintenance of this unit has been included. Therefore, it should be read
carefully in order to avoid any problems.
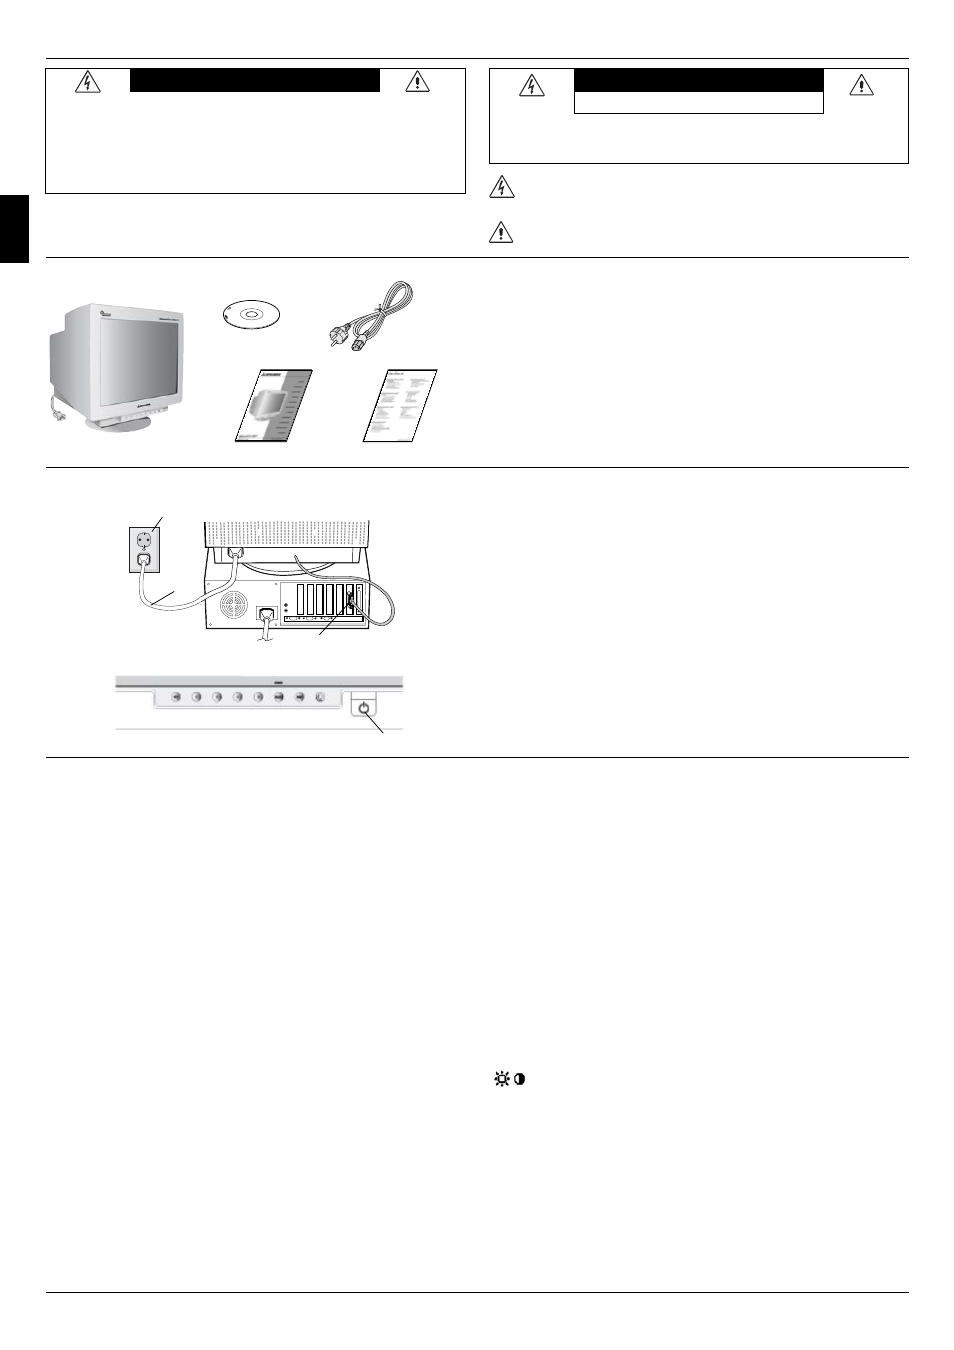
Diamond Pro 930
SB
monitor box* should contain the following:
• Diamond Pro 930
SB
Monitor with tilt/swivel base
• Power cord
• Captive Signal Cable
• User ’s manual
• Sales Office List
• CD ROM – Includes complete User’s Manual in PDF format
and Windows related files (INF file and colour profile). To see
the complete User’s Manual, Acrobat Reader 4.0 must be
installed at your PC.
* Remember to save your original box and packing material to
transport or ship the monitor.
Contents
To attach the Diamond Pro 930
SB
monitor to your system, follow
these instructions:
1. Turn off the power to your computer and
Diamond Pro 930
SB
monitor.
2. If necessary, install the display card. For more information, refer
to the display card manual.
3. For PC: Connect the 15-pin mini D-SUB of the captive signal
cable to the connector for the display card in your system (Figure A).
Tighten all screws.
4. Connect one end of the power cord to the Diamond Pro 930
SB
monitor and the other end to the power outlet (Figure A).
5. Turn on the monitor (Figure B) and the computer.
6. The Windows 95/98/2000/Me/XP INF file for your monitor can be
found on the CD-ROM, delivered with the monitor.
7. This completes the installation.
NOTE: If you need more information, please refer to complete
User's Manual in CD ROM.
Quick Start
EXIT
Main Menu
Exits the OSM menu.
Sub-Menu
Exits to the OSM con-
trols main menu.
RISK OF ELECTRIK SHOCK
• DO NOT OPEN
/
Y
Y
Captive Signal Cable
Power Outlet
User’s manual
Controls
OSM (On-Screen Manager) control buttons on the front of the
monitor function as follows:
To access OSM press any of the control buttons (EXIT,
/
Y
,
/
Y
, –, +).
Power
Cord
15-pin mini D-SUB
Figure A
Sales Office List
Power Cord
CD ROM
Note: Deactivates the OSM menu and activates the OSM
menu when the OSM is turned off.
CONTROL
Moves the highlighted
area left/right to select
one of the sub-menus.
Moves the highlighted
area left/right to select
one of the controls.
Note: Deactivates the OSM menu and to adjust Bright-
ness with Hot key set “ON”
CONTROL
–/+
Has no function.
Moves the bar in the - or
+ direction to decrease
or increase the adjust-
ment.
Note: Deactivates the OSM menu and to adjust Contrast
with Hot key set “ON”
SELECT/
SBMODE
Enters sub-menu.
Has no function.
Note: When the OSM is off, it will act as the SuperBright
(SB) function key. User can select between SB
MODE OFF, SB MODE1, and SB MODE2. The first
time this key is pressed, the current SB Mode is
indicated. Within a 3 second window, if this key is
selected again, the SB MODE will change to the
next SB MODE. For example, the current mode is
SB MODE OFF, the key is pressed twice within a
3 second time frame, the SB MODE will change to
SB MODE1 and so on. The color temperature at
each SB Mode is adjusted by appropriate color
control except for the sRGB mode whose color
setting cannot be adjusted. When the unit is turned
off, it will reset to SB off mode.
Super Bright Mode OFF: for text based images
(normal use)
Super Bright Mode-1 ON: for images
Super bright Mode-2 ON: for moving image such
as DVD movies
RESET
Resets all the controls
within the highlighted menu
to the factory setting.
Main Menu
Sub-Menu
Resets the highlighted
control to the factory
setting.
Note: When RESET is pressed in the main and sub-
menu, a warning window will appear allowing
you to cancel the reset function.
Brightness/Contrast Controls
Brightness: Adjusts the overall image and background screen
brightness.
Contrast: Adjusts the image brightness in relation to the background.
Degauss: Eliminates the buildup of stray magnetic fields which
alter the correct scan of the electron beams and affect the purity of
the screen colours, focus and convergence. When activated, your
screen image will jump and waver a bit as the screen is
demagnetized.
Caution: Please allow a minimum of 20 minutes to elapse between
uses of the Degauss Control.
When Hot key function is set to “ON”, accessing the OSD is only possible
with the “EXIT” button.
Figure B
Power Button