Meade Instruments LXD 75 User Manual
Page 62
6 2
APPENDIX E: MOUNTING
THE MODEL SC-8 SCHMIDT-
CASSEGRAIN OPTICAL
TUBE
How to Attach the Optical Tube to the Mount
The LXD75 model SC-8 Schmidt-Cassegrain assembles and operates identically to
all the other LXD75 models equipped with an Autostar handbox, with one exception:
the optical tube is attached to the mount with a
mounting bracket rather than the cra-
dle ring assembly. The optical tube is shipped with the mounting bracket already
attached. To attach the mounting bracket /optical tube assembly to the mount, perform
the following steps.
1.
Perform steps 1 through 6 as described in
HOW TO ASSEMBLE YOUR TELESCOPE
,
pages 11 and 12.
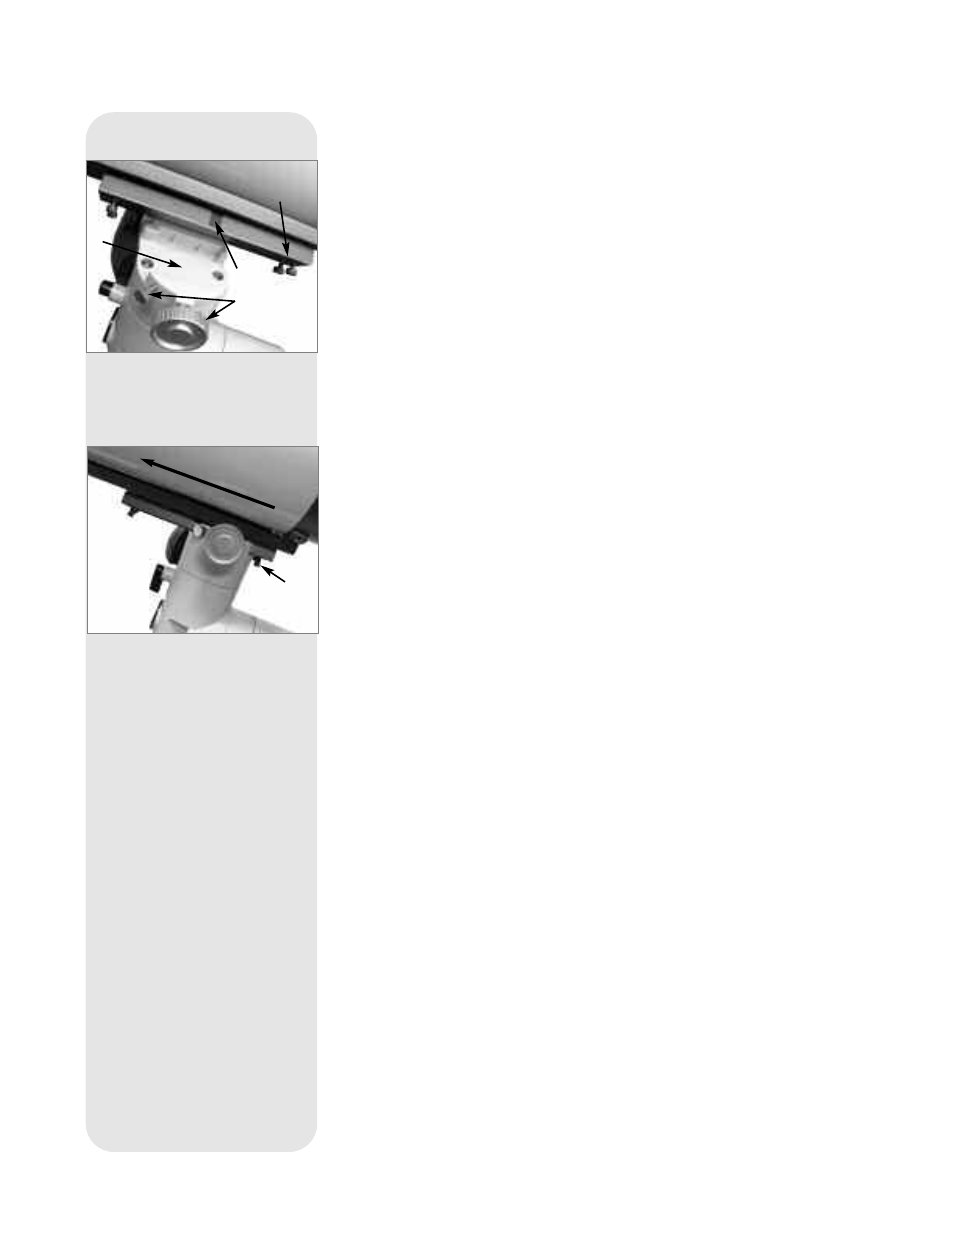
2.
Slide the mounting bracket into the cradle assembly mounting slot. For most
applications, set the groove in the bracket next to the cradle locking knob, so that
the bolt of the cradle locking knob will enter the groove when the knob is tight-
ened. Tighten both the cradle locking knob and the secondary locking knob to a
firm feel. See
Fig. 54.
If you are using heavy accessories (such as a camera, microfocuser, etc.) on the
back end of the tube, you may need to balance the tube differently to keep the
tube from drifting downward: Slide the mounting bracket and tube forward, until
the screws at the back end of the tray touch the mount. See
Figs. 54 and 55.
Then tighten the cradle locking knob and the secondary locking knob to a firm
feel.
3.
Continue the assembly with step 9 as described in
HOW TO ASSEMBLE YOUR TEL-
ESCOPE
, page12, and complete all the subsequent steps. All other procedures
are identical as described earlier in this manual.
Fig. 54 Mounting the SC bracket and
optical tube to the mount.
Fig. 55: Adjusting the balance of the
optical tube when using heavy acces-
sories.
Groove
Screws at the
back-end of
the bracket
Locking Knobs
Screws at the
back-end of
the bracket
Slide F
orw
ard
Slot