MITSUBISHI ELECTRIC WS-48315 User Manual
Page 19
MODELS: WS-48315 / WS-55315 / WS-65315
Page 19
1. Carefully position the replacement CRT and fasten in place using 4 screws "d". [Figure 5-5]
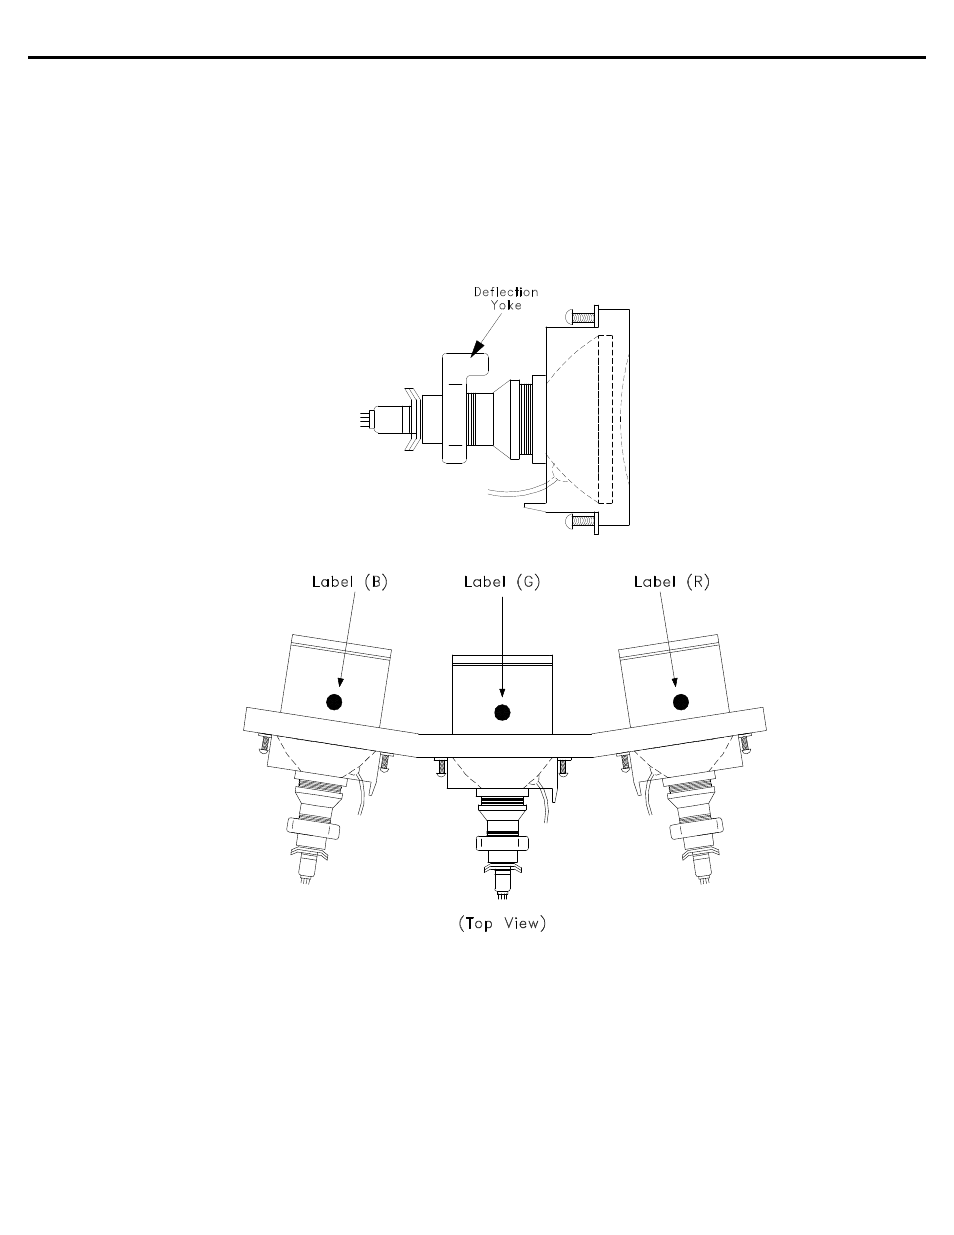
2. Install the Deflection Yoke and other CRT components back in their original position on the CRT neck.
[Figure 5-6]
3. Install the Lens that was removed in step 6 of Removal Of The CRT. [ Figures 5-1 and 5-2 ]
a) Position the Lens so that the Label faces the direction shown in Figure 5-7
b) Install the mounting screws “b”. [Figure 5-1]
4. Insert the Optical Unit into the Light Box Assembly.5. Install the PCB-CRT.
6. Insert the Anode Lead Wire into the Flyback Transformer.
7. Re-clamp the Lead Wire in its original position.
Figure 5-6
Figure 5-7
Adjustment procedures after replacing the CRT(s)
• CRT Cut Off / White Balance Adjustment
• Static Convergence Adjustment
• Dynamic Convergence Adjustment
- DLP HC900E (5 pages)
- WS-48511 (92 pages)
- S490U (5 pages)
- XD50U (77 pages)
- S490 (36 pages)
- LVP-X400U (29 pages)
- ES100 (30 pages)
- WS-73411 (79 pages)
- XD250U-ST (42 pages)
- FL7000U (8 pages)
- DATA PROJECTOR (68 pages)
- XL5900U (6 pages)
- WD-62526 (80 pages)
- FL7000 (48 pages)
- WS-65909 (88 pages)
- XD500U-ST (34 pages)
- WS - 48313 (76 pages)
- WS-55809 (72 pages)
- ColorView XL30U (2 pages)
- VS-50805 (88 pages)
- XD470U (30 pages)
- SA51 (2 pages)
- FL6900U (48 pages)
- X250 (28 pages)
- LVP-X300U (34 pages)
- ws-48413 (80 pages)
- EX51U (2 pages)
- XD90U (2 pages)
- WD-62627 (118 pages)
- WT-42315 (76 pages)
- HD1000 (39 pages)
- WS-65615 (100 pages)
- Mitsubishi Electric LCD HC6800 (47 pages)
- XD206U (2 pages)
- PK20 (2 pages)
- WD-65000 (71 pages)
- 3D DLP HOME-CINEMA TELEVISION SERIES 742 (62 pages)
- DLP XD460U (40 pages)
- XD80U (2 pages)
- XD80U (64 pages)
- XL650U (45 pages)
- XL4U (5 pages)
- XL8U (34 pages)
- XD200U (34 pages)
- XD110R (30 pages)