Stacked iso din head unit provision, Kit assembly – Metra Electronics 99-8214TB User Manual
Page 8
6
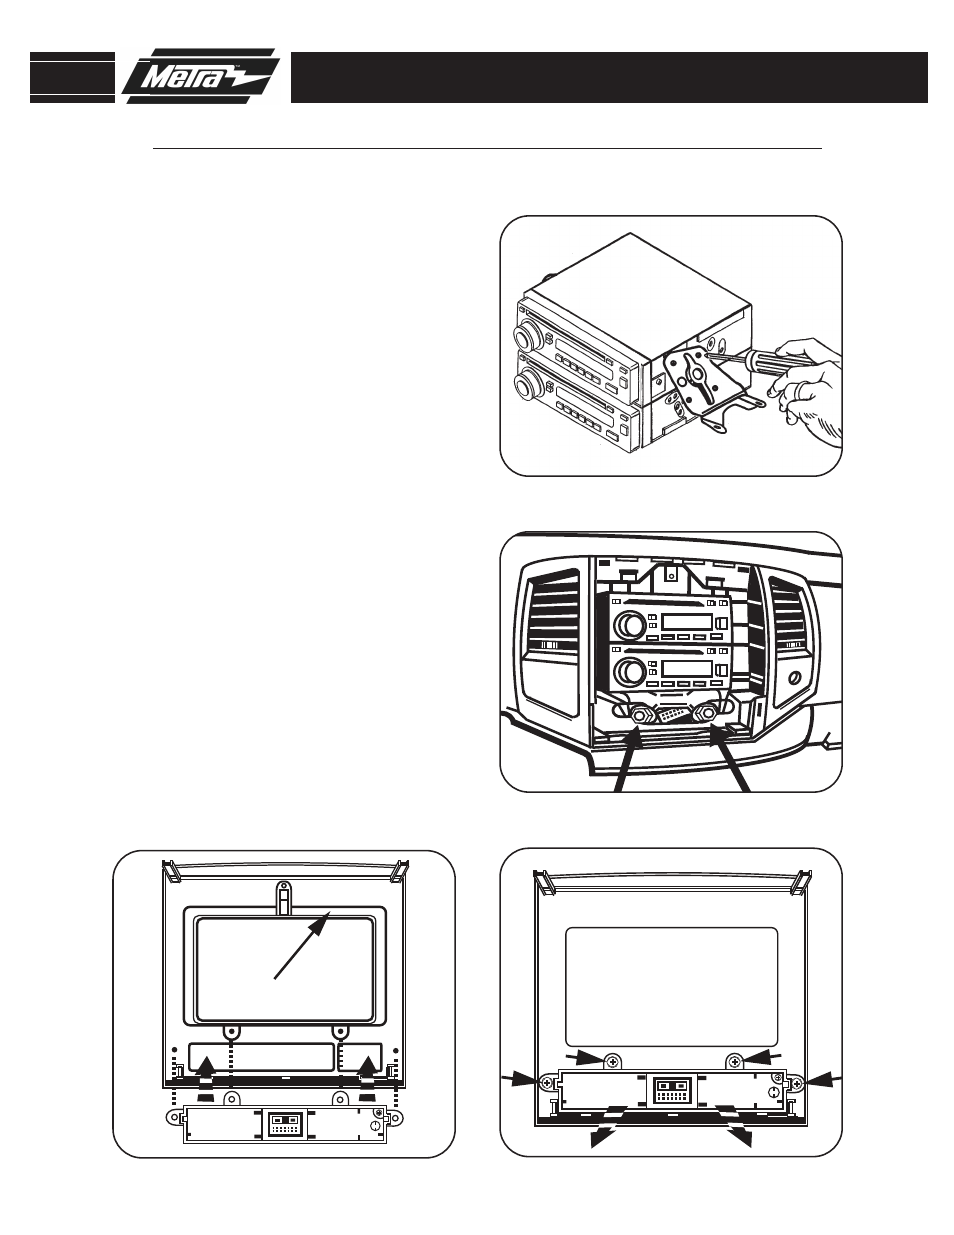
Slide the aftermarket radio units into
the factory brackets and secure the
unit to the brackets using the
screws supplied with the head unit.
(Figure A)
1
Secure the aftermarket radio units
and factory bracket assembly into
the sub dash. (Figure B)
2
STACKED ISO DIN HEAD UNIT PROVISION
99-8214
KIT ASSEMBLY
A
B
REMOVE
CLOCK/HAZARD SWITCH
BRACKET ASSEMBLY
REMOVE
CLOCK/HAZARD SWITCH
BRACKET ASSEMBLY
REAR VIEW OF RADIO HOUSING
C
RESTORE
CLOCK/HAZARD SWITCH
BRACKET ASSEMBLY
RESTORE
CLOCK/HAZARD SWITCH
BRACKET ASSEMBLY
REAR VIEW OF
RADIO HOUSING
DOUBLE DIN TRIM PLATE
D
Remove the (4) screws securing the
clock/hazard switch bracket to the
radio housing and remove the
clock/hazard switch bracket
assembly. (Figure C)
3
Place the Double DIN trim plate into
the radio housing and replace the
clock/hazard switch/bracket assem-
bly using the (4) #6 x 3/8” Phillips
pan head screws. (Figure D)
4
Continue to Final Assembly.