Under bench use, Switching on and off, Making a cut – Global Machinery Company MX1275 User Manual
Page 9
Under bench use
1. Set the saw into the bench as required, ensuring the
saw is secured adequately.
2. Attach a vacuum adapter to the saw.
3. Ensure the retracting blade guard can retract and
return freely, operating as designed, before plugging
cordset in the mains socket.
4. Run saw up to ensure it is running smoothly before
attempting any cutting.
5. Make sure guarding is suitable so that the operator
cannot touch the saw blade when the blade is
spinning.
6. Make sure an anti-kickback device is fitted to your saw
bench.
7. Make sure a suitable safety off switch is fitted to the
saw bench. The saw switch may then be locked on
using a spring clamp, cable tie or similar and then
plugged into the safety socket on the saw bench. This
clamp MUST be taken off when the saw is removed
from the saw bench.
8. Using all safety equipment make a test cut in an off
cut piece of material making sure all guarding is set up
correctly before continuing with your bench sawing.
Switching on and off
1. Connect the plug to the power supply.
2. To switch on the saw, press
the lock-off button (2)
and squeeze the trigger
switch (1).
3. When you release the
trigger, the machine turns
off and re-engages the
safety lock-off switch to
help prevent accidental
operation.
Caution.
Allow the blade to come to a complete standstill
before setting the saw down.
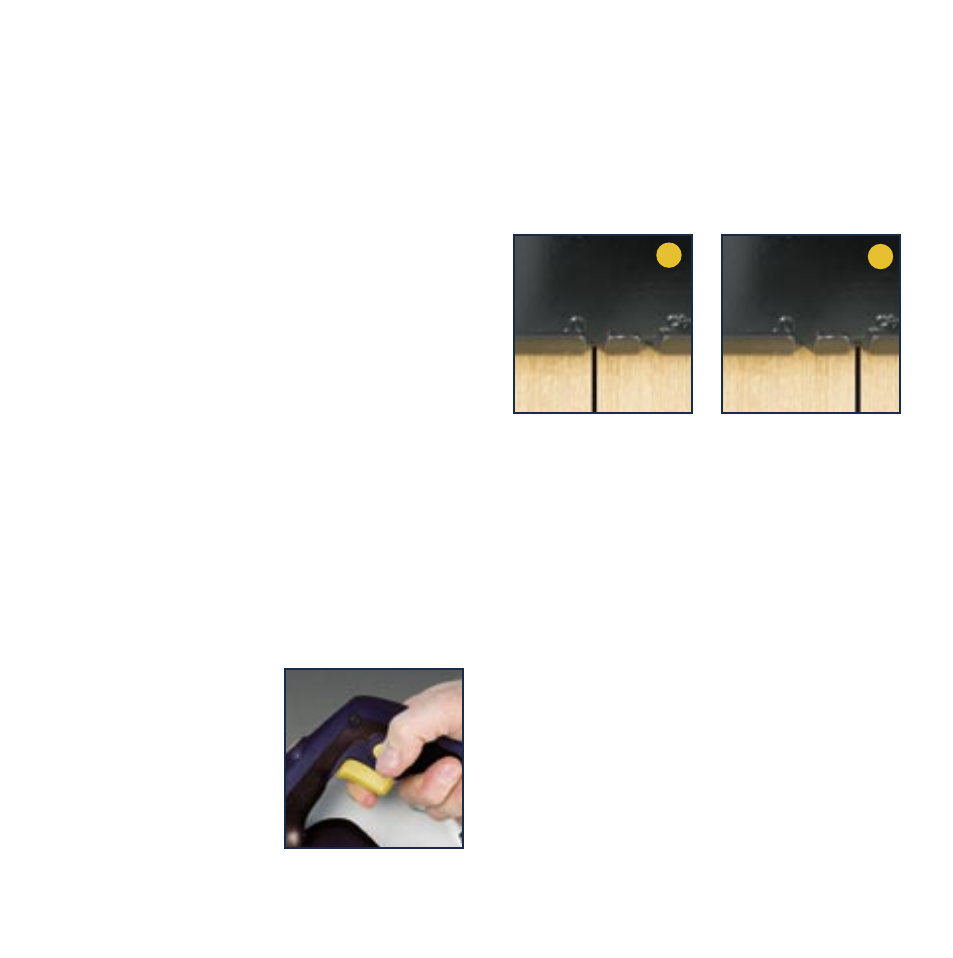
Making a cut
1. Adjust the depth and angle of cut as required.
2. Plug in the machine and start the motor.
3. Line up your pencil line with the correct sighting notch
- for 90° cuts use the right hand (when viewed from
the operators perspective) sighting notch (a) and for
45° cuts use the left hand sighting notch (b).
4. When the blade is at its maximum speed
(approximately 2 seconds), slowly push the saw
forward using both hands.
Note.
Use only enough pressure to keep the saw cutting.
Do not force the saw so that there is an appreciable
slowing of the motor. Allow the blade and the saw to do
the work.
9
a
b
90˚ Cuts
45˚ Cuts