Goodman Mfg Split Type Room Air Conditioner and Heat Pump 000 &12 User Manual
Page 3
3
•
Select a location where noise, vibration and hot dis-
charged air will not be an issue.
•
Do not install where high frequency equipment is used
(wireless equipment, welding machine, medical facility)
as it may interfere with the unit’s operation.
Rooftop Installations
If it is necessary to install the outdoor unit on a roof structure,
ensure the roof structure can support the weight and that proper
consideration is given to the weather-tight integrity of the roof.
Since the unit can vibrate during operation, sound vibration
transmission should be considered when installing the unit.
Vibration absorbing pads or springs can be installed between
the condensing unit legs or frame and the roof mounting as-
sembly to reduce noise vibration.
Tools
Level gauge
Gas leak detector
Screwdriver
Vacuum pump
Electric drill, hole core drill (65mm)
Gauge manifold
Flaring tool set
Users manual
Torque wrenches
Thermometer
1.8kgf.m 13 ft-lb
Multimeter
4.2kgf.m 30 ft-lb
Pipe cutter
5.5kgf.m 40 ft-lb
Measuring tape
6.6kgf.m 48 ft-lb
Spanner (half union)
Hexagonal wrench (4mm)
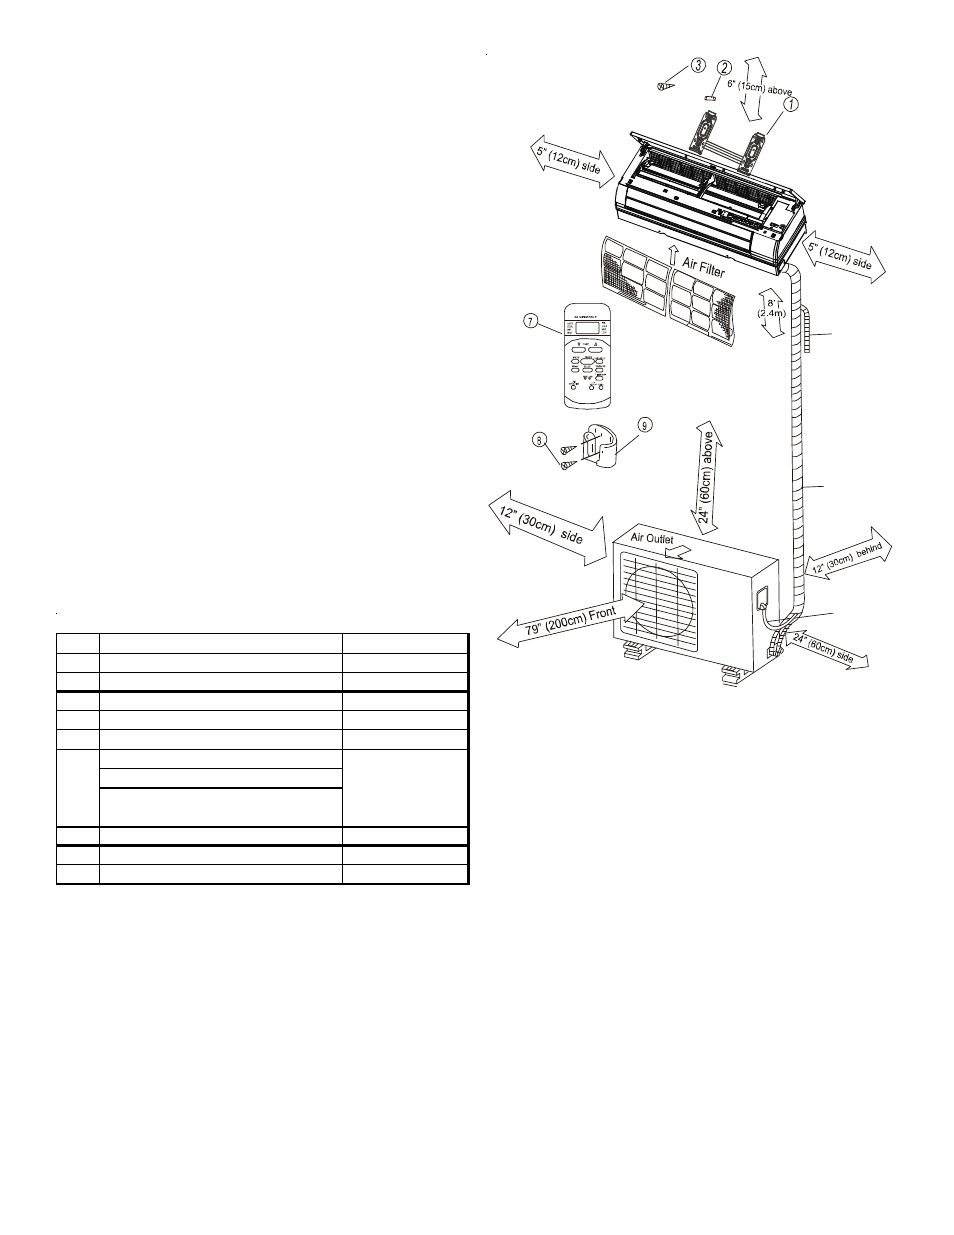
No.
Description
Quantity
1
Installation Plate
1
2
Clip Anchor
8
3
Self-tapping Screw A ST3.9x25
8
4
Seal (on selected models
1
5
Drain joint
1
*Connection Pipe Assembly
Liquid Side 1/4" (Φ 6.35)
Gas Side 3/8" (Φ 9.52)
1/2" (Φ12.7)
7
Remote Control
1
8
Self-tapping Screw B ST2.9x10
2
9
Remote Control holder
1
PARTS
6
*See
Note
*Parts must be purchased separately. Consult dealer for pipe sizes.
(Minimum pipe wall thickness of 1/32" (0.7 mm) is recommended)
NOTE:
Parts listed are provided with the unit except where
noted. Any additional parts required must be purchased sepa-
rately.
Additional
Drain
Pipe
O
Loop the
connective
cable.
Wrapping
Tape
Figure 3
NOTE:
Copper lines must be insulated independently.
IMPORTANT NOTES:
• A stud finder should be used to locate studs and prevent
unnecessary damage to the wall.
• A minimum pipe run of 10’ (3 meters) is required to mini-
mize vibration and excessive noise.
Indoor Unit Installation
Installation of Mounting Bracket
1. Install the mounting bracket horizontally and securely to
the wall, allowing room for access on either side of the
unit.
2 If the wall is constructed of brick, concrete or similar
material, drill eight (8) 3/16” (5 mm) diameter holes in the
wall. Insert the clip anchor for appropriate mounting
screws.
3. Install the mounting bracket on the wall with eight (8)
type “A” screws.