Installation, Installing custom 3/4 ″ door panel and handle – GE Monogram ZIFS240 User Manual
Page 15
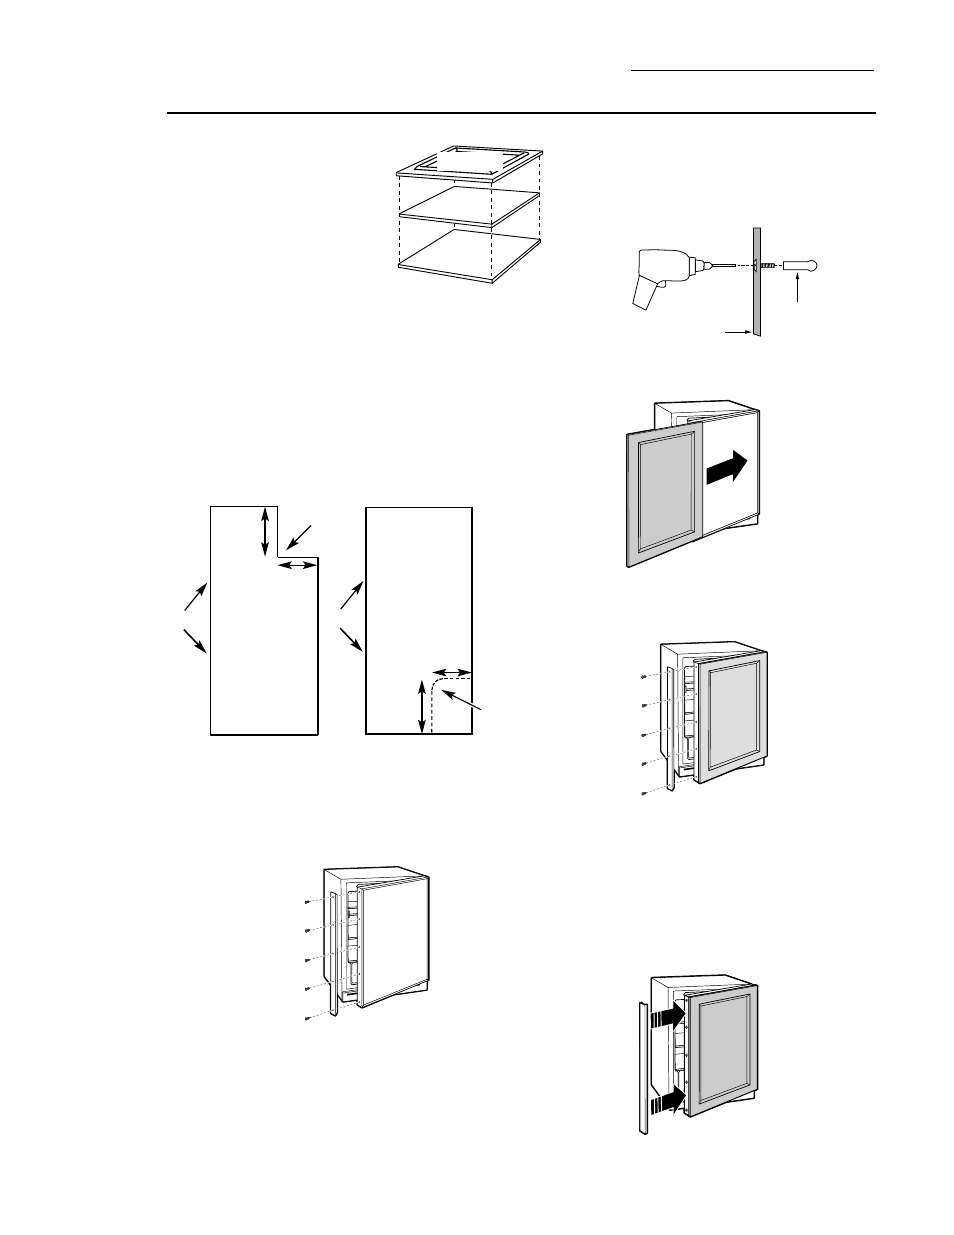
Assemble overlay panels
with glue and screws:
1. Center spacer panel
on the backer panel,
left to right and top to
bottom. Secure the
panels with glue.
2. Center the spacer/backer panel on the
overlay panel. Secure with glue and screws.
Countersink all screws into the backer
panel.
Custom Panel Hinge Routing Dimensions
Use a 3/4
″ drill bit to route a slot 3/8″
toward the front of the overlay panel, 3/4
″
high and 7/8
″ wide into the assembled
panel.
Install custom door panel and handle:
1. Open door to 90°.
2. Remove 5 screws holding trim; lift off trim.
Retain screws.
3. A custom handle of your choice, supplied
by your cabinet maker, must be installed
onto the overlay panel before the panels
are slid into the trim. Countersink all
screws into the backer panel. Screws
cannot protrude from the backer panel.
4. Slide overlay panel into the door trim.
5. Reinstall the side trim using the trim
screws removed earlier.
6. Place the brushed decorative cover over
the side trim to hide the screw heads.
Ensure side trim is aligned top to bottom
and front to back. Snap into place.
NOTE:
For shipping purposes the
brushed decorative cover will be secured
to the front of the unit.
15
Installation
Fresh-Food Refrigerator
Installing
custom 3/4
″
door panel
and handle
(cont.)
(ZIFI240 model
only)
7/8
″
3/8
″
Top
view
of
overlay
custom
panel
3/8
″
3/4
″
Right
side
view
of
overlay
custom
panel
Route
for hinge
clearance
Route
for hinge
clearance
Front
Front
Spacer Panel
Backer Panel
Overlay Panel
Handle
Custom
Door Panels
Screws Must
Be Countersunk
Into Panel