Installation instructions, Step 1 install ceiling bracket, Step 2 install duct covers – GE JXCHSS User Manual
Page 2
Installation Instructions
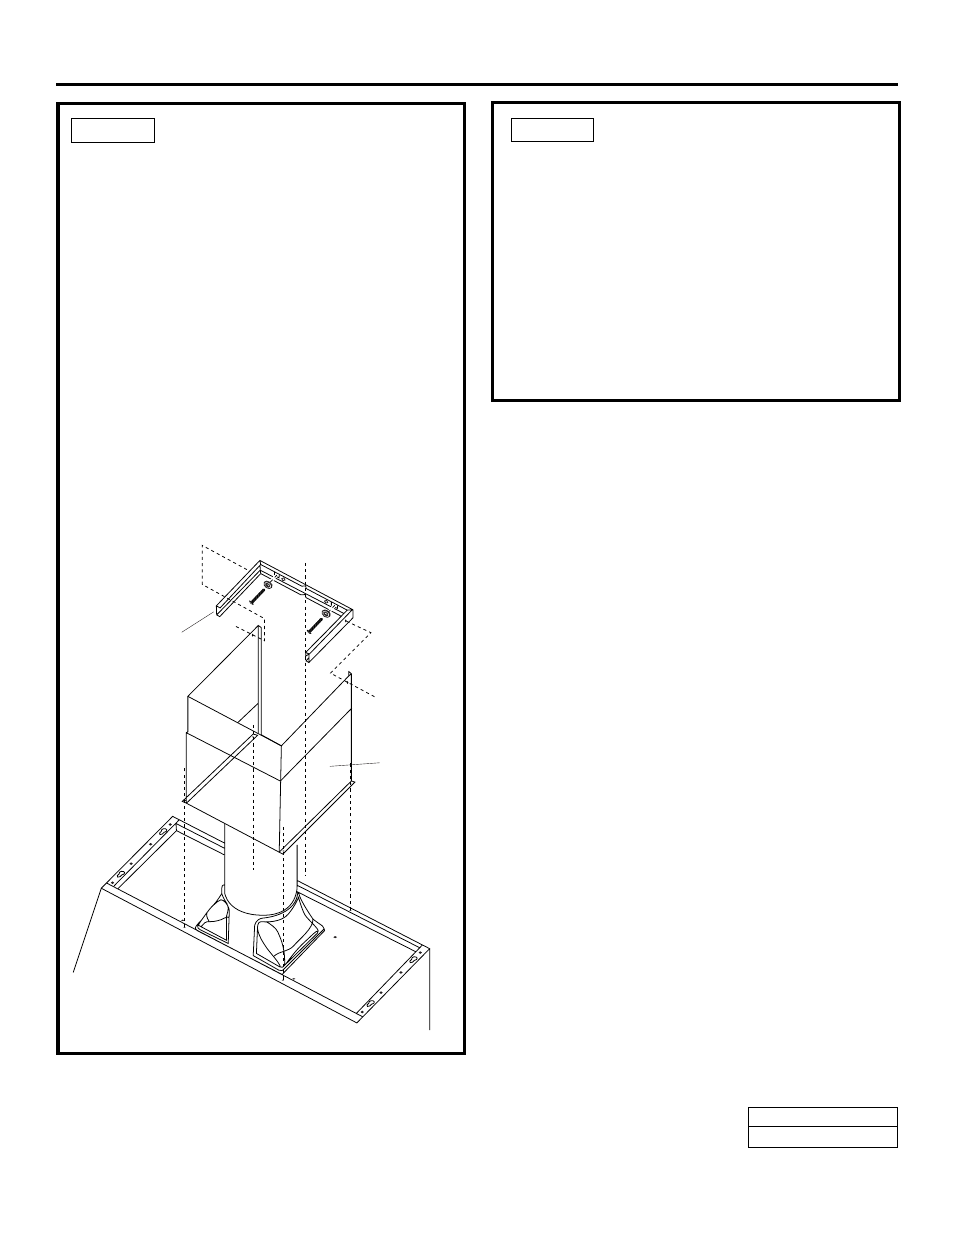
STEP 1 INSTALL CEILING BRACKET
The ceiling bracket must be installed when the duct
cover is used to span 24
″
or more height above the
hood. The bracket will hold the decorative duct cover
in place at the top.
Note:
The ceiling bracket is not required when using
only the 12
″
section of the duct cover.
• Install the 2 small screws into the sides of the duct
bracket. Remove the screws. Pre-tapping the holes will
insure ease of final installation.
• Match center notch on the bracket to the centerline
on the wall and flush against the ceiling.
• Mark the 2 screw hole locations.
• Drill 1/8
″
pilot holes in marked bracket location.
• If pilot holes do not enter studs, enlarge the holes to
3/8
″
and install wall fastener anchors.
• Secure the bracket to the rear wall with wood screws
and washers. Use wall anchors if needed.
Note: Bracket has 2 sets of holes. Use larger holes for wall
fasteners or wood screws with washers. Use smaller holes for
wood screws with washers.
STEP 2 INSTALL DUCT COVERS
To install the 12
″
duct cover alone:
• Place the 12
″
section of the decorative duct cover on
top of the hood.
• Secure the cover to the top of the hood with 4 screws
provided.
To install the 2-piece duct cover:
• Place the 2-piece duct cover on top of the hood.
• Secure the bottom cover to the top of the hood with
4 screws provided.
• Extend the inside section upwards to meet the
ceiling and ceiling bracket.
• Secure the duct cover to the bracket with the 2 small
Phillips screws provided.
See Step 2
to Install
Duct Cover
Install
Ceiling Bracket
When Duct
Cover is
Used to Span
24" or More
Pub. No. 49-80107
Dwg. No. 164D4290P065
(N.D. 245) 6/01