Anti-tip bracket installation – GE Monogram All-Refrigerators and All-Freezers User Manual
Page 18
18
Anti-Tip Bracket Installation
36” All-Refrigerator and All-Freezer Units
Anti-tip
bracket
installation
(cont.)
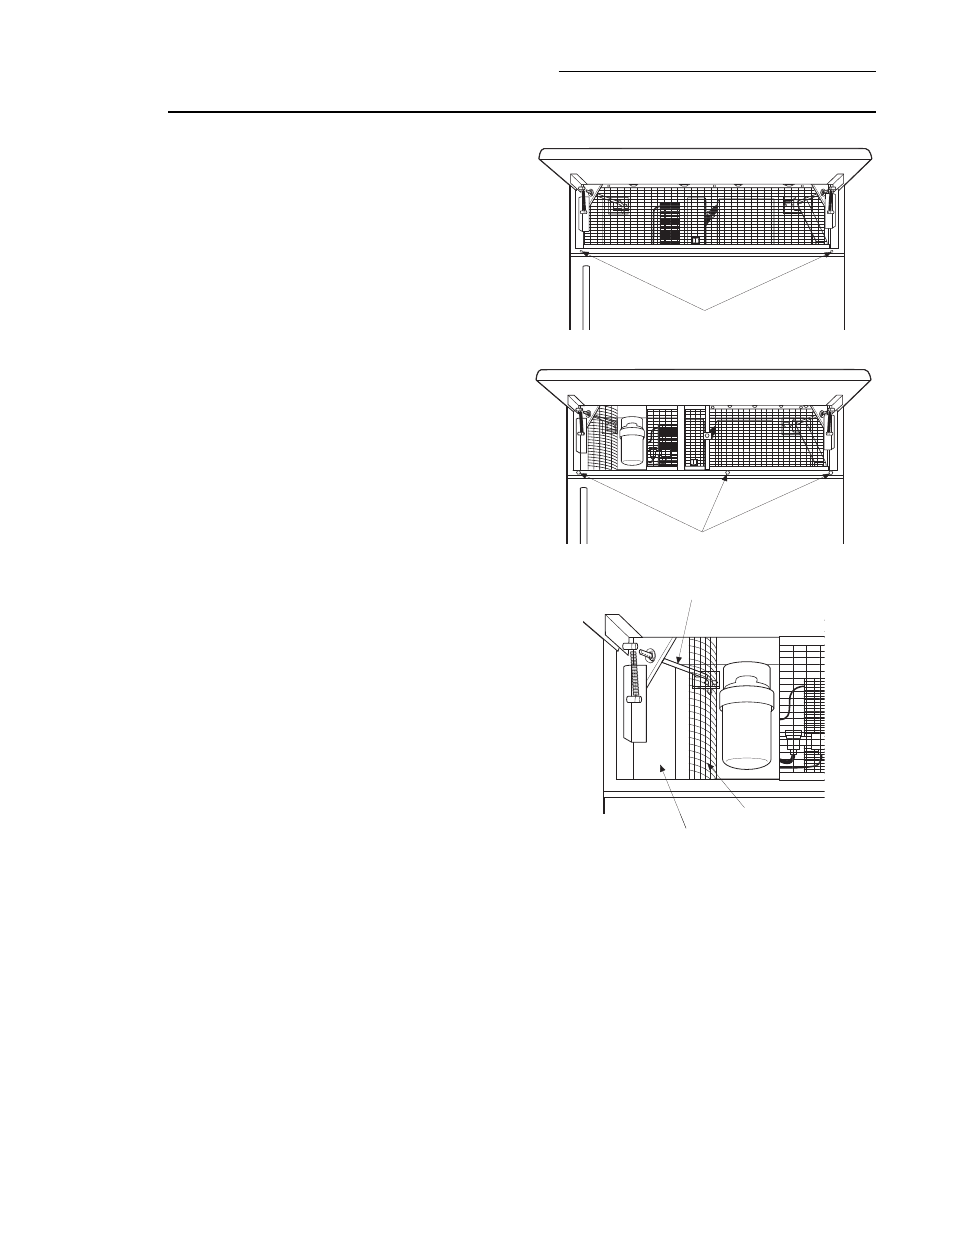
Remove Grilles for Access to Power Cord
and Anti-tip Locking Hooks
Fresh Food Unit
• Open the access door.
• Using a 1/4" hex driver, remove the 2 screws
at the bottom of the grille.
• Pull the bottom of the grille forward, down
and out to remove.
Freezer Unit
• Open the access door.
• Using a 1/4" hex driver, remove the 2 screws
at the bottom of the grille on the right.
• Pull the bottom of the grille forward, down
and out to remove.
• Using a 1/4" hex driver, remove the screw
on the left side of the grille.
• The grille is aluminum and will bend easily.
Gently pull forward on the left side of the grille
to open for access. This grille will not be
completely removed.
Power Cord
Locate the power cord inside the left cavity.
If it has not been adjusted so the plug is easily
accessible, do so now.
Move Unit into Final Position
• Move refrigerator toward its final installed
location. Align the tabs on the wall bracket
with the openings in the back of the unit.
• The unit has “L” bolts in the upper left and right
corners inside of the access compartment.
These bolts will interlock with the wall bracket
and secure the unit using the washers and hair
pin cotters in the hardware kit once the unit has
been leveled and is in the final position.
“L” Bolt
Left Grille Open
Power Cord Location
“L” Bolt
Left Grille Open
Power Cord Location
Screws
Screws