Genie 3452535556 GCG User Manual
Page 14
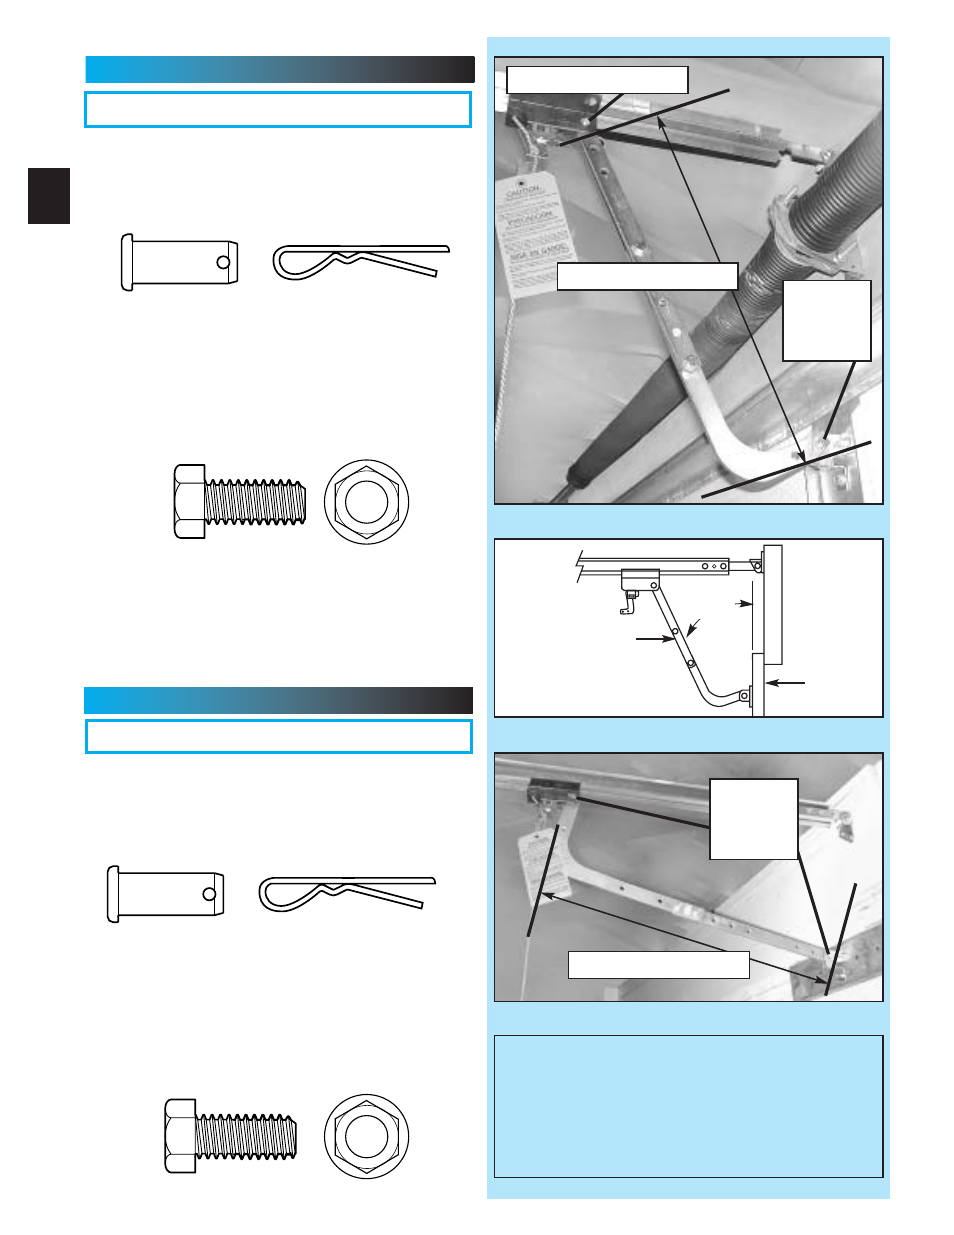
INSTALL DOOR ARMS:
Sectional doors
OPEN YELLOW PARTS BAG
1. Attach the arms.
•
Fasten curved door arm to door bracket using
clevis pin (24) and cotter pin (25) (Fig. 2-10).
•
Straight arm to carriage using clevis pin (24) and
cotter pin (25) (Fig. 2-10).
2. Connecting the arms.
•
Slide carriage back and forth to adjust arm length.
–
Overlap arms as much as possible.
–
Make overall length as short as possible.
•
Fasten arms together using 2 bolts (27) and
nuts (28) (Fig. 2-10). (Place the bolts as far
apart as possible.)
NOTE: Whenever possible, it is recommended
that the door arms assembly be angled away
from the door to prevent putting downward force
on the door and door bracket.
(Fig. 2-11).
Additionally, where possible, the straight door
arm may be eliminated.
[25]
[24]
FIG. 2-10 Attaching door arms (sectional doors)
.
[27]
[28]
INSTALL DOOR ARMS:
1-piece doors
OPEN YELLOW PARTS BAG
1. Attach the arms.
•
Straight arm to door bracket using clevis pin (24)
and cotter pin (25) (Fig. 2-12).
•
Curved arm to carriage using clevis pin (24)
and cotter pin (25) (Fig. 2-12).
2. Connecting the arms.
•
Slide carriage back and forth to adjust arm length.
–
Overlap arms as little as possible.
–
Make overall length as long as possible.
•
Fasten arms together using 2 bolts (27) and
nuts (28) (Fig. 2-12).
[25]
[24]
FIG. 2-12 Attaching door arms (1-piece doors)
.
14
REMINDER: If you have no access to your
garage from the outside other than your
garage door, please consider a GER-2
emergency release kit shown on page B in
center of manual.
Call Customer Service at 1.800.354.3643, or
visit www.geniecompany.com.
[27]
[28]
short as possible
long as possible
clevis & cotter pins
clevis &
cotter
pins
clevis &
cotter
pins
3/8"-16 x 7/8"
3/8"-16
3/8"-16 x 7/8"
3/8"-16
FIG. 2-11 Door arms at angle to door.
door arms
door
angle