Adjustable arm bar, Non-adjustable arm bar – Graco 7825 User Manual
Page 5
9
767-12-97
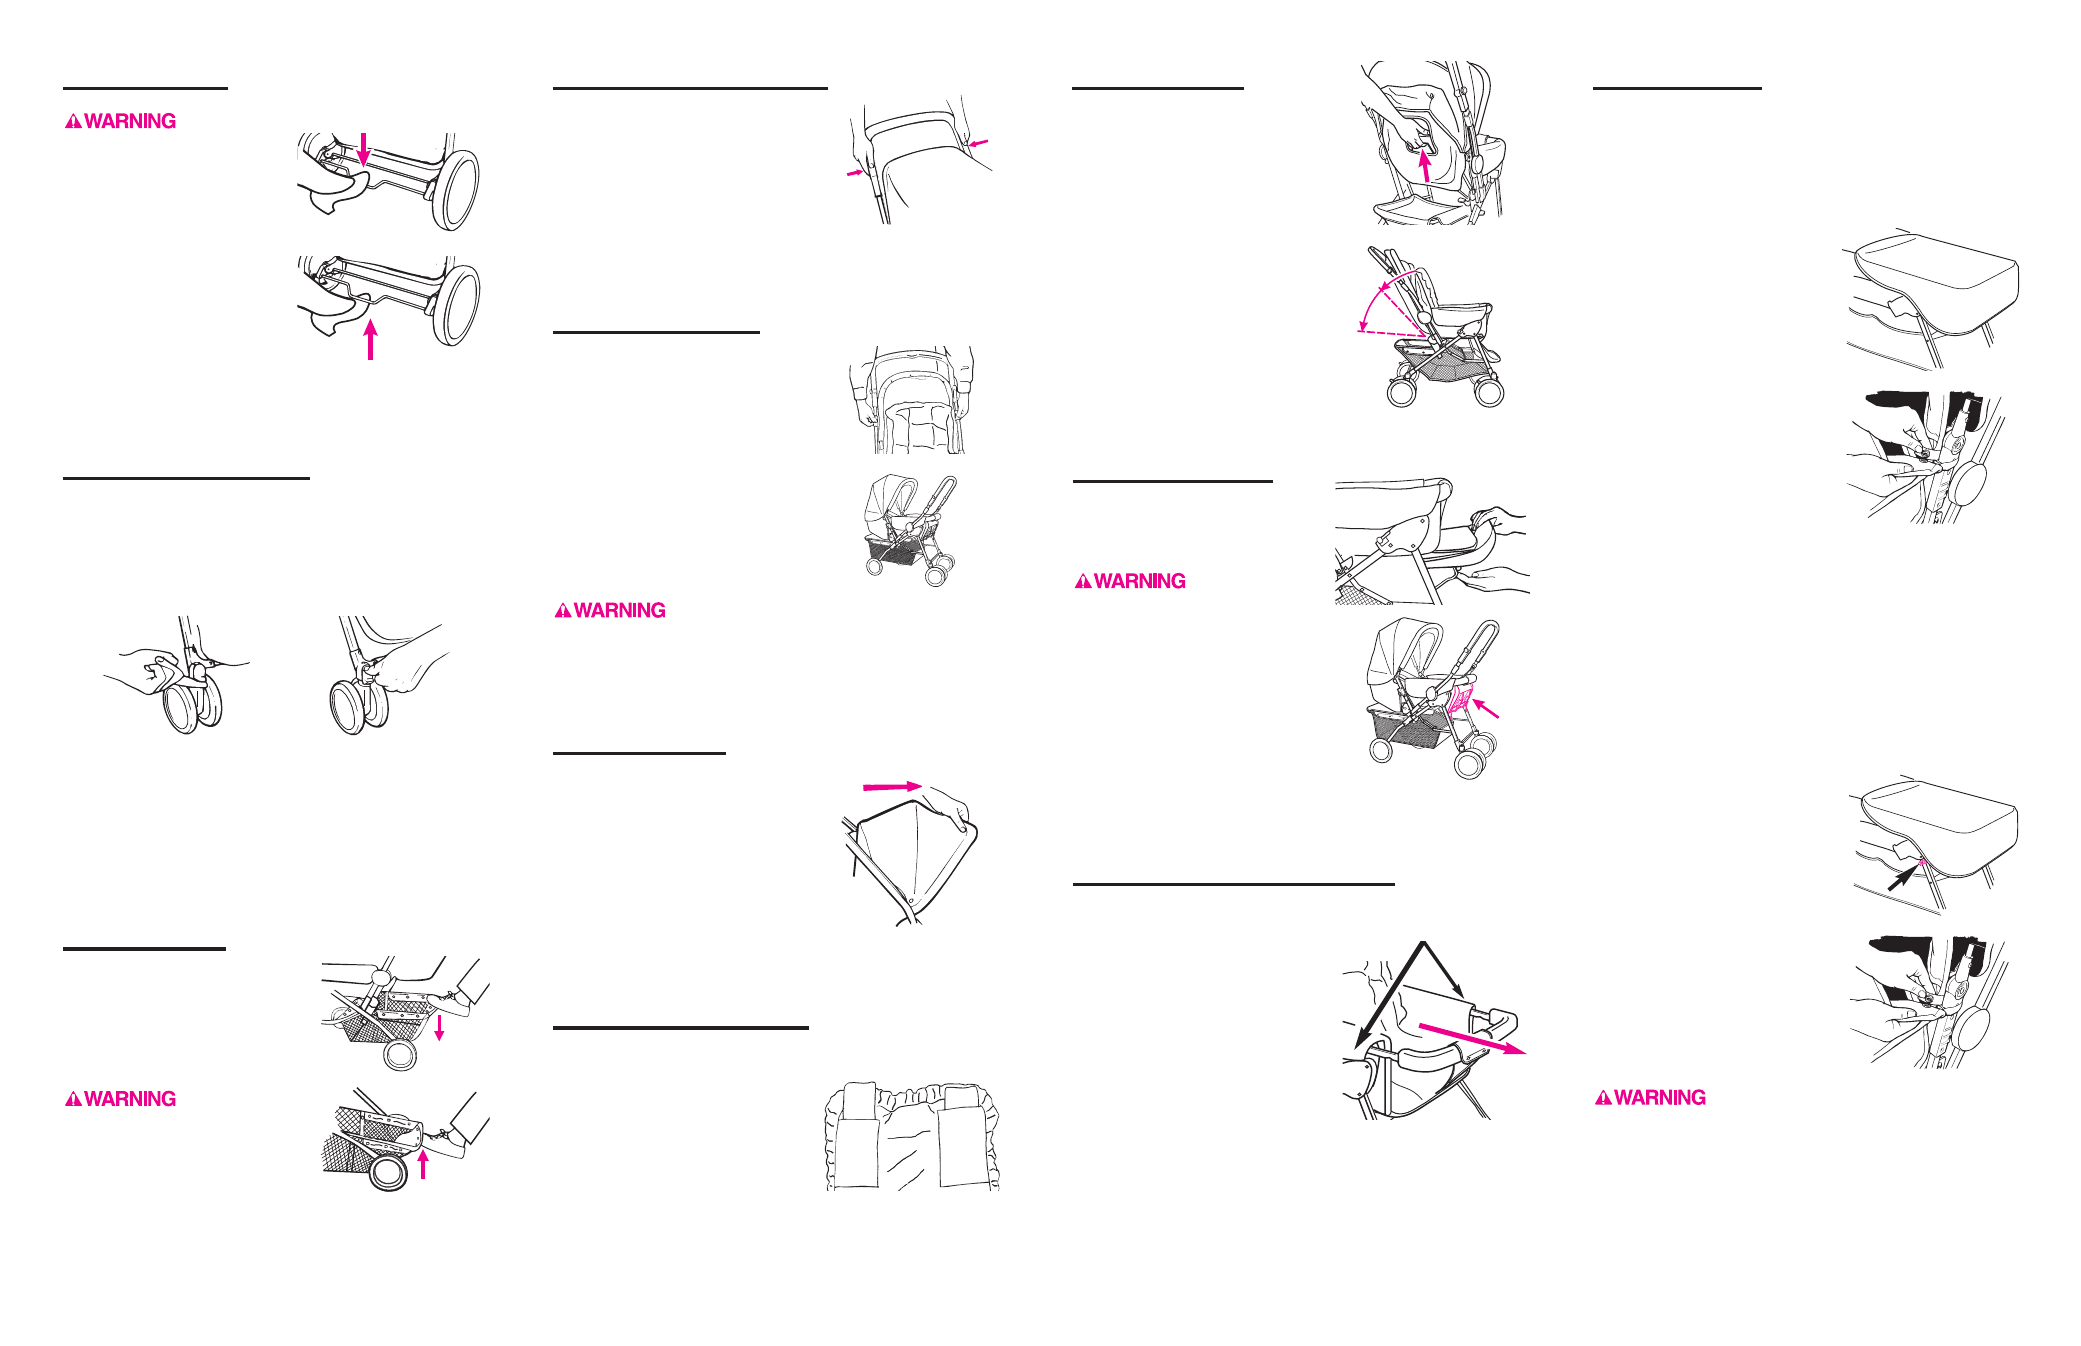
To Use Brakes
Always apply
brakes to park stroller.
Push DOWN on center of
wire to park.
Lift UP to stroll.
12
10
11
To Change to Swivel
or Non-swivel Wheels
Front swivel wheels lock for use on uneven surfaces
such as grass, stones or gravel.
Before locking swivels, push stroller forward a
few feet to ensure that the wheels are correctly
positioned.
Push buttons up or down, depending on model, to lock
or release swivels. Turn swivel to check that it is locked
or released.
To Move Handle to
Carriage Position
Step 1.
Pull up on both plastic slides on
the handle as shown to unlock.
Step 2.
Move handle to new position.
NOTE: Remember to reverse
the swivel wheels when revers-
ing the handle.
Use care when reversing handle to
avoid catching childs arms or hands in the folding
mechanism.
To Use Canopy
To open canopy, pull it forward.
Canopy bag (on certain models)
carries a maximum of 2 pounds
(0.9 kg).
On certain models, you can
unzip the rear panel and fold it
out of the way to see your baby.
To Use Head Supports
Back of cloth seat pad
To use stroller with a smaller
child, pull the plastic pieces from
pockets located in the back of
the cloth seat pad, and reinsert
them with curved side toward
the front.
To use stroller with a larger
child who does not need head
support, insert the plastic pieces
with the curved side toward the
back.
To Use Basket
To lower basket, push DOWN
on basket.
To raise basket, lift UP on
basket.
Do not allow
your child to stand on the
basket. It may collapse and
cause injury.
To Adjust Handle Height
Push both buttons and slide
handle to one of the four
possible positions.
Be sure handle is engaged in
one of the latching positions.
To Adjust Back
Step 1.
Push back of seat slightly
forward while squeezing as
shown to unlock.
Step 2.
Adjust to desired position.
Adjustable arm bar:
Step 1.
Move the arm bar to extended position. Pull on bar to
be sure both sides are attached.
Step 2.
Raise footrest and place boot
under footrest. Slide boot over
front of stroller. IMPORTANT:
Snap straps at bottom of boot
around front legs on both sides
as shown.
Step 3.
Snap straps at top of boot
around stroller frame on both
sides as shown.
STRANGULATION HAZARD. Never
use your stroller with arm bar extended without the
boot properly attached.
To Raise Footrest
Lift footrest to desired position
and hook wire into footrest
bracket.
Child may
slip into leg openings and
strangle. Never use in a
reclined carriage position
unless footrest is placed
under padded front bar and
wire is snapped into lower
notch.
To Adjust or Remove
Arm Bar (on certain models)
Step 1.
Feel through fabric at sides
for buttons. Push in buttons to
move the arm bar to extended
position or remove it.
After extending arm bar or
returning it to original position,
pull on bar to be sure both sides
are attached.
Step 2.
To replace the arm bar after removing it, push arm bar into
armrest holes until it locks in place. Pull on bar to be sure
both sides are attached.
Buttons under fabric
To Attach Boot
The method of boot attachment depends on whether or
not your stroller has an adjustable front arm bar. Follow
the appropriate instructions below.
Non-adjustable arm bar:
Step 1.
Raise footrest and place boot
under footrest. Slide boot over
the front of stroller.
Step 2.
Snap straps at top of boot
around stroller frame on both
sides as shown.