Genesis Advanced Technologies ATLAS & YUKON GRXXX & User Manual
Page 27
27
Copyright ©2001 Liberty Group
Service & Repair Manual
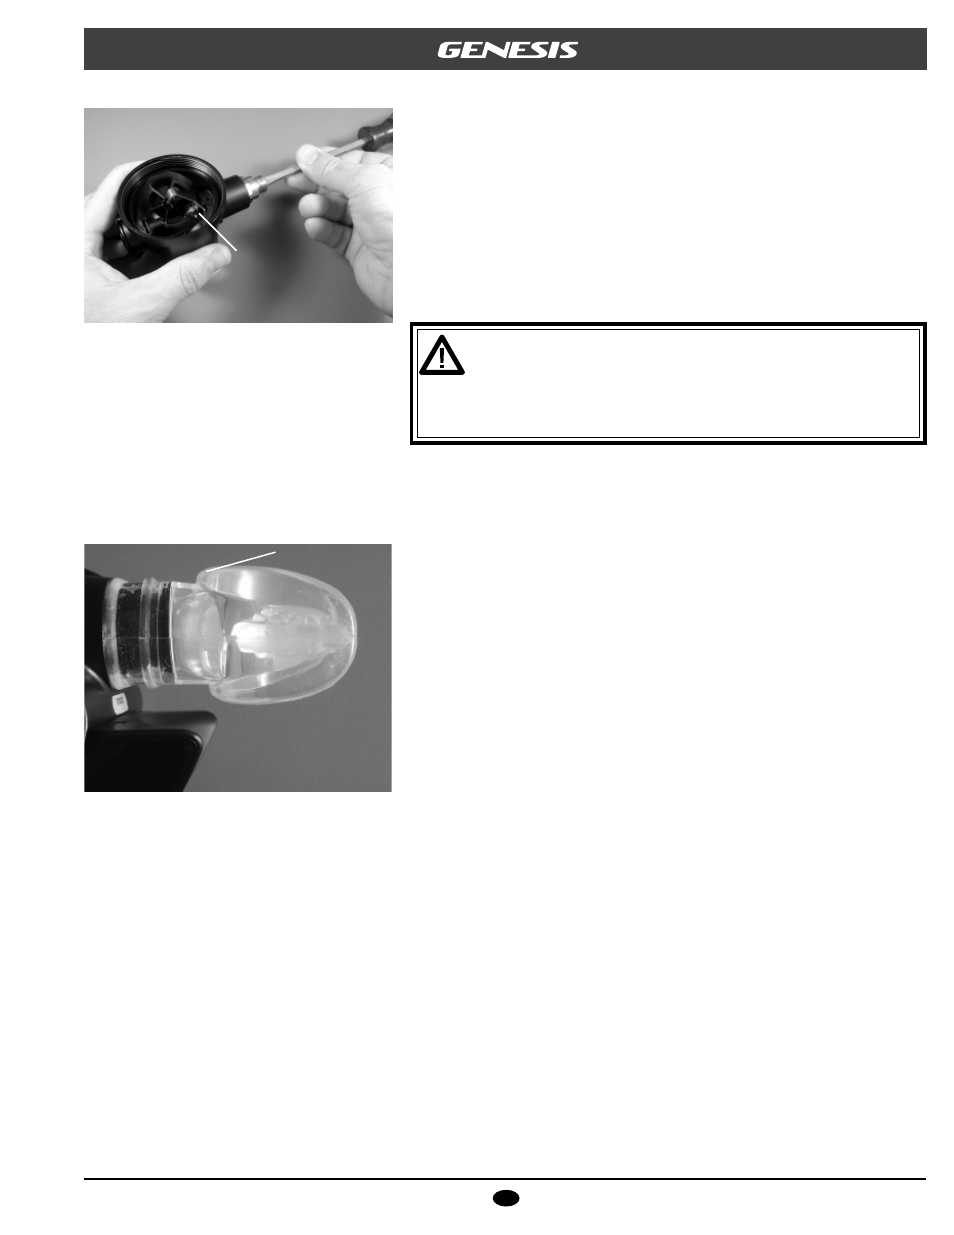
16. Apply a medium blade screwdriver to engage the slotted
head of the orifice, and turn it clockwise approximately 5
full revolutions. Then, grasp the screwdriver by the shaft,
rather than the handle, for best sensitivity of touch. Con-
tinue turning the orifice very slowly while closely observing
the locknut on the end of the poppet (see Fig. 18). STOP
turning the orifice when the locknut begins to move slightly.
This will indicate that the orifice has made contact against
the LP seat.
CAUTION: Do not continue to turn the orifice further be-
yond the point where it makes contact with the low pressure
seat. Doing so may damage the LP seat or sealing surface
of the orifice, requiring their replacement, and can also re-
sult in an incorrect adjustment of the second stage.
17. Lay the diaphragm(3) inside the case, directly over the
lever, with its raised surface facing up.
18. Fit the diaphragm cover(2) inside the case so that it seats
directly over the diaphragm. Adjust as needed to align the
logo parallel with the inlet coupling.
19. Mate the cover ring(1) over the diaphragm cover and into
the case, and turn it clockwise by hand until snug. Be
careful to avoid over-tightening.
20. Install the mouthpiece(12) onto the mouthpiece tube of the
case, with the extended ridge facing up to accommodate
the natural overbite of the human jaw (see Fig. 19). Fit a
tie-strap(14) over the mouthpiece with the locking tab
facing toward the inlet coupling, and cinch it completely
snug. Snip off the excess strap that extends outside the
locking tab.
▼
After completing the reassembly of the second stage,
proceed to Section 6 – Final Testing
Fig. 18 – Orifice Preliminary Setting
observe locknut
Fig. 19 – Orthodontic Mouthp iece Orientation
extended ridge