Installation instructions, Tools you will need – GE JV247 User Manual
Page 8
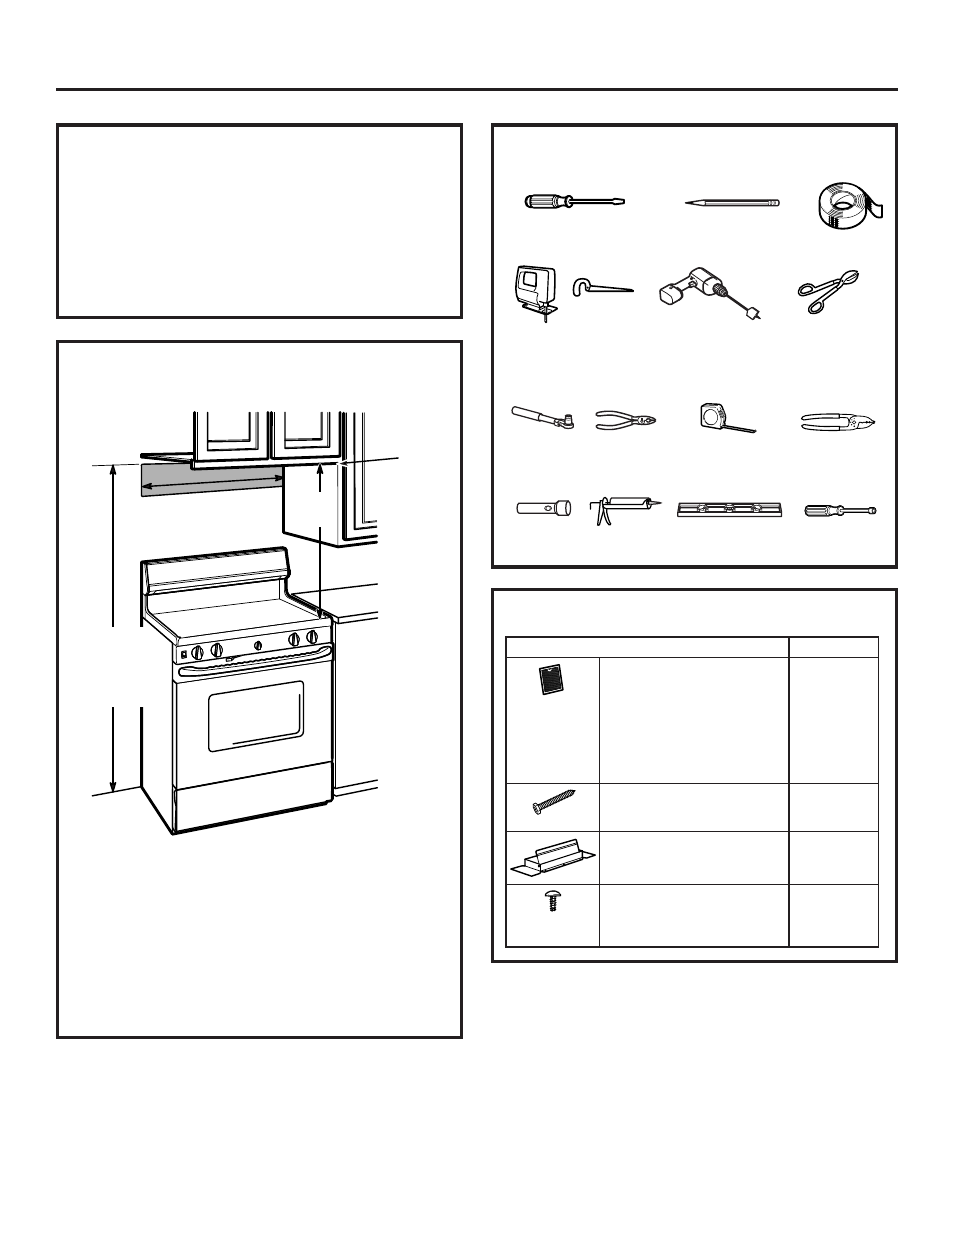
PART
QUANTITY
Grease Filter only (JV338)
1
Charcoal Filter only
1
(JN327 and RN328)
Grease Filter and Charcoal Filter
2
(JV24X, JV347, JV348 and JV367)
Mounting Screws
4
(8 - 18
″ x 3/4″ Phillips pan head)
Exhaust Adaptor
1
(for 3
1
⁄
4
″ x 10″ rect. venting)
Exhaust Adaptor Screw
1
(8 - 18
″ x 3/8″ Phillips pan head
or hex head)
8
•
If the unit is damaged in shipment, return the unit to the
store in which it was bought for repair or replacement.
•
If the unit is damaged by the customer, repair or
replacement is the responsibility of the customer.
•
If the unit is damaged by the installer (if other than
the customer), repair or replacement must be made
by arrangement between customer and installer.
DAMAGE – SHIPMENT/INSTALLATION
PARTS INCLUDED
MOUNTING SPACE
NOTES:
•
Hood width may be greater than the width of the range
or cooktop, but it may not be smaller.
•
Ensure the range or cooktop is installed per
manufacturer’s installation instructions.
•
If you are going to vent your range hood to the outside,
see the “Ducting Requirements” section for exhaust duct
preparation.
66
″ or more
from the floor
to the top of
the hood
24
″, 30″ or 36″ to
match cooktop width
30
″
min.
Bottom edge of
cabinet needs
to be 30
″ or
more from
the cooking
surface
Flat-blade and Phillips
screwdrivers
Pencil
Metal snips
(in some
applications)
Electric drill
Saw (saber or keyhole)
Duct tape
Pliers
Level
Caulking
Tape measure
TOOLS YOU WILL NEED
1/4
″ pivoting
hex socket
Flashlight
Wire stripper
1/4
″ Nutdriver
Installation Instructions