Installation, Before you begin – Follett Symphony 50HI400A 23 User Manual
Page 6
6
25CI400A/W • 25HI400A • 50CI400A/W • 50HI400A
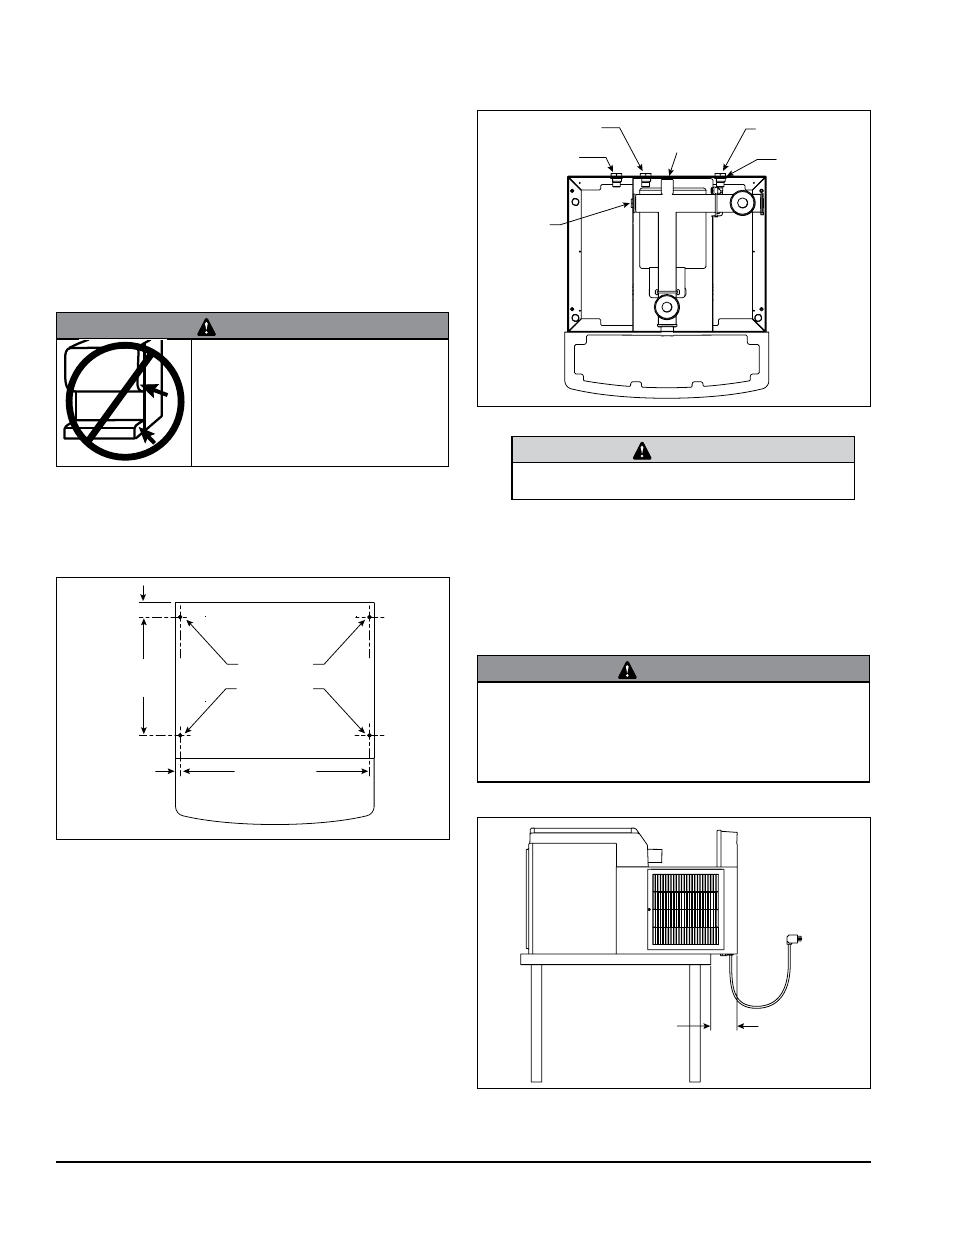
Fig. 2
Utility connections as viewed
from top for countertop back access
3/8"
diameter cord
condenser inlet
3/8" FNPT
drain plug
condenser outlet
3/8" FNPT
drain
3/4" FNPT
potable water
3/8" FNPT
6. Make utility connections (Fig. 2).
CAUTION
• Do not connect water-cooled condenser outlet line to
the dispenser drain line.
7. Turn on water supply and check for leaks.
8. Clean and sanitize dispenser and icemaker before
putting into service.
9. Turn power on and allow icemaker to produce ice.
Installing countertop dispensers with
bottom exiting utilities
WARNING
• A sturdy work surface capable of supporting the entire
dispenser must be used
• The work surface must be large enough to accommodate
height of dispenser
• Failure to provide proper support may result in personal
injury
Fig. 3
5.00"
(127mm)
min.
1. Position dispenser with dispense chutes facing
upward on sturdy work surface (Fig. 3).
Installation
Before you begin
Level dispenser in both directions to ensure proper
operation.
Provide clearances noted in clearances table on page 5.
Countertop models provide the option of taking utilities
out bottom or back of dispenser.
Wall mount model utilities exit through back of
dispenser only.
Directions for each installation follow.
WARNING
• DO NOT LIFT UNIT AT THESE POINTS.
Panels will not support weight of unit
• Failure to follow warning may result in
equipment damage or personal injury
Installing countertop dispensers with rear
exiting utilities (no legs)
Fig. 1
Countertop anchoring locations
12.50"
(318mm)
1.56"
(40mm)
20" (508mm)
.50"
(13mm)
4X
Ø.375"
(10mm)
hole
1. Position dispenser in desired location.
2. Mark dispenser outline on counter and remove
dispenser.
3. Drill four 7/16" holes in counter to anchor dispenser
to counter (Fig. 1).
4. Apply a thick bead approximately 1/4" (7mm)
diameter of NSF listed silicone sealant (Dow
Corning*
1
RTV-732 or equivalent) 1/4" (7mm) inside
marked outline of dispenser.
5. Reposition dispenser on counter and secure to
counter with four 3/8"-16NC bolts.
6. Smooth excess sealant around outside of dispenser.
* Dow Corning is a register trademark of Dow Corning Corporation in the United
States and other countries