Getting started, Computer tips and trouble shooting, Correct workout position – Fitness Quest 5K 6100 User Manual
Page 12: Step 11 – ac adapter, Step 10 – water bottle holder installation, If the computer is powered by batteries and, If the computer is powered by the ac adapter and
18
11
Once your Recumbent Bike is assembled, make sure that your workout space has a solid, level surface with
plenty of space around it. We recommend placing a mat under your unit to protect your flooring.
Correct Workout Position
When exercising, keep your back straight and your head in a neutral position to minimize neck and upper
back strain. When pedaling do not lock out your knees, at the bottom of the pedaling motion there should
be a slight bend in the knee. Always try to pedal the bike with a smooth and rhythmic motion.
GETTING STARTED
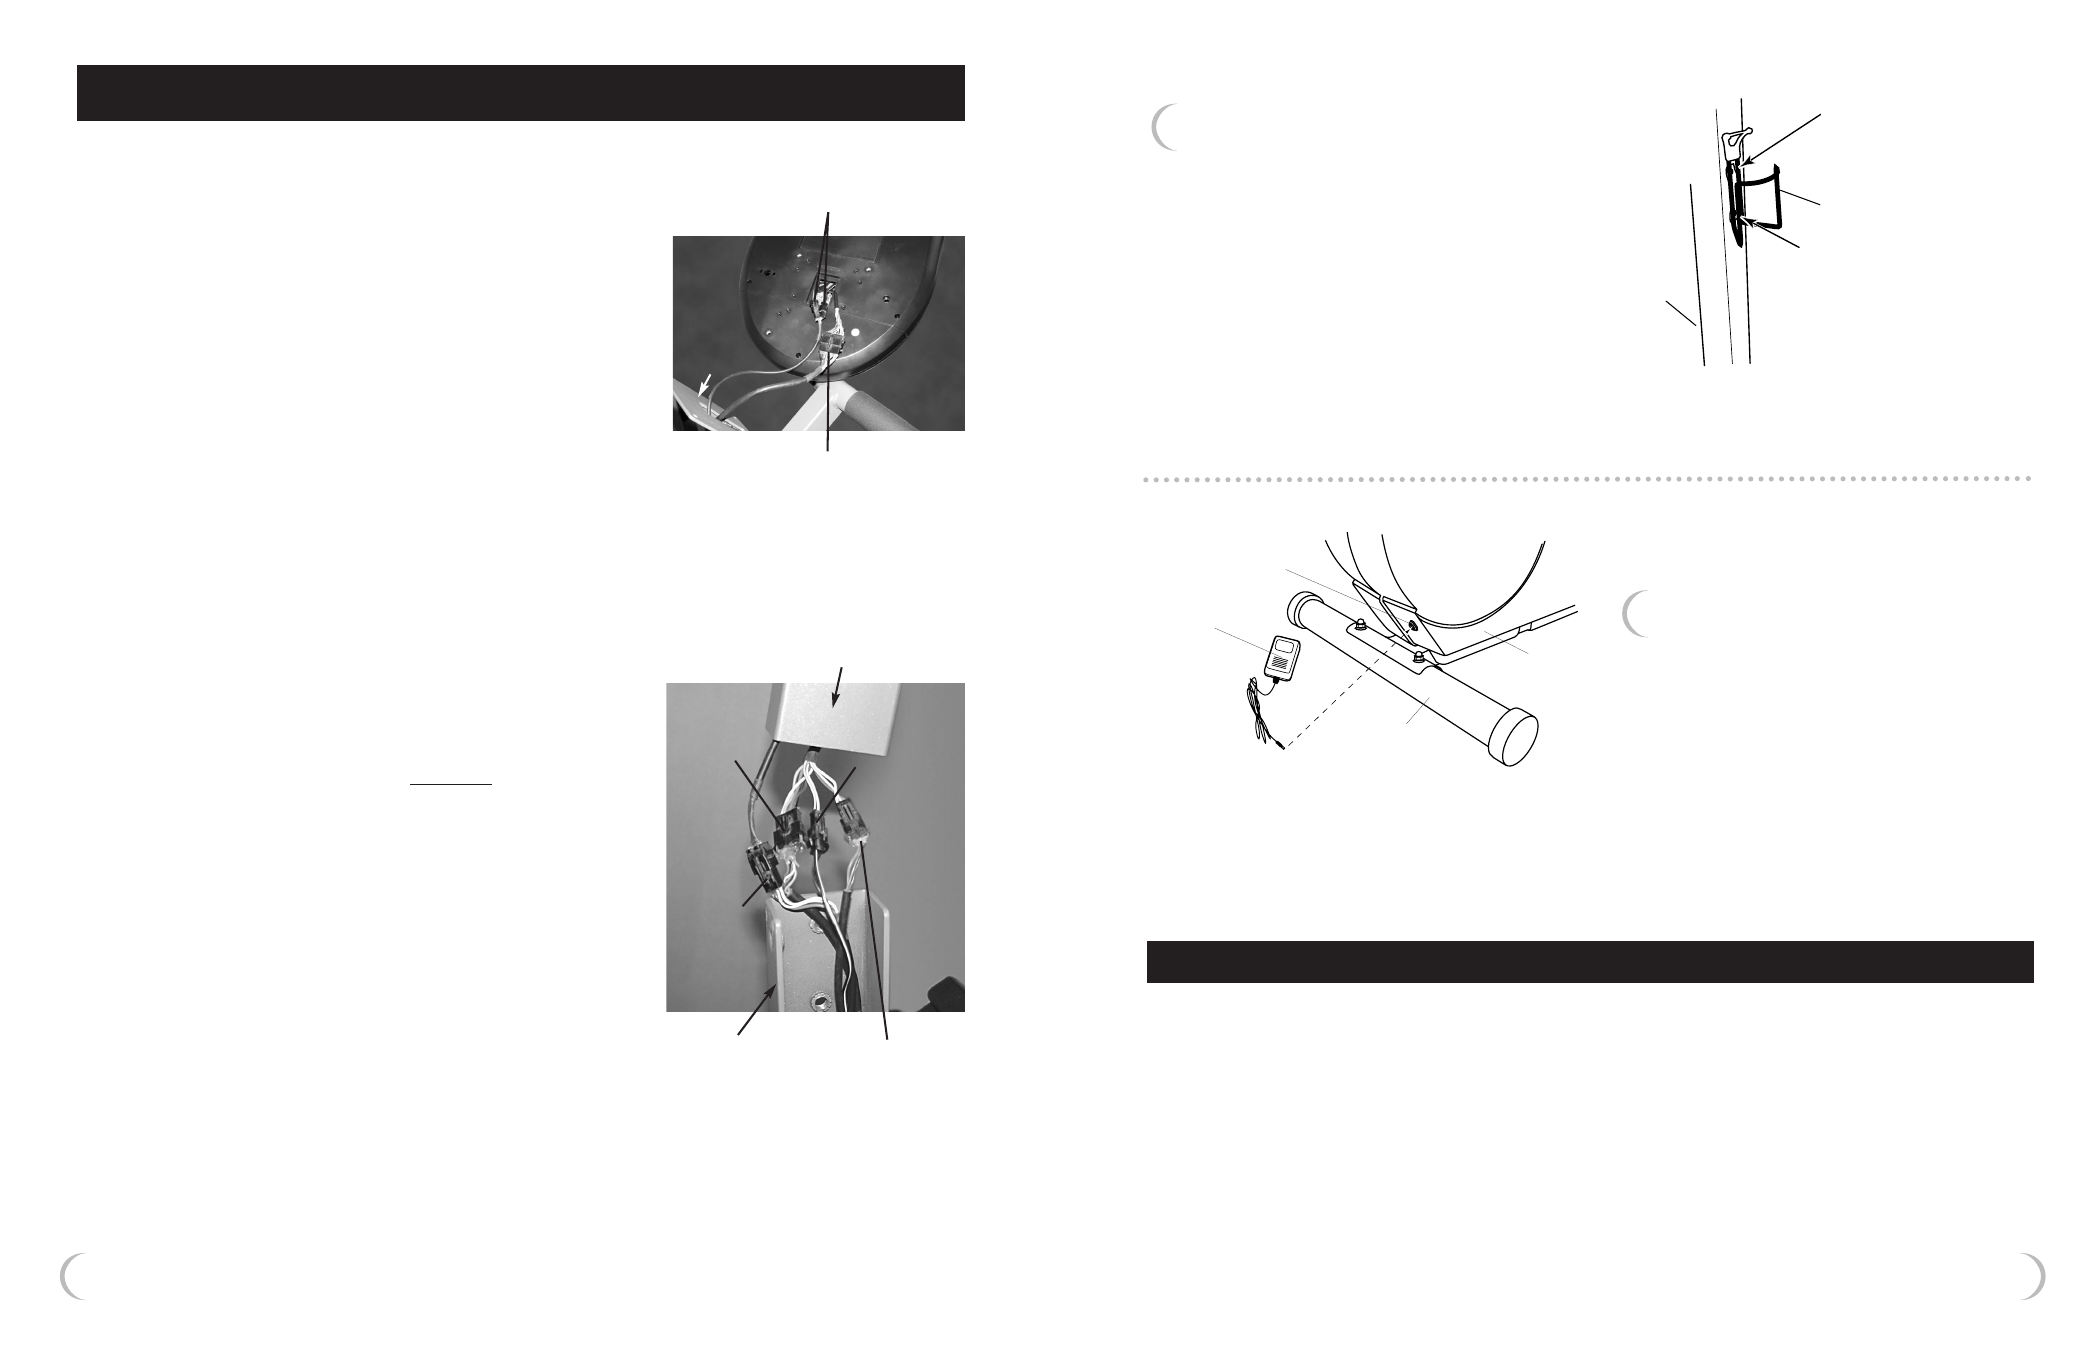
STEP 11 – AC Adapter
a) Plug AC Adapter into receptacle
located in the Main Frame near
the Front Foot Tube, see Figure 10.
b) Insert AC Adapter plug into outlet
in wall.
STEP 10 – Water Bottle Holder
Installation
a) Remove (2) Phillips Screws from Computer
Tube
b) Align holes and attach Water Bottle Holder
to Computer Tube with phillips screws
removed in Step A
c) Place water bottle in holder
Figure 11 - AC Adapter
Figure 10 - Install Water Bottle Holder
main
frame
front foot
tube
receptacle
AC adapter
looking from the
left side of the unit
computer
tube
water bottle
holder
remove and
re-insert
phillips screw
remove and
re-insert
phillips screw
COMPUTER TIPS AND TROUBLE SHOOTING
If you have any problems with your Computer: First
check this manual to be sure you have followed the
assembly instructions correctly.
Computer Installation: Follow Step 9 on page 10 of the Owner's Manual
Computer Tube Assembly: Follow Step 6 on page 9 of this Manual
(Make sure all wire connectors are firmly attached and "click" into place).
If the Computer is powered by batteries and:
The Computer does not illuminate at all
• Reconnect the (10) wire connector at the base of the Computer and
the (5) wire connector inside the Computer Tube.
• Reinstall the batteries using instructions on page 10, step 9.
Upon start-up the Computer's LCD display illuminates faintly
• Install new batteries. Although the batteries are new when they are
shipped from the factory, over time they will slowly discharge.
The Computer displays “E 1"
• Make sure the (5) wire connector inside the Computer Tube
is securely fastened.
If the Computer is powered by the AC Adapter and:
The Computer does not illuminate at all
• Reconnect the (10) wire connector at the base of the Computer
and the (5) wire connector inside the Computer Tube.
The Computer displays “E 1"
• Make sure the (5) wire connector inside the Computer Tube is
securely fastened.
NOTE: If the AC Adapter receptacle is plugged into the Computer, but
the adapter is not plugged into an AC wall outlet (or has been removed)
from the AC wall outlet, the Computer will not display. To reset the
Computer, the AC Adapter must be plugged into the AC wall outlet.
If the Computer is powered by Batteries or
AC Adapter and:
The Computer is illuminated but does not display Speed or Distance
• Reconnect the (10) wire connector at the base of the Computer and
the the (2) wire connector inside the Computer Tube.
The Computer is illuminated but does not display a pulse reading
• You must press the START button on the Computer, and have both
hands placed firmly on the Pulse Sensors on the Rear Handlebar for
the Computer to detect and display your pulse.
NOTE: Depending on what program you have set the Computer to, after
pressing the START button, it will take the Computer approximately 6 -11
seconds before it will display your pulse reading. If you take one hand off
of the Pulse Sensor, the Computer will stop displaying your pulse.
NOTE: Keeping your Pulse Sensors clean will provide better conductivity
between your hands, and the Pulse Sensor.
To insure a more accurate pulse reading, both hands must grab the Pulse
Sensors on the Rear Handlebar continuously for approximately 6 seconds.
2 (2) wire connectors connect
Pulse Sensors
(10) wire connector leads to
the motor/magnetic sensor/
AC adapter jack
computer
back
computer
tube
(2) wire
connector to
magnetic
sensor
(3) wire connector
to AC Adapter
receptacle
(5) wire
connector
to motor
(4) wire
connector to
pulse
sensors
computer
tube
main
frame