Door handle removal instructions – FRIGIDAIRE 297298800 User Manual
Page 6
A
B
Remove Screws
Single Unit Installation
Matching Freezer and Freezer Door Handle
Installation
Kick Plate Removal
6
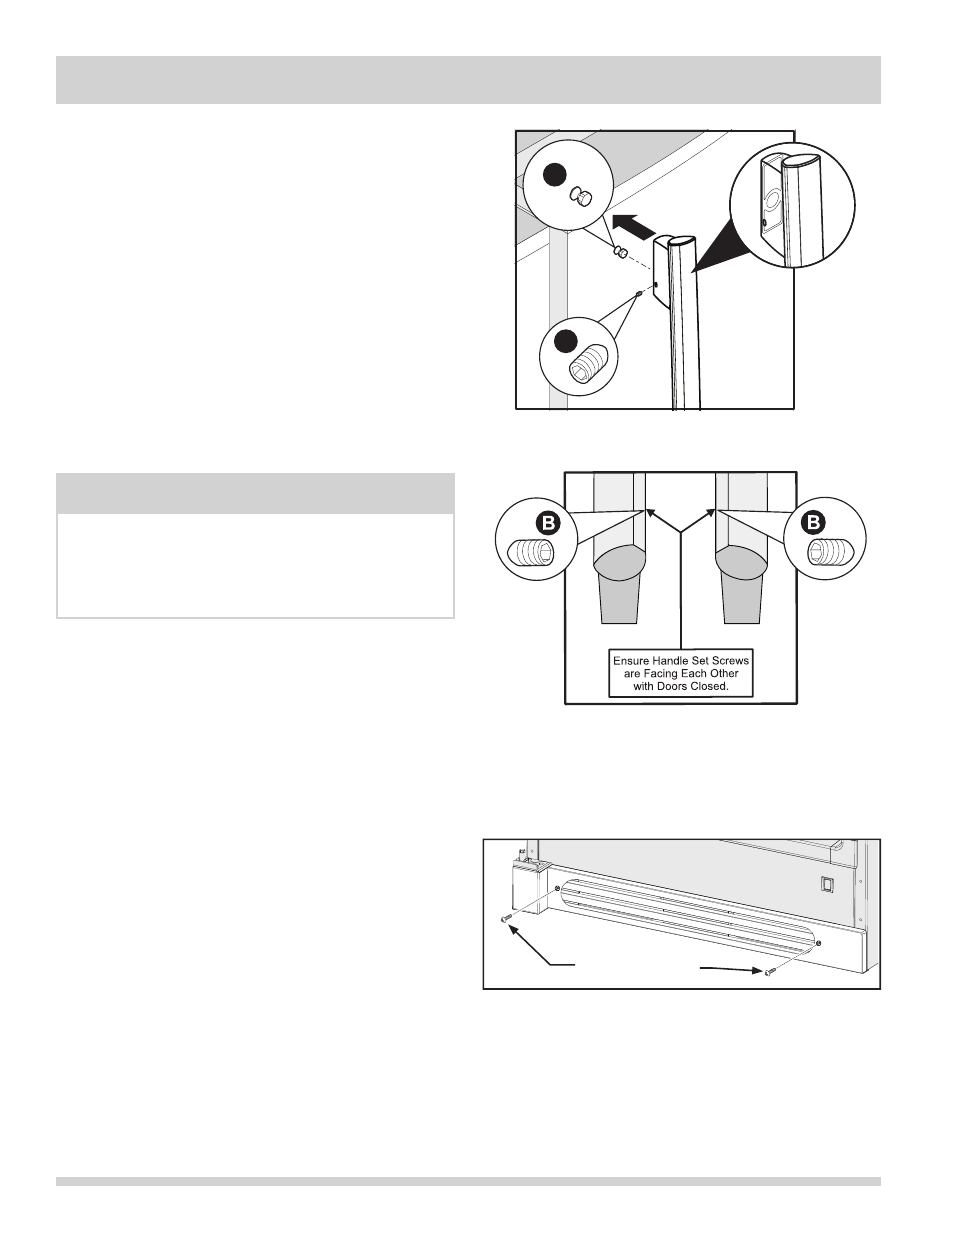
Door Handle Mounting Instructions
1. Remove handle from carton and any other protective
packaging.
2. Position freezer handle end caps over upper and
lower pre-installed shoulder bolts (A) that are
fastened into door, ensuring the holes for the set
screws are facing towards the outside of door if a
single unit installation or the freezer door (if installing
the matching freezer)
3. While holding handle fi rmly against door, fasten
upper and lower Allen set screws (B) with supplied
Allen wrench.
4. Repeat steps 2 and 3 to install freezer handle (if
installing the matching freezer). Ensure the holes for
the set screws are facing towards the freezer door.
Kick Plate Removal
To remove the kick plate, use a Phillips head screwdriver
and remove the two screws holding the kick plate to the
cabinet. Then pull the kick plate away from the unit.
Leveling
• The freezer must have all bottom corners resting
fi rmly on a solid fl oor.
• The
fl oor must be strong enough to support a fully
loaded freezer.
• It
is
VERY IMPORTANT for your freezer to be
level in order to function properly. If the freezer
is not leveled during installation, the door may be
misaligned and not close or seal properly, causing
cooling, frost or moisture problems.
Leveling instructions continued on next page.
NOTE
All set screws should be tightened and sub-fl ush (Allen
set screw should be seated just below the surface of
the end cap) of handle end cap. The end caps should
be drawn tight to freezer door with no gaps.
DOOR HANDLE REMOVAL INSTRUCTIONS