Back stretch, Standing hamstrings stretch, Buttocks, hips and abdominal stretch – Fitness Quest 6.5r User Manual
Page 9: Inner thigh stretch, Arm pullback, Step 5 – rear handlebar assembly, Step 4 – seat cushion and back rest installation
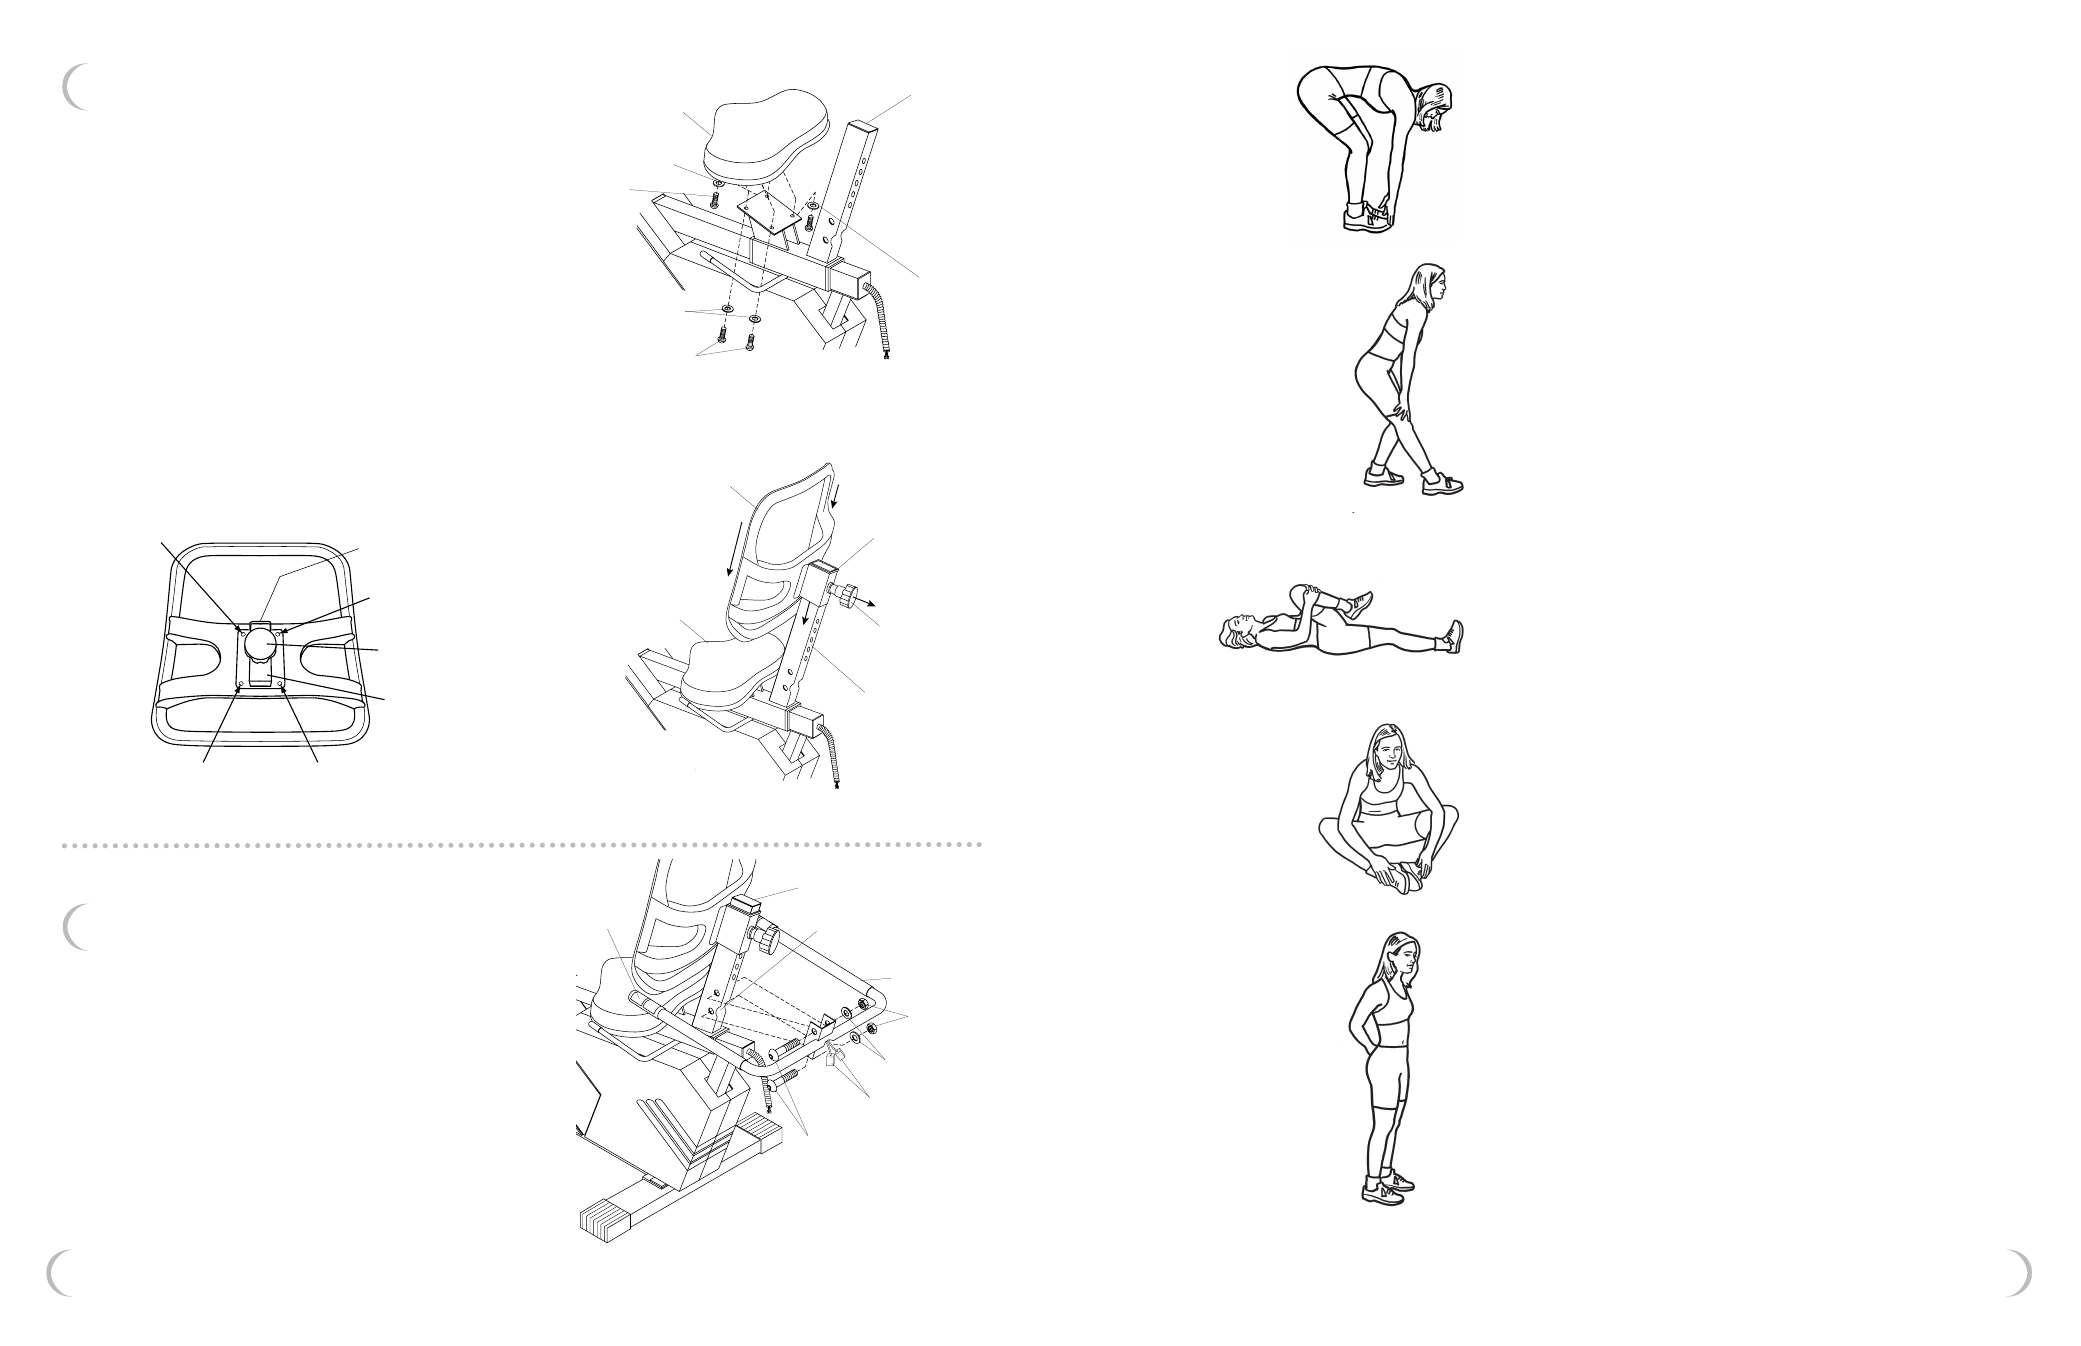
4. Back Stretch
Stand with your legs shoulder length apart and your knees
slightly bent. Bend forward from your waist with your arms
extending loosely in front of your body. Gently bend from
the waist flexing your body as far forward as it will go.
Hold for 20 to 30 seconds. Straighten up and repeat.
5. Standing Hamstrings Stretch
Stand with your legs hip-width apart. Extend one leg out in
front of you and keep that foot flat against the ground. With
your hands resting lightly on your thighs, bend your back leg
and lean forward slightly from your hips until you feel a stretch
in the back of your thigh. Be sure to lean forward from the hip
joint rather than bending at your waist.
Hold for 20 to 30 seconds. Repeat for the opposite leg.
6. Buttocks, Hips and Abdominal Stretch
Lay flat on your back with your hips relaxed against the floor.
Bend one leg at the knee. Keeping both shoulders flat on the
floor, gently grasp the bent knee with your hands and pull it over
your body and towards the ground. You should feel a stretch in
your hips, abdominals and lower back.
Hold for 20 to 30 seconds and release. Repeat for opposite side.
7. Inner Thigh Stretch
Sit on the floor and bend your legs so that the soles of your feet
are together. Place your elbows on your knees. Lean forward
from the waist and press down lightly on the inside of your knees.
You should feel a stretch in the muscles of your inside thigh.
8. Arm Pullback
Stand with your feet shoulder width apart and toes pointing
forward and with your knees slightly bent. Let your arms hang
relaxed on either side of your body. Expand your chest and pull
your shoulders back. Bend your elbows slightly and clasp your
hands behind your back. Slowly straighten your arms as you lift
your hands upward. Raise your hands upward until you feel mild
tension in your shoulder and chest region.
Hold for 20 to 30 seconds. Lower your arms to their original
position and bend your elbows. Release your hands and return
them to your sides.
21
8
seat carriage
notch
rear
handlebar
M8 nylon
nuts
M8 washers
M8 x 45mm
allen
bolts
handlebar
pulse wires
pulse
sensor
STEP 5 – Rear Handlebar Assembly
a) Remove (2) Allen Bolts, (2) Washers and (2) Nylon
Nuts from Rear Handlebar with Pulse Sensors.
b) Place Rear Handlebar into notch in Seat
Carriage with Handlebar pointing forward
and Pulse Sensors facing up, see Figure 5.
c) Secure Rear Handlebar with (2) Allen Bolts,
(2) Washers and (2) Nylon Nuts removed in
Step 5a. Tighten Bolts with Allen Wrench
provided.
Figure 5 - Install Rear Handlebar
STEP 4 – Seat Cushion and Back Rest Installation
top of back rest
seat carriage bushing
goes towards top of seat
seat carriage slider
M6 x 30mm phillips bolt
M6 x 30mm
phillips bolt
M6 x 30mm
phillips bolt
seat adjustment knob
seat
cushion
seat
carriage
M6 x 15mm
phillips bolts
M6 washer
M6
washers
M6 x 15mm
phillips bolts
M6 washer
Figure 4c - Install Back Rest
Figure 4a - Install Seat
Figure 4b - Install Seat Carriage Slider
a) Position Seat Cushion over lower Seat Carriage
with narrow side pointing forward and align bolt
holes. Secure with (4) Phillips Bolts and (4) Washers
and tighten, see Figure 4a.
b) Place Back Rest upside down on a flat surface,
see Figure 4b.
c) Position Seat Carriage Slider on Back Rest, as shown
in Figure 4b, with Seat Adjustment Knob facing away
from Back Rest and Seat Carriage Bushing towards
top of Back Rest. Attach using (4) Phillips Bolts,
(4) Washers and (4) Hex Nuts. Tighten bolts.
d) Pull Seat Adjustment Knob out and slide Back Rest
onto Seat Carriage. Note: Slide the side opposite
of the Seat Carriage Bushing on first. Release
Seat Adjustment Knob and continue to slide Back
Rest Down until it clicks into an adjustment hole.
Turn knob to lock into place, see Figure 4c.
back
rest
seat
cushion
seat
carriage
bushing
seat
adjustment
knob
seat
carriage