3 frypot boilout – Frymaster Dean 2424E User Manual
Page 11
2-4
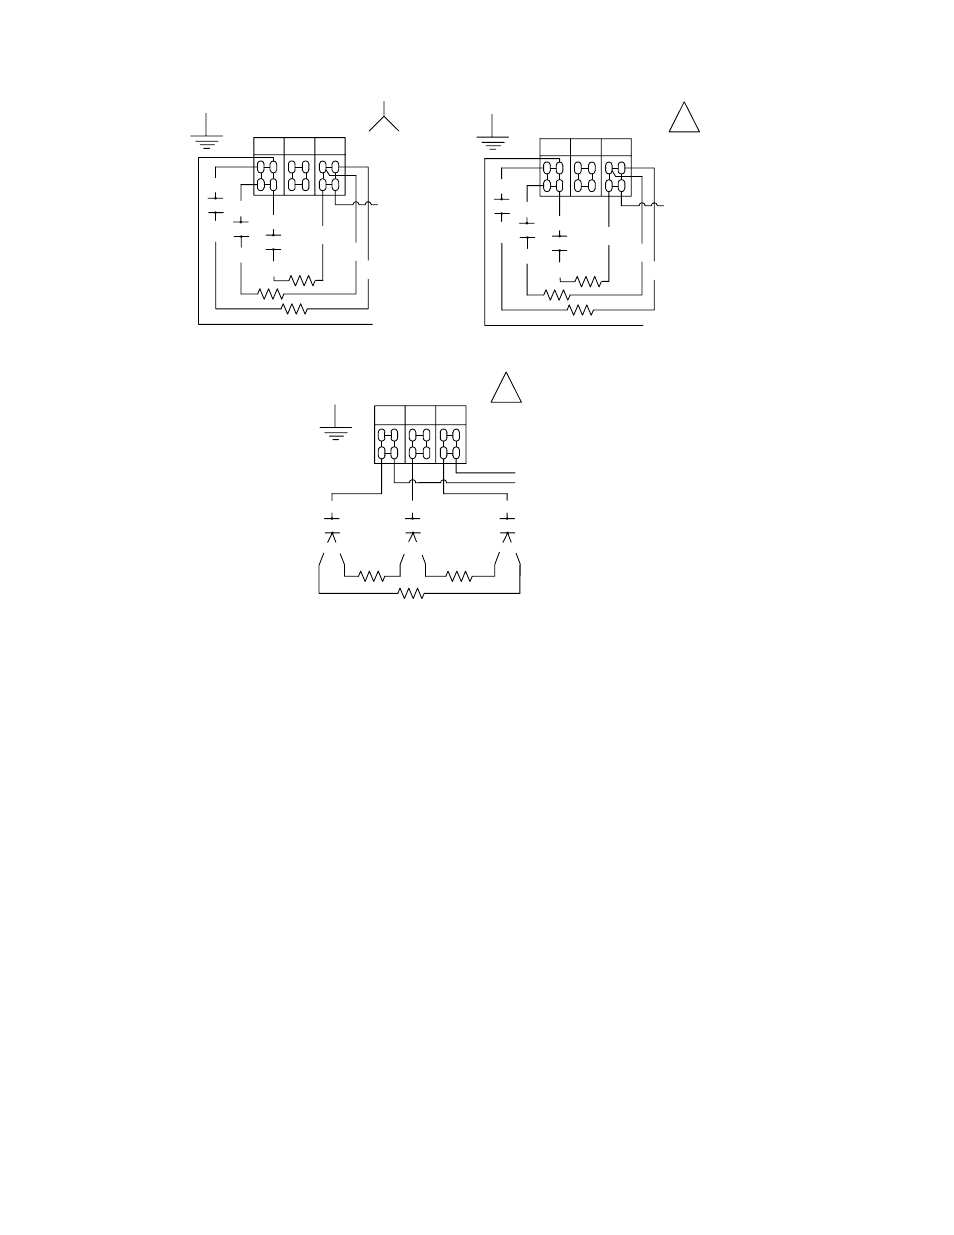
SINGLE PHASE (NO NEUTRAL)
FIELD CONNECTION
L1
L2
L3
1
1HV
1C1
2HV
1C2
2
3
3HV
1C3
4
5
6
FROM TRANSFORMER
FROM
TRANSFORMER
SINGLE PHASE
FIELD CONNECTION
NEUTRAL TO L3
L1
L2
L3
1
1HV
1C1
2HV
1C2
2
3
3HV
1C3
4
5
6
FROM TRANSFORMER
FROM TRANSFORMER
3 PHASE 3 WIRE (DELTA)
FIELD CONNECTION
L1
L2
L3
1HV
1C1
1
2
5
3
2HV
1C2
3HV
1C3
4
6
FROM TRANSFORMER
FROM TRANSFORMER
6. Boil out the frypot(s) in accordance with the Boilout procedure in Section 2.3.
2.3 Frypot
Boilout
Before the fryer is first used for cooking product, it should be boiled out to ensure that residue from
the manufacturing process has been eliminated.
Also, after the fryer has been in use for a period of time, a hard film of caramelized vegetable oil will
form on the inside of the frypot. This film should be periodically removed by following the boilout
procedure.
Boilout the frypot(s) in accordance with the procedure below before filling with cooking oil or
shortening for the first time and at least once a month thereafter:
1. Verify that the frypot drain valve is closed, and then fill the empty frypot with a mixture of cold
water and detergent. Follow the instructions on the detergent container when mixing.
2. If this is the first time the fryer is being operated after installation, set the operating thermostat
or optional solid-state controller to 225°F (110°C), then press the POWER switch to the POWER
position. If the fryer is so equipped, press the FRYER RESET switch for a couple of seconds
then release it. If the light in the reset switch does not remain lit when the switch is released,
verify that the drain valve is fully closed, and then press the reset switch again. NOTE: On