Installation instructions – Fisher & Paykel HC90DXB1 User Manual
Page 6
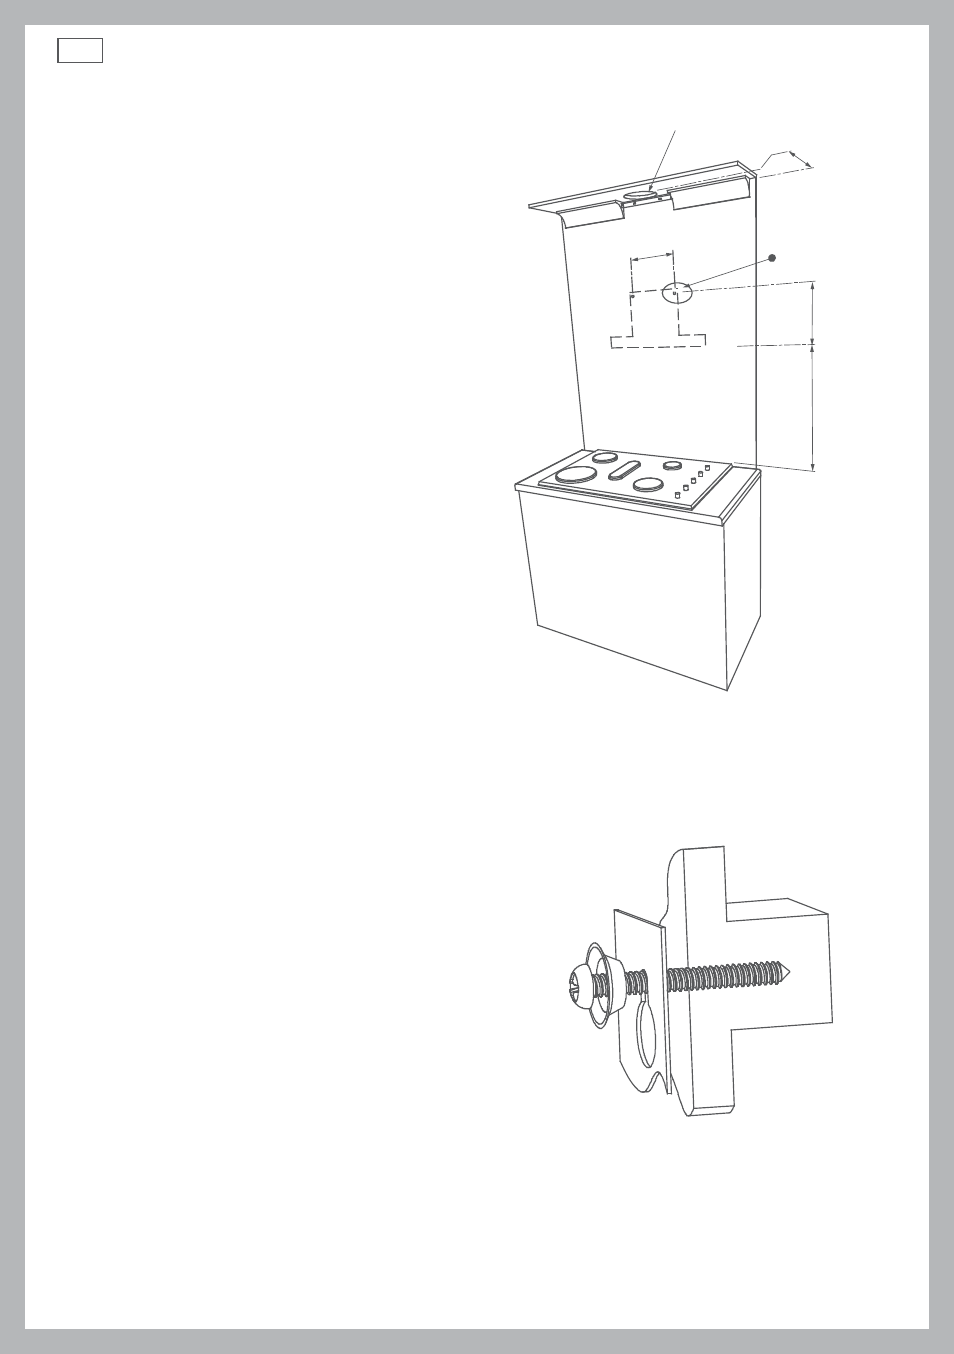
4
Installation instructions
1
Before commencement, unpack the wall canopy
and check that it functions correctly.
2
Pre-drill pilot hole 3 mm diameter at dimensions
C and B: B = 225 mm and C = 260 mm.
Note: Fixing to a solid stud is recommended,
see Fig.4.
3
Loosely fix the 12 x 2” screws and 2 x cup
washers in position, check with a spirit level
across the screws to ensure they are level.
4
Mark the position of the decorative chimney at
the ceiling and wall. Cut the cornice moulding
away if required, to enable the chimney to fit
flush against the wall and ceiling.
5
Mark and cut out the hole in the ceiling or wall
to fit the ducting (160 mm (min) diameter). This
is positioned centrally above the wall canopy,
with a centre line 100 mm from the wall (for the
ceiling option).
6
Using the screws supplied, fix the chimney
bracket to the wall or ceiling, checking that it is
centrally located above the canopy.
7
Remove the protective plastic covering from all
parts including the filters.
8
Fit the wall canopy onto the mounting screws
and tighten.
9
Connect and secure the ducting (use duct tape
if required).
10
Assemble the chimney pieces to a height that
best suits the installation, leave these screws
loose so that the chimney is free to extend by a
few mm. Place the two pieces onto the canopy
top and secure the lower part to the canopy
sides. Extend the upper chimney to the ceiling
and secure in place with the screws supplied.
Fig.3 Installation of unit
Fig.4 Bolt into solid stud
Diameter 160 mm (min)
100 mm from
centre to wall
Note: fix to
a solid stud
B = 225 mm
See “A” on
page 3
C = 260 mm