Fagor America SFA-8CELX User Manual
Page 10
19
EN
18
EN
Important :
When refitting the condenser, ensure that it is pushed in firmly right to the back of its hou-
sing when locking it in
6 / USER-MAINTENANCE INSTRUCTIONS
Fig. 21
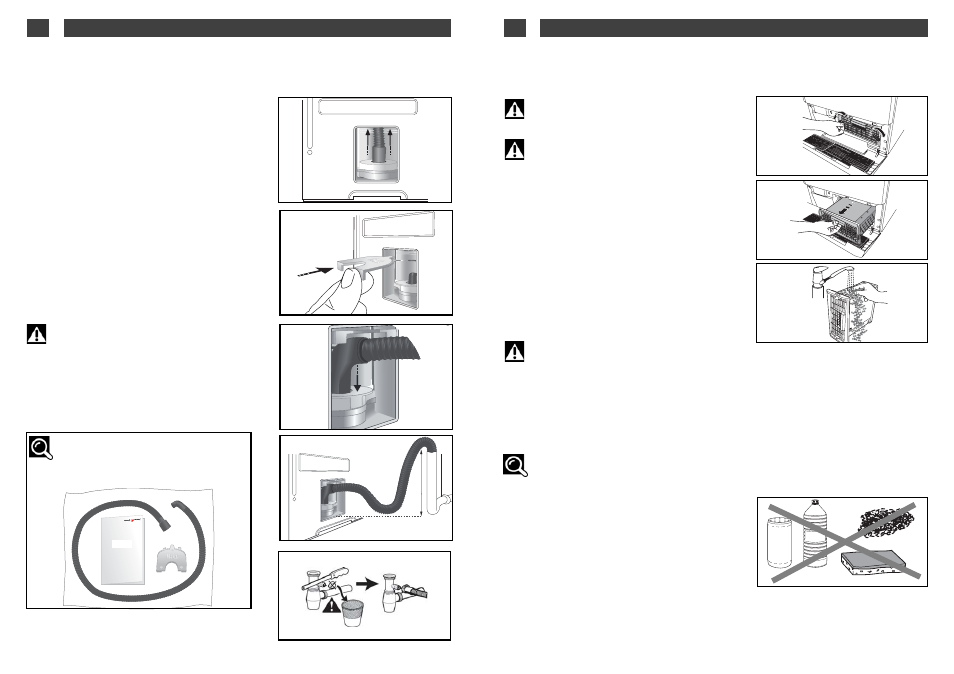
• CLEANING THE CONDENSER
Fig. 18
Fig. 19
Fig. 20
Important :
The condenser must be cleaned twice a
month.
Important :
Unplug the power cable from the socket
before cleaning the condenser.
— Open the grill at the front of the appliance.
— Release the condenser
(Fig.18).
— Remove it carefully
(Fig.19).
— Remove any fluff from the condenser.
— Clean it with water only under the tap
(Fig.20).
— After cleaning, ensure that none of the tubes are
“blocked” and that the fins are clean.
— Rub it superficially.
— Re-insert the condenser and lock it in place. Close
the grill.
Advice :
To clean the control panel, the access to the
drum and the casing, use only a sponge or a damp
cloth and some soapy water.
— Ensure that there is no fluff accumulating round
the dryer.
— Clean the door seal with a damp cloth.
— Clean the filter housing with your vacuum cleaner
once a year.
You should n
no
ott u
us
se
e,, under any circumstances
(Fig
21) :
— Abrasive powders
— Metal or plastic sponges
— Alcohol-based products (alcohol, thinners, etc.)
• CLEANING THE APPLIANCE
6 / USER-MAINTENANCE INSTRUCTIONS
• DIRECT EVACUATION OF WATER CONDENSER
90 cm maxi
Fig. 15
Fig. 13
Fig. 14
Fig. 17
Fig. 16
To avoid having to empty the collection tank every
time you use the appliance, you have a kit (*) for
removing the water from the condenser directly into
the drain (hose and deflector). To fit this :
— Take off the existing pipe and push it inside the
appliance
(Fig. 13).
— Clip the deflector with the top of the pump
(Fig. 14).
— Connect the hose from the kit to the end connector
on the appliance
(Fig. 15)
You can connect the other end of the hose either :
- To a ventilated trap
(Fig. 16).
- Or a sink trap
(Fig. 17).
When connecting to a trap, you must remove the fil-
ler plug. Then press home the rubber tip. If neces-
sary, add a clamp connection
(Fig. 17).
Important :
The deflector must be positioned before the
drain hose connection to avoid any water splashes
when taking off the hose.
Déflecteur
Encart
Tuyau
Remarks :
(*) This kit is provided with the appliance
or is available near your After-sales service
under the ref. 57X3184 (according to model).
Deflector
Hose
Insert