Frymaster 8196428 User Manual
Page 11
1-7
5. Unplug the elements wires (white wires with plugs) inside component box.
6. Remove the lid.
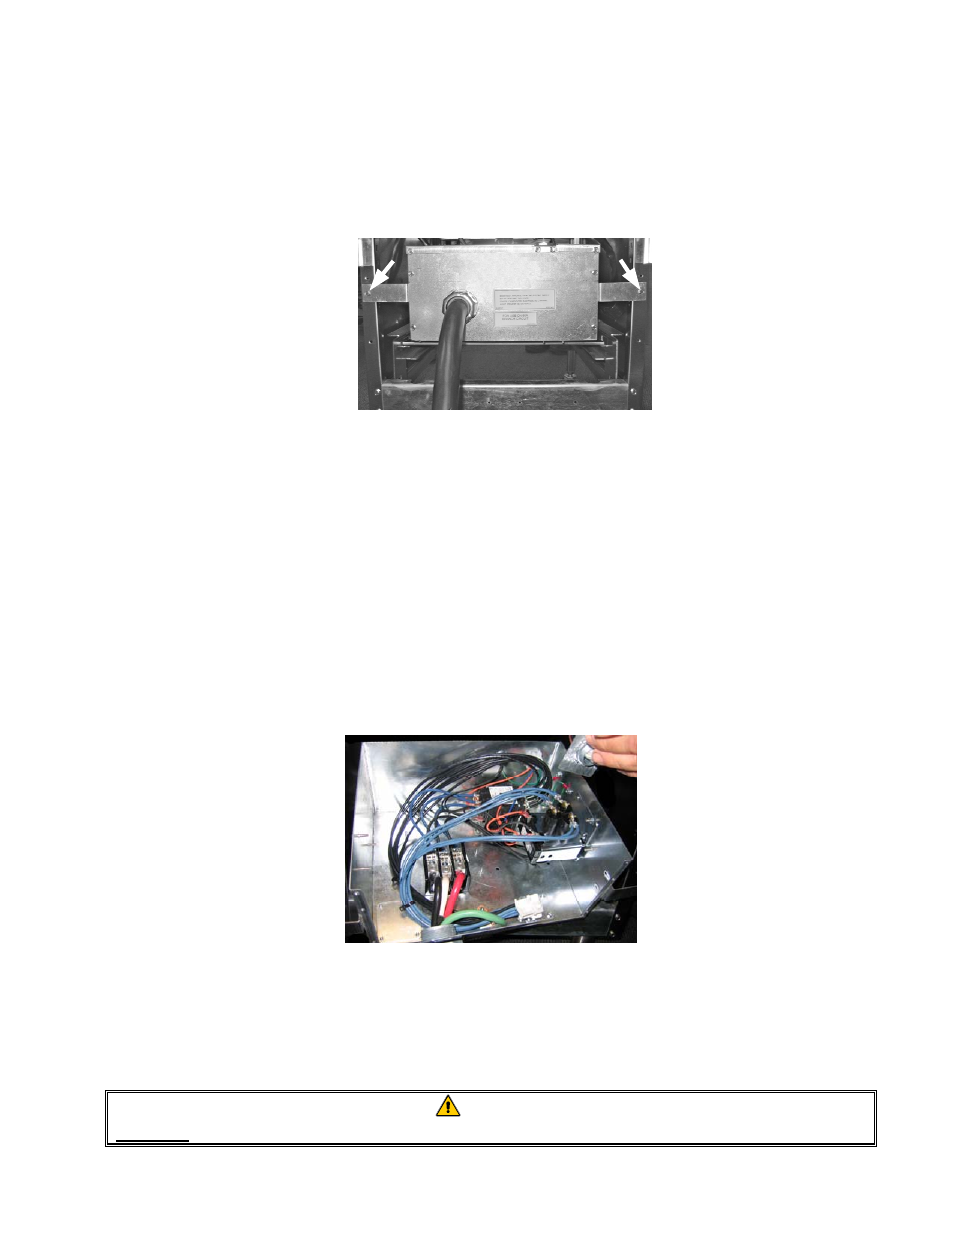
7. Remove the screw (white arrows below) from each of the tabs on either side of the contactor
box.
8. Unplug the 12-pin control cord inside the box.
9. Carefully lower the contactor box out of the fryer cabinet. Ensure no wires are pulled or
damaged in the process.
10. The contactors and relays are held on by threaded pin studs so that only removal of the nut is
required to replace the component.
11. To reinstall the contactor box, reverse Steps 1-7 to return the fryer to operation.
Contactor box components.
1.8 Replacing a Frypot
1. Drain the frypot into a Shortening Disposal Unit (SDU) or other appropriate metal container.
Remove the filter pan and lid from the unit.
DANGER
DO NOT drain more than one full frypot or two split frypots into the SDU at one time.
Remove the screws (white arrows) from the tabs
on either side of the contactor box.
- D460G (2 pages)
- J3F (88 pages)
- TB14 (60 pages)
- Universal Holding Cabinet (53 pages)
- D80 Series (44 pages)
- CF SERIES J65X (50 pages)
- HCP (30 pages)
- GF40 (2 pages)
- GF14 (24 pages)
- FOOTPRINT E4 (88 pages)
- Enodis RE17TC (2 pages)
- Dean 52 Series (39 pages)
- CFESA BKSDU (13 pages)
- JCFX (76 pages)
- GEN II LOVTM BIELA14 (86 pages)
- Enodis FPRE14-7 (2 pages)
- UHC-HD (3 pages)
- FootPrint PRO FPP545 (2 pages)
- Dean SM35 (40 pages)
- FOOTPRINT RE80 (64 pages)
- 8196606 (24 pages)
- D680G (2 pages)
- 35 Series (40 pages)
- SR62 Series (14 pages)
- FPD65 (60 pages)
- LOV BIGLA30 (88 pages)
- FPD (100 pages)
- FOOTPRINT PRO SERIES 45 (50 pages)
- 1814 (10 pages)
- LOV M3000 (50 pages)
- 14 Series (78 pages)
- HD1814 SERIES HD1814G (46 pages)
- 1824/2424G (44 pages)
- YSCF14G (26 pages)
- HLZ18 (4 pages)
- FDP65 (60 pages)
- BIGLA30 (86 pages)
- BIELA14 (26 pages)
- BIRE14 (32 pages)
- FPH55 (2 pages)
- 2424G (68 pages)
- KSCF18G (68 pages)
- Enodis PF50S (2 pages)
- MH52 (115 pages)
- SM5020G (2 pages)