Festool LEX 2 150/3 User Manual
Page 4
4
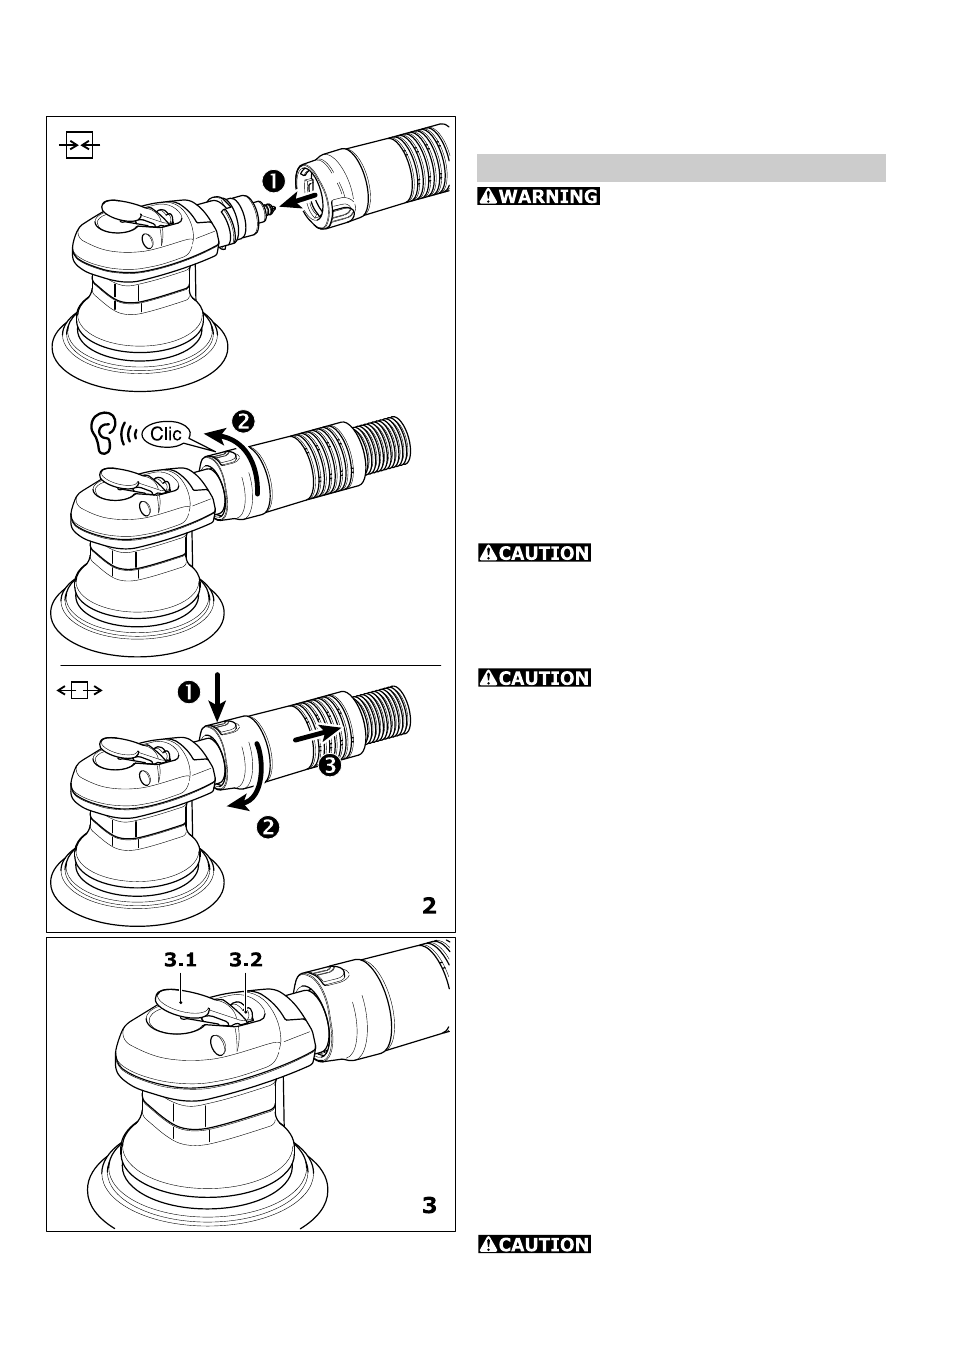
Starting
Pressing the lever (3.1) switches on the
pneumatic tool. Releasing the lever switches
the tool off again.
Tool settings
Always disconnect the tool from
the compressed air supply before doing any
work on the tool.
Speed adjustment
You can regulate the sanding speed steplessly
between 4,000 and 8,000 rpm using the
adjusting wheel (3.2). This enables you to
optimize the speed to suit the material.
Suction unit
Sanding dust is extracted through the extraction
channels in the sanding pad and taken di-rectly
to the material removal point. To ensure
optimized dust extraction, we recommend using
a Festool dust extractor with automatic switch-
on/switch-off device for compressed-air tools.
In order to prevent damage to the
pneumatic motor, dust extraction must be
allowed to run through the pneumatic tool when
it is at standstill.
Sanding pads
Sanding pads have different
weights depending on their diameter. Using a
sanding pads of the incorrect size will cause
excessive vibration of the tool.
Only use sanding pads with an undamaged burr
layer.
Sanding pads are available in three degrees of
hardness to suit the type of application:
- Hard: high edge strength, for removing coarse
material from surfaces and for sanding edges.
- Soft: universal for coarse and fine sanding,
with elastic structure for even and curved
surfaces.
- Super soft: high elasticity, for smooth fine
sanding of moulded parts, curves, radii. Do
not use on edges.
Assembly - see Fig. 4. Make sure the positive-
fit supports on the sanding pad (4.1) are flush
with the ones on the tool (4.2).
Abrasive
Self-adhesive abrasives, such as Stickfix
sandpaper, and sanding cloths can be affixed
to the Stickfix sanding pads.
To affix the abrasive, simply press it onto the
sanding pad and remove it after use.
The abrasive must be centered on
the pad and the holes aligned with those on
the sanding pad.
Connection and disconnection see Fig. 2.
IAS 2 connecting system see accompanying
instruction sheet.