3 activating the auto plotter, Figure 6-1 arp menu, Figure 6-2 arp display – Furuno FR-7112 User Manual
Page 41
6-3
6.3 Activating the Auto Plotter
To activate the ARP-10, follow the steps shown
below.
1. Adjust the GAIN, A/C SEA and A/C RAIN
controls for proper radar picture.
2. Press the [MENU] key to open the main
menu.
3. Operate the trackball to select “ARP-10
MENU”.
4. Press the [ACQ/ENTER] key. The menu
shown in Figure 6-1 appears.
5. Operate the trackball to select the menu item
“1. Display”.
6. Operate the trackball to select “On”.
7. Press the [ACQ/ENTER] key.
8. Press the [MENU] key to close the menu.
[ ARP MENU ]
Select item by T-ball
and press ENTER key.
1
. Display
2 . All Cancel
3 . Vector Ref
4 . Vector Length
5 . History
6 . CPA Set
7 . TCPA Set
8 . Auto ACQ
1min
30min
1min
2nm
3min
12min
Off
Rel
3min
6min
Off
15sec
2min
3min
Off
0.5nm
3nm
5nm
30sec
1min
4min
5min
Off
On
True
30sec
15min
30sec
6min
1nm
6nm
2min
6min
On
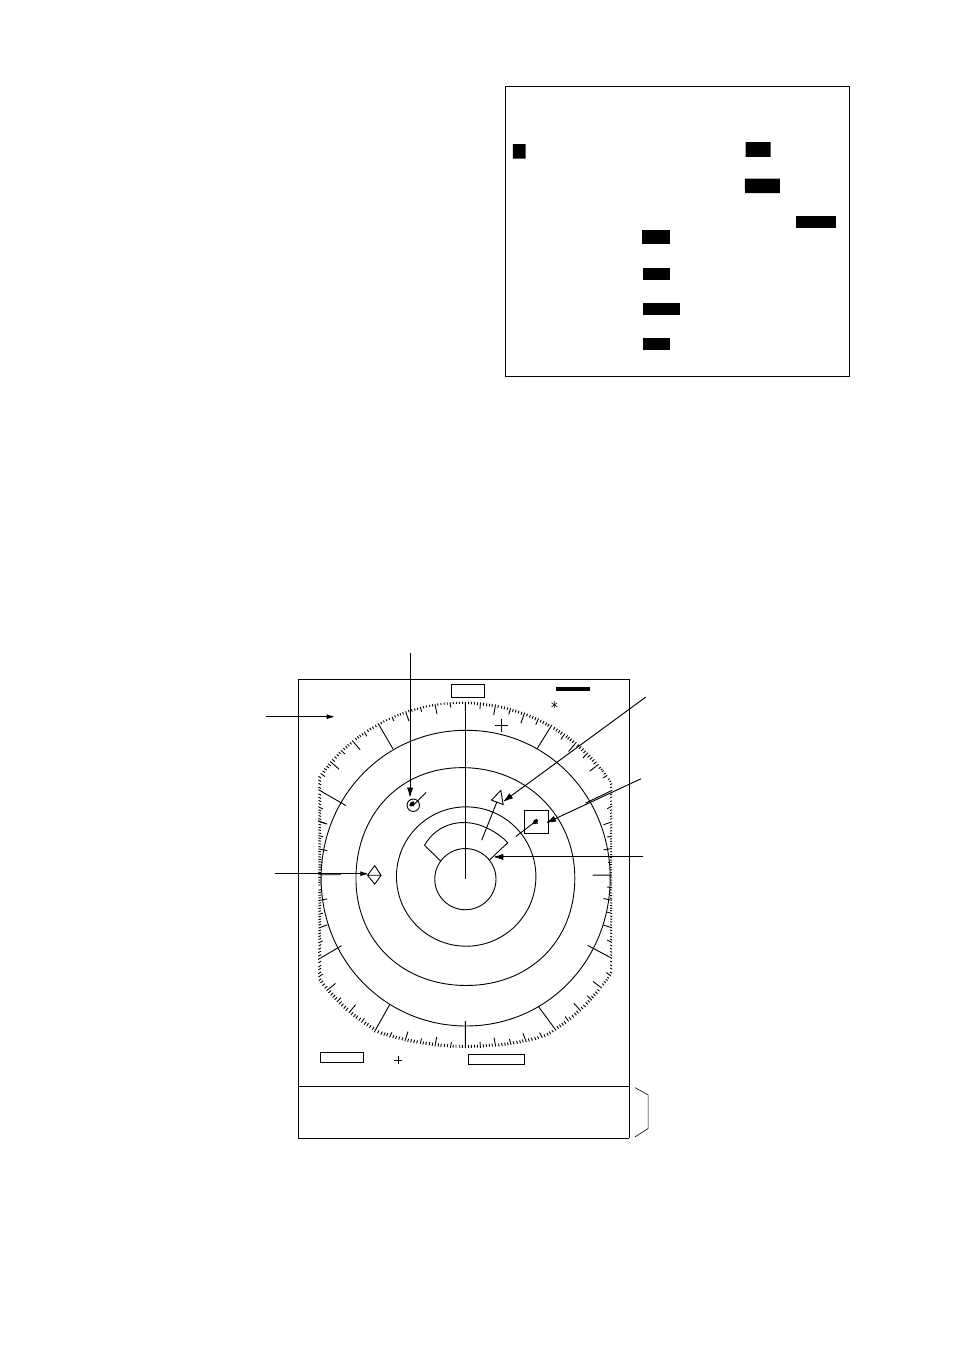
Figure 6-1 ARP menu
HDG 234.5
°
SP
HU RM
8
NM
2
TRAIL
30min
ZOOM
ES1
AUTO
25:38
G (OUT)
VRM
0.048NM
0.100NM
13.5
°
R
0.142NM
A/C
AUTO
EBL/PI
345.6
°
R
23.0
°
R
TRUE VECTOR
15 MIN
BEARING 42.5
°
T
RANGE 5.36 NM
CPA 2 NM
COURSE 287.8
°
T
SPEED 12.5 KT
TCPA 12:35
ARPA Data Area
Target is being tracked but is not selected
for data readout
Target selected
for data reading
(large square)
Auto
Acquisition
Area
Threatening
target
Lost Target
AUTO TARGET
FULL
Target Full
Mark
Figure 6-2 ARP display