Gchanging picture resolution, Ecómo cambiar la resolución de las imágenes – Fisher-Price Camera User Manual
Page 21
1
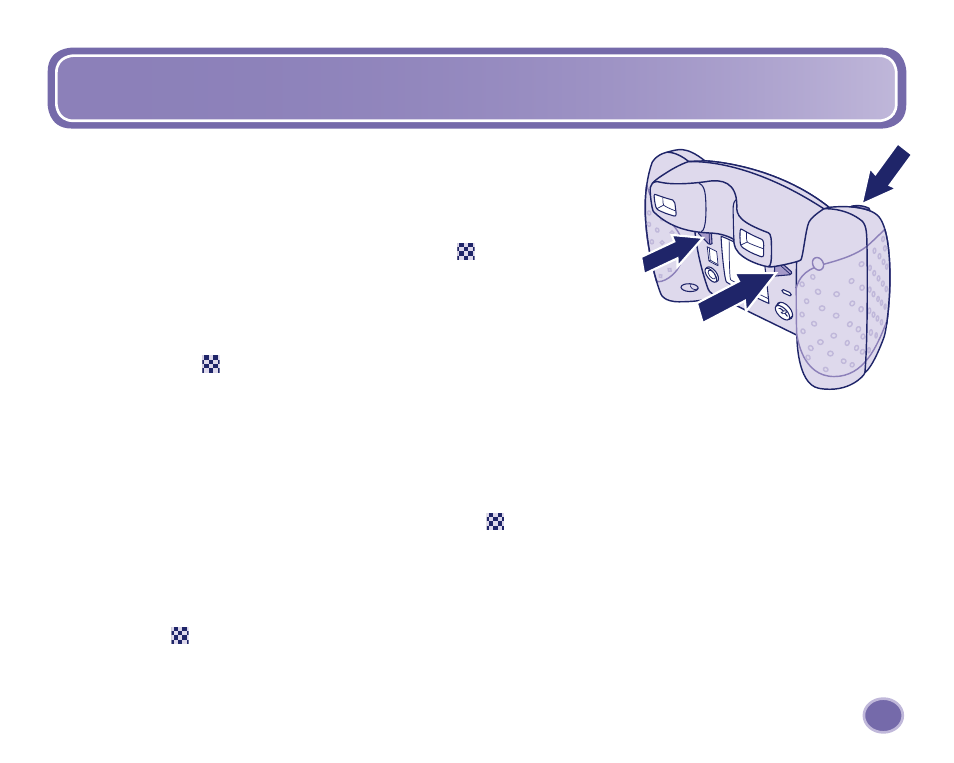
G Your camera comes set up to take normal quality pictures (standard resolution).
If you’d like to take higher quality pictures (high resolution), follow these steps.
• Press the image back and image forward at the same time and hold (1 and 2).
• Press the shutter release button (3). You’ll hear a tone.
• The high resolution icon appears on the LCD screen .
• You are ready to take pictures in high resolution.
• To change back to standard resolution, repeat this procedure.
Note: When you change batteries, the resolution resets to standard.
• When reviewing pictures, images taken in high resolution will have the high
resolution icon shown on the LCD screen.
Note: High resolution images use up more memory. For more information about image capacity,
see the chart on page 26.
E La cámara viene de fábrica en el modo de resolución estándar (para obtener fotos de calidad normal). Para hacer
fotos de mayor calidad (alta resolución), seguir estos pasos:
• Pulsar simultáneamente el botón “foto anterior” y el botón “foto siguiente” y mantenerlos pulsados (1 y 2).
• Pulsar el botón del obturador (3). Se oirá un pitido.
• El icono de alta resolución aparecerá en la pantalla LCD .
• Ahora la cámara ya está lista para hacer fotos en alta resolución.
• Para volver a la resolución estándar, repetir esta operación.
Atención: al cambiar las pilas de la cámara, la resolución vuelve automáticamente a la opción estándar.
• Al repasar las fotos que se han tomado, en aquellas que se han hecho en alta resolución aparecerá el icono de alta
resolución en la pantalla LCD.
Atención: las imágenes tomadas en alta resolución ocupan mayor memoria. Más información sobre la capacidad de
imágenes en el cuadro de la página 26.
3
1
2
G
Changing Picture Resolution
E
Cómo cambiar la resolución de las imágenes