Important – Fisher & Paykel DD24DT User Manual
Page 7
OPTIONAL
1
2
3
4
4
optional
max.
¾ ”
(19 mm)
4
3
5
19
19
9
1
2
8
6
7
2
1
4
5
4
3
x 4
1
2
3
A
C
C
B
B
A
1
Ensure product is level and
aligning with cabinetry.
Using the most appropriate
length Hexagonal socket
supplied, fully extend
levelling feet up to required
distance by hand.
Hexagonal socket
optional
max. ¾
” (19 mm)
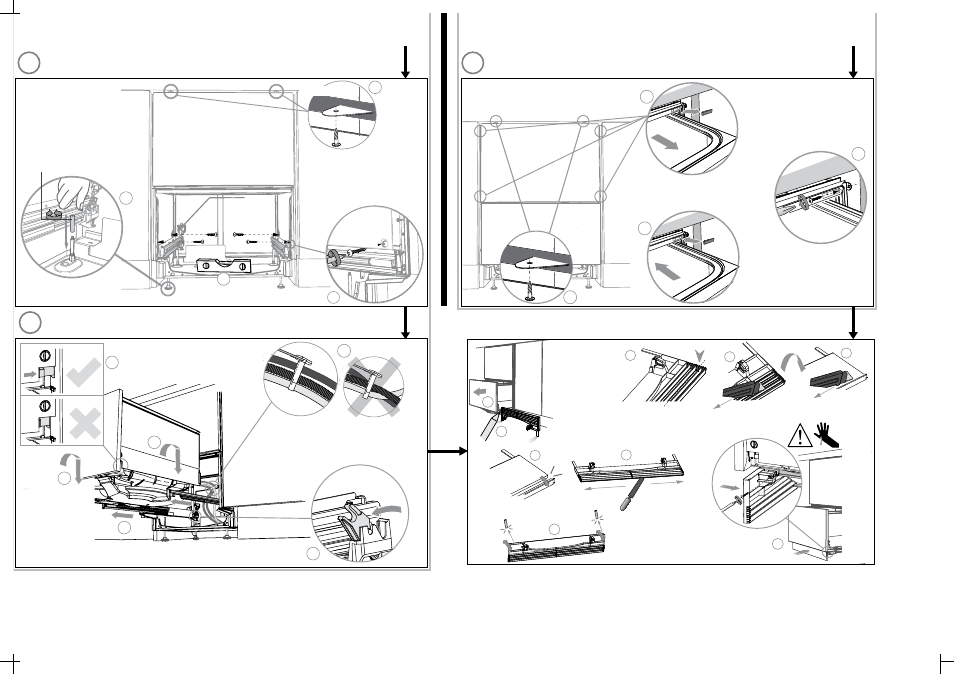
The product has three pairs of
mounting brackets: a pair of optional
brackets on the top (C) and two pairs
of formed brackets in the side of the
chassis (A,B). Use at least two out of
the three pairs to secure the product.
Ensure the sound insulation is
repositioned
correctly.
LEVEL AND SECURE THE PRODUCT
SECURE THE PRODUCT
REFIT THE DRAWER
FINALLY, FOR BOTH METHODS, FIT THE TOEKICK
10
10
11
Before refitting the drawer, ensure the
hoses are not twisted and the latches
at the rear of each drawer runner are
facing forward.
Ensure the drawer clips on
both sides are reset.
Ensure the drawer
is now rotated
clockwise back.
Important!
Do not overtighten screw.
Where the toekick
meets the bottom
of the tub is the
cut-off point
Open the upper drawer halfway.
Using a flat-bladed screwdriver, prize
the plastic gray plug out of the trim
moulding.
Replace the plastic gray plug back
into the trim moulding and ensure
the trimseal is facing forward.
Repeat for all four brackets.
Using a small Philips screwdriver,
screw through the trim moulding,
securing the side mounting
bracket to the cabinetry. Do not
damage the rubber trimseal.
(2,1) -2- 599632C DD24D TALL installA2 USCA.indd 15/4/09 11:51:16 AM
(2,1) -2- 599632C DD24D TALL installA2 USCA.indd 15/4/09 11:51:16 AM