Install the mounting bracket, Pair the phone with the ooma telo, Step 2 – ooma Telo VoIP Phone System with DP1-T Wireless Desk Phone (Black) User Manual
Page 3: Step 3 step 5, Step 4
4
5
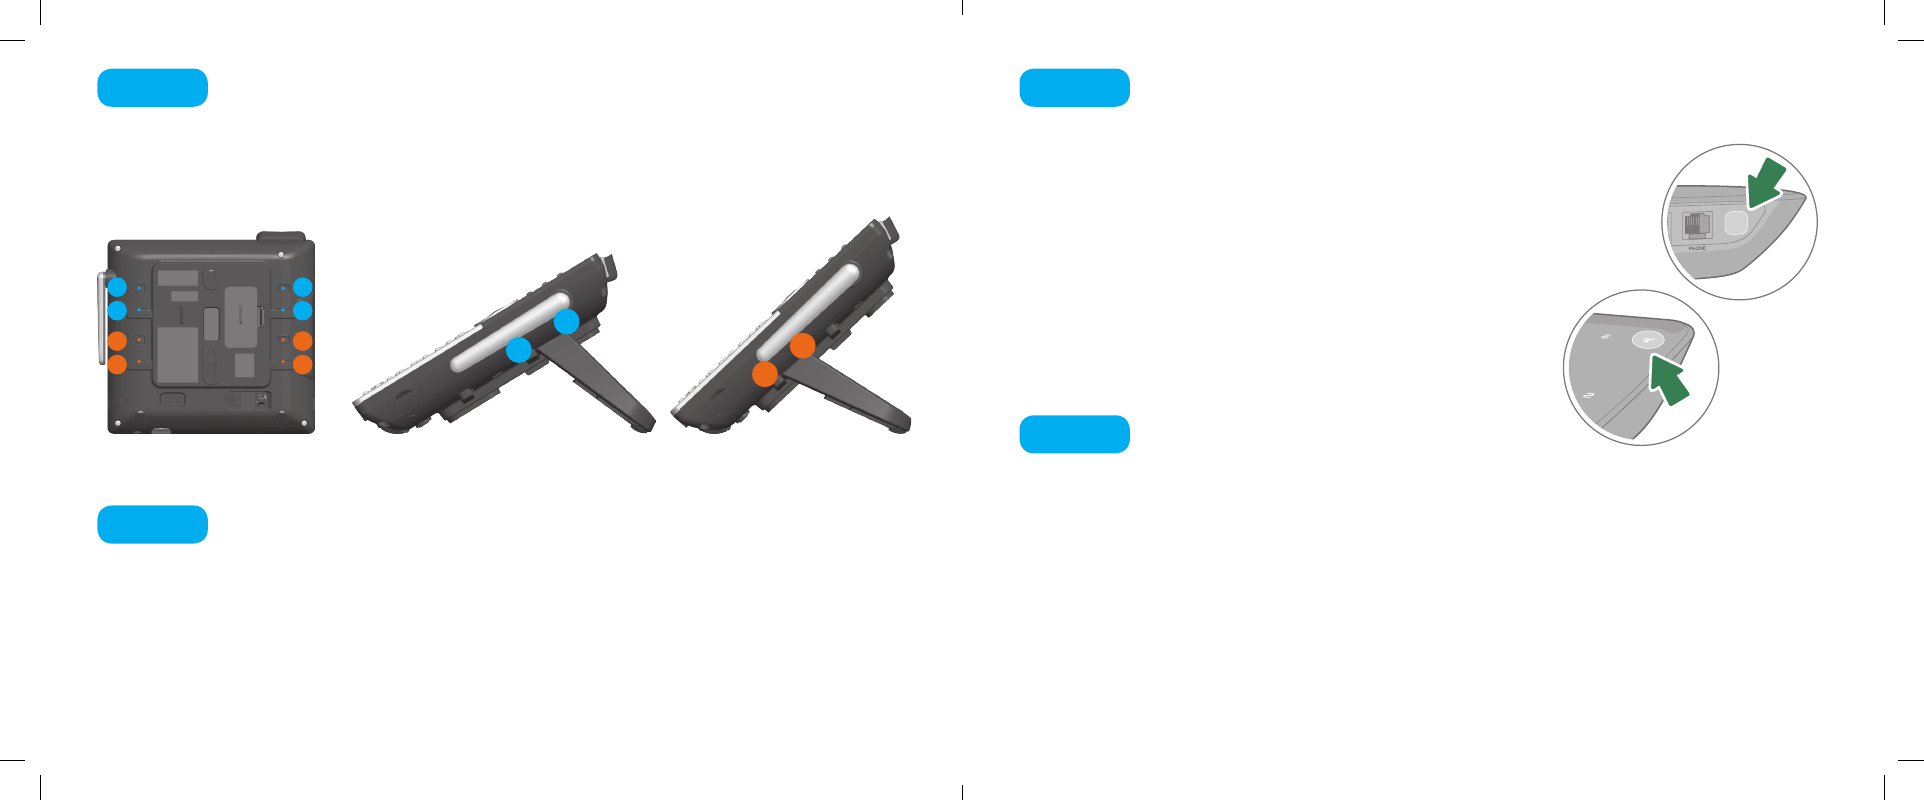
Insert the fixed tabs of the mounting bracket into slots A and B, and then
insert the flexible tabs into slots C and D. There are two sets of tabs
(High and Low) depending on your positioning preference.
Low tabletop position
High tabletop position
Install the mounting bracket
Step 2
Connect the handset and
power cord to the deskset
Allow phone to
download updates
Step 3
Step 5
Plug the small end of the power adapter into the power jack at the bottom of
the desktop phone and the other end to a power outlet. Plug the end of the
coiled handset cord into the handset jack at the bottom of the desktop phone.
The Ooma DP1 desk phone is perpetually in pairing mode
until it is paired with an Ooma Telo. Put your Telo device
into pairing mode by pressing the PAGE button on the
back of your device for three seconds. The DP1 phone will
automatically pair to the Ooma Telo, a confirmation screen
will be displayed.
Pair the phone with the Ooma Telo
Step 4
The phone may need to download and install a software upgrade
once it is paired. This process may take several minutes.
The phone will display a ready screen when it is available to place
and receive calls
Page key on
newer Telos
Page key on
older Telos
B
B
D
D
B
A
B
A
D
C
D
C
Low
High
Ooma-Residential DP1 Desk Phone-QSG Booklet_EN-FR-2018-12-Feb 2017-R7.indd 5-6
2/12/18 5:36 PM