Installation on high surfaces, Ceiling mounting or rear projection – Canon REALiS 4K501ST Pro AV 5000-Lumen LCoS Projector User Manual
Page 37
37
Installation Procedure
Bas
ic G
uide
In
st
allation
Pr
ocedu
re
■
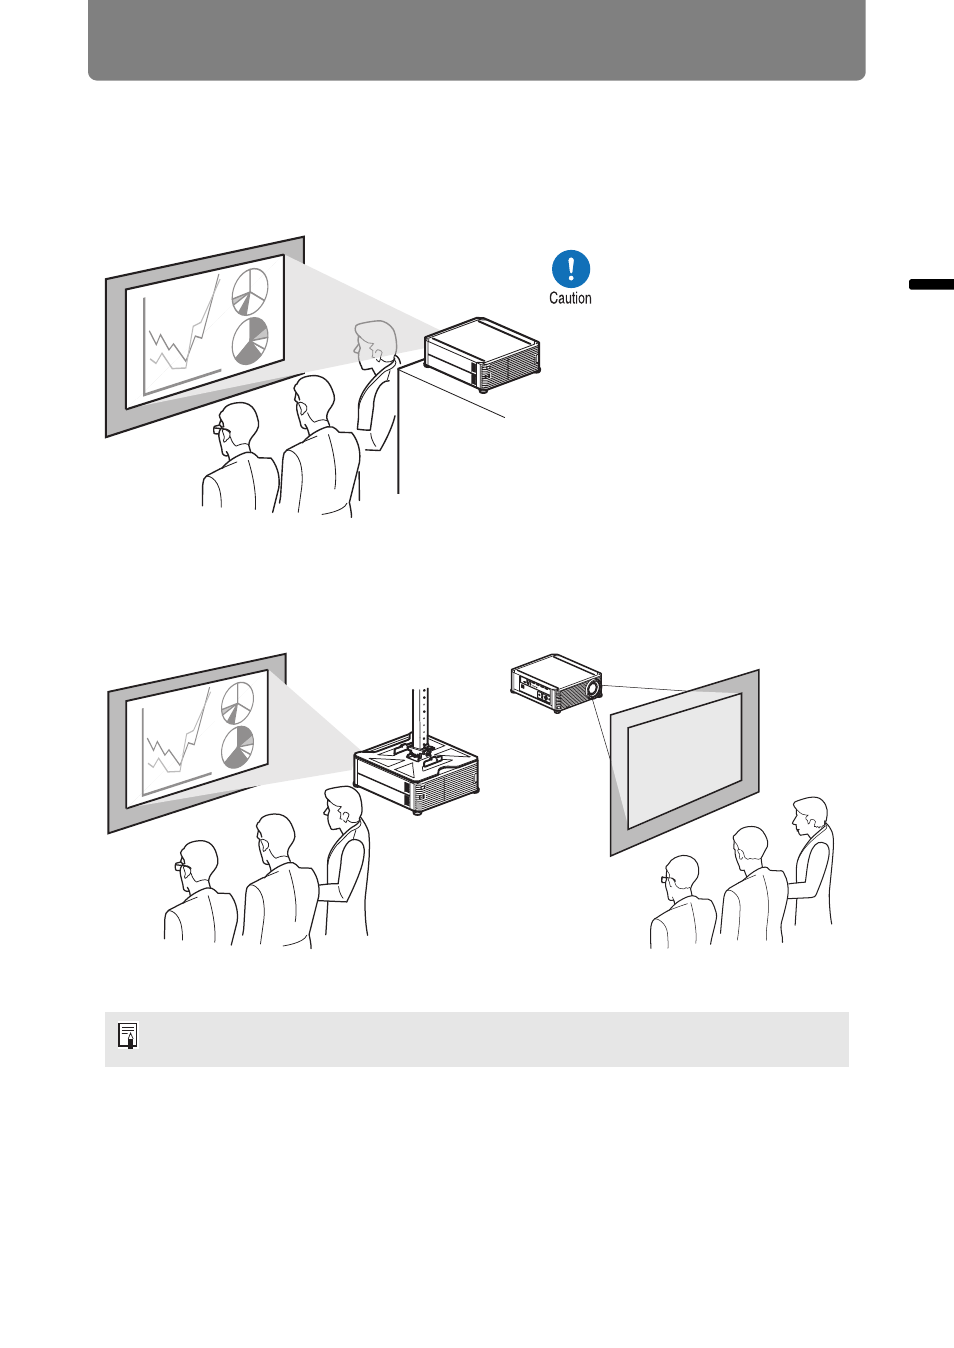
Installation on High Surfaces
Using the lens shift function (
), you can project images toward a lower level.
When setting the projector on a high surface for projection, make sure the surface
is flat and stable, and install the projector right-side up with the adjustable feet
facing down.
■
Ceiling Mounting or Rear Projection
You can mount the projector on the ceiling (ceiling mounting) or place it behind the
screen (rear projection) if you use a translucent screen.
When mounting the projector on the ceiling, it is more convenient to install the projector
right-side up, with the adjustable feet facing down.
The projector may fall and
cause accidents or injury.
Ceiling mounting
Rear projection
- LV-5110 (2 pages)
- LV-5200 (2 pages)
- LV-7105 (2 pages)
- LV-7215 (56 pages)
- RE-455X (6 pages)
- LV-7245 (71 pages)
- LV-8310 (12 pages)
- LV-7340 (6 pages)
- LV-7345 (44 pages)
- LV-7350 (2 pages)
- LV-7545 (44 pages)
- LV-7575 (63 pages)
- LV-7585 (81 pages)
- LV-8320 (26 pages)
- LV-8320 (62 pages)
- LV-8320 (81 pages)
- LV-S1 (44 pages)
- LV-X1 (44 pages)
- LV-X2 (44 pages)
- LV-X4 (64 pages)
- REALiS SX6000 Pro AV (240 pages)
- SX 50 (244 pages)
- X700 (146 pages)
- HDMI SX80 (154 pages)
- LV-7325U (48 pages)
- REALiS WUX4000 D (12 pages)
- REALiS SX60 (146 pages)
- DC-5384 (40 pages)
- REALiS WUX4000 (13 pages)
- REALiS WUX10 (2 pages)
- Multimedia Projector LV-8215 (2 pages)
- LV 5100 (40 pages)
- REALiS SX6 (190 pages)
- RE-350 (23 pages)
- REALIS SX80 MARK II (168 pages)
- REALIS WUX10 MARK II D (25 pages)
- T2000 (65 pages)
- X600 (133 pages)
- LV-7320U (40 pages)
- LV-7355 LV-7350 (48 pages)
- REALIS WUX10 MARK II D (146 pages)
- Projectors (12 pages)
- REALiS SX7 (141 pages)
- REALiS SX7 Mark II D (1 page)
- compact XGA projector LV-7385 (2 pages)