Installation (cont.), 14 vent hood – Fire Magic 36-VH Vent Hood User Manual
Page 14
REV 2 - 1502191555
L-C2-387
14
VENT HOOD
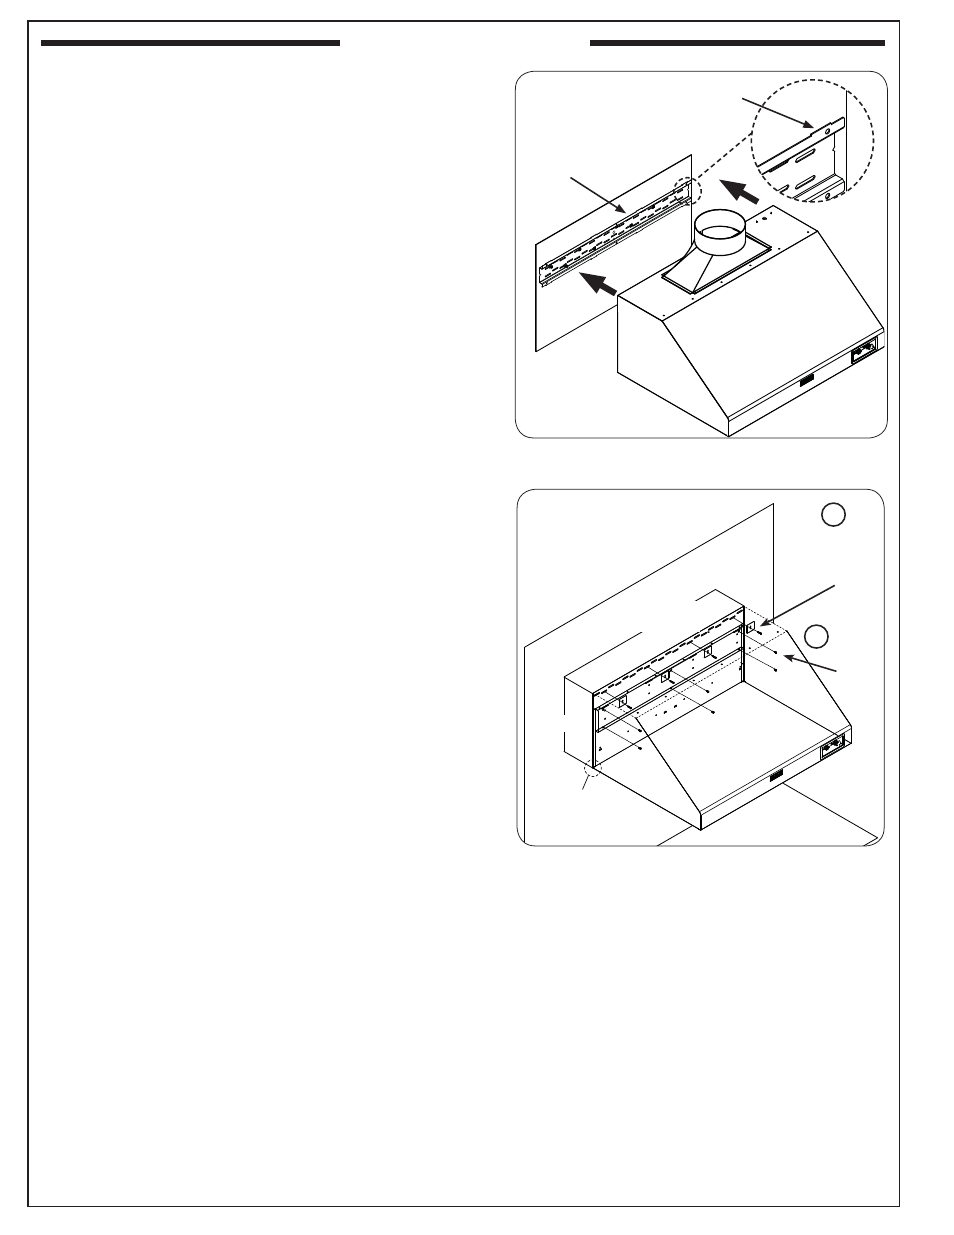
1. Rest the vent hood onto the wall mount bracket, being
sure that the tabs on the bracket engage the slots on
the rear of the hood for proper support. See Fig. 14-1.
2. Ensure the sides, top, and bottom of the vent hood sit
fl ush with the spacer (see Fig. 14-2). (The spacer will
already be fi nished with any applicable substrate, to
allow for the vent hood to rest fl ush.)
3. From the inside of the vent hood; fasten the hood to
the bracket using a medium Phillips screwdriver and
the 1/4-20 screws supplied with the vent hood (that
were originally removed at beginning of installation).
See Fig.14-2, Detail A.
4. From the inside of the vent hood, using appropriate
mounting hardware for the spacer construction; secure
the top portion of the hood directly into the spacer. Use
the supplied support plates when fastening, see Fig.
14-2, Detail B.
Fire Magic spacers include these screws (#10 x 3/4").
INSTALLATION (cont.)
Fig. 14-2 Secure vent hood (42" shown)
Hood
REAR
WALL
Countertop
(grill not shown
for clarity)
Spacer
(Flush)
A
Install
supplied
screws
through
hood
into wall
bracket
Fasten hood
directly into
spacer (support
plates supplied)
B
(transition not
shown for clarity)
Fig. 14-1 Rest vent hood in place
Tabs must
engage slots on
rear of hood
Hood
Spacer
Wall mount
bracket