Fire Magic Gourmet Stainless Steel Charcoal Barbecue User Manual
Page 2
2
REV 4-1405300800
L-C2-153
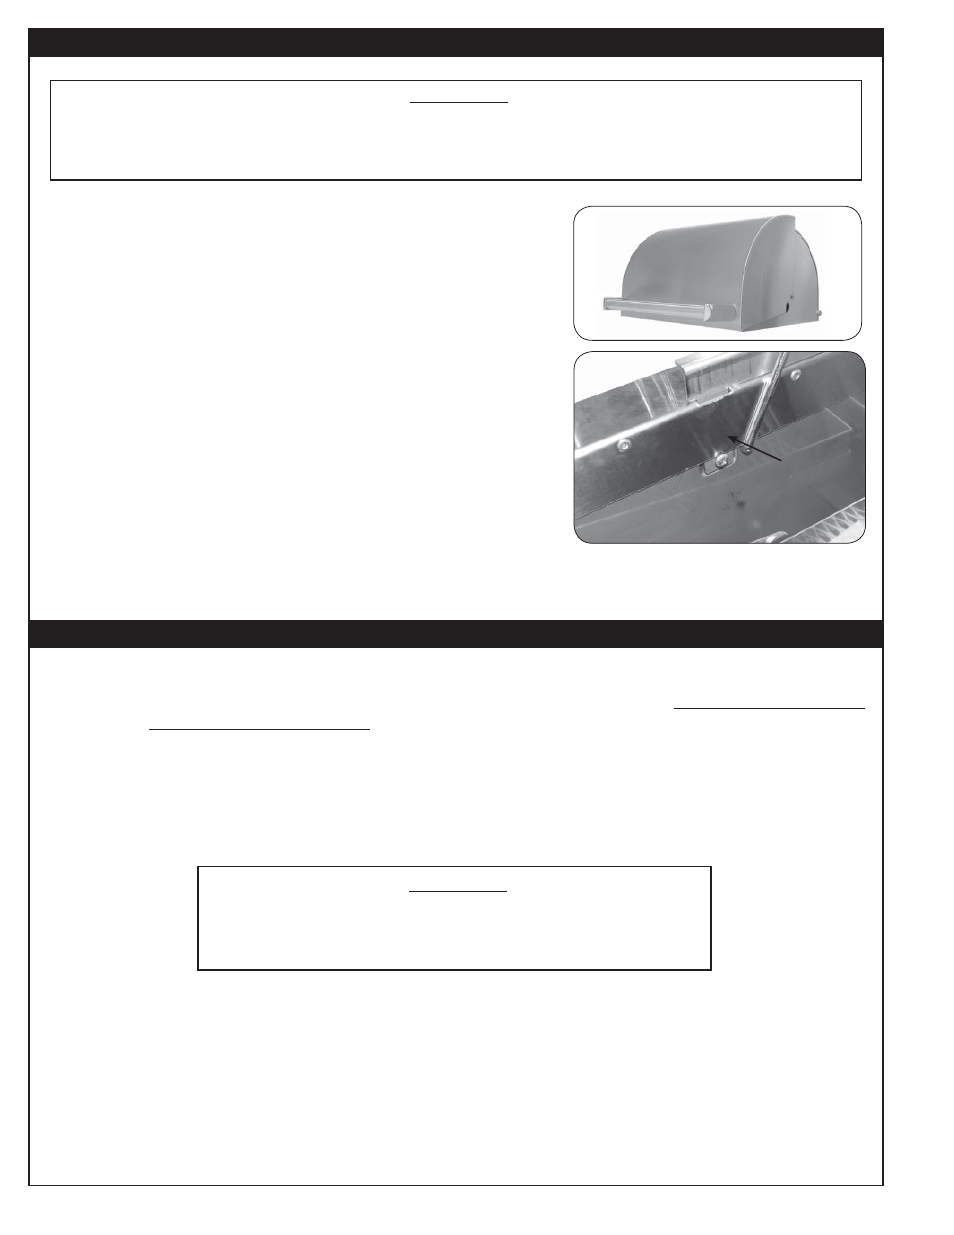
CHARCOAL GRILL OVEN (optional)
If you purchased an oven with your charcoal grill it will come pre-assembled
from the factory.
The oven (with the rounded top Fig. 2-1) is easy to remove and replace.
Simply remove the cooking grids and lift the oven off of the grill, then replace
the cooking grids. To reinstall reverse the above process.
The smoker model oven has an angled lid and adjustable air vents to aid in
controlling the rate at which the charcoal burns. The oven may be lifted off
after removing the left and right retaining screws (Fig. 2-2) on the inside of
the oven.
Clean all surfaces with Fire Magic
®
foaming grill cleaner.
For stainless steel restoration and fi nish maintenance, see the instructions
enclosed with Fire Magic
®
products for stainless steel.
Ashes and dripping are removed by sliding the drip tray out from
beneath the grill. You must keep the drip tray heat shield in position for
proper operation.
Fig. 2-1
WARNING
Improper installation, adjustment, alteration, service, or maintenance can cause injury or property
damage. Refer to this manual. For assistance or additional information, consult a qualifi ed professional
installer or service agency.
INSTALLATION
USING THE GOURMET STAINLESS STEEL CHARCOAL GRILL
EXHAUST REMOVAL
If installed under a patio roof, the grill area should be fully covered by a non-combustible chimney and exhaust
hood. An exhaust fan with a rating of 1,000 CFM or more is necessary to effi ciently remove smoke and other
cooking by-products from the covered area.
THIS UNIT SHOULD NOT BE LOCATED IN A FULLY ENCLOSED AREA OF ANY KIND.
WARNING
All surfaces of the charcoal unit become HOT during use. Exercise
caution when using this unit, especially when adding charcoal or
cranking the charcoal pan up or down.
1.
Remove the cooking grids and pile your charcoal on the charcoal pan. Avoid spillage.
WARNING: When adding charcoal, spread it across the charcoal pan evenly and DO NOT exceed a height
of 1" above the charcoal pan.
Excessive amounts of charcoal may cause over heating and damage to your grill.
2.
Follow the instructions supplied with your charcoal/fuel for lighting.
3.
Turning the crank handle raises or lowers the charcoal pan to increase or decrease the grilling heat as you
desire.
4.
Lower the charcoal pan and open the access door to add or spread out your coals while cooking.
Retaining screw
Fig. 2-2