SIG SAUER G-LAD Green Laser User Manual
G-lad tactical green laser, G-lad tactical green laser contents, Features
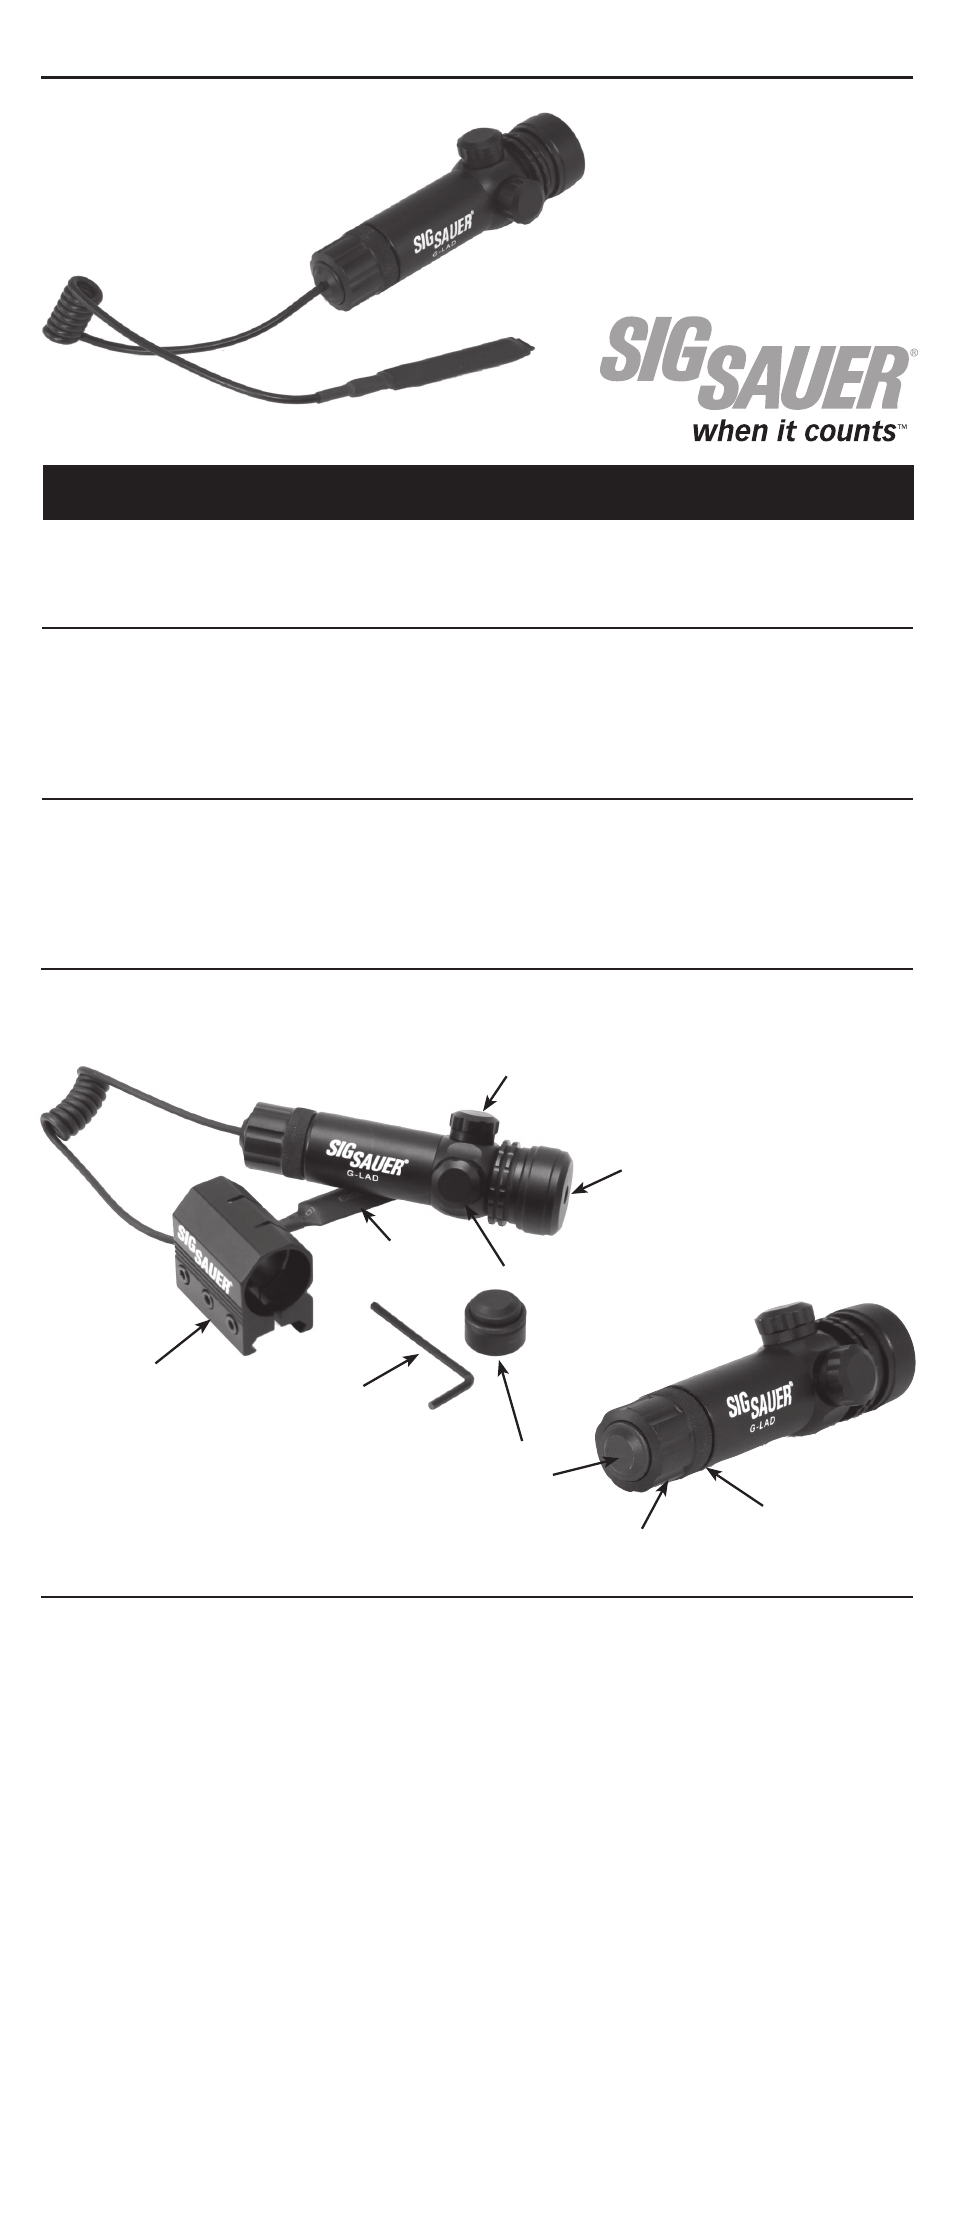
1. G-LAD Tactical Green Laser 2. Remote momentary on/off pressure switch
3. M1913 accessory rail mount 4. 3V CR123A Lithium Battery 5. Allen key
G-LAD TACTICAL GREEN LASER
G-LAD TACTICAL GREEN LASER
CONTENTS
OWNER’S MANUAL
The rugged answer to accurate moving or stationery target acquisition, day or night, the G-LAD Tactical
Green Laser produces a visible green laser beam visible 60 yards during true daylight, and 1 mile at
night. 20 times brighter than red laser lights, this easily mounted laser produces a target dot smaller
than 2” at 100 yards. An anodized aircraft aluminum housing delivers unfailing performance under any
weather conditions.
FEATURES
• 532nm green laser beam at 1 mile nighttime range
• 20 times brighter than red laser sights. visible in broad daylight
• Constant on/off switch and remote momentary on/off pressure switch
• Durable aluminum housing with hard anodized fi nish
• Powered by one CR123A battery that provides 4 hours continuous use
INSTRUCTIONS
Install battery:
• Unscrew cover at rear of sight.
• Insert battery + facing upwards.
• Tightly screw on cover
Mounting on fi rearm:
• Mount attaches to standard M1913 accessory
rail with standard Philips screwdriver. Make
sure the mount is securely attached to rail
before inserting laser through ring for use.
Getting started:
For constant on/off use:
• Unscrew back cover (battery compartment),
and remove the remote momentary on/
off pressure switch by pushing through the
threaded cover.
• Install the constant switch/back through
threaded cover, then screw entire rear cover
assembly back on, with battery in place.
• Green laser stays on with one push of rear
button, and shuts off with second push.
For momentary on/off use:
• Replace the constant on/off switch piece with
the remote corded pressure switch, making
sure corded wire extends out of the threaded
rear cover piece. Screw entire assembly back
on, holding battery in place.
• Squeeze remote switch pad at end of cord and
hold for laser to switch on and hold for as long
as you would like laser on. Releasing the pad
turns off the laser.
Adjusting windage and elevation:
• Adjust windage and elevation by removing the
turret covers and using a coin to align the main
laser spot to overlap with the scattered points. 1
click = 1.3 inch (33m) @ 50 yds. Once adjusted,
replace covers and tighten by hand.
IMPORTANT
• If the laser light is to be stored for a long period
of time (2 months or more) please remove
batteries from the laser tube to prevent
corrosion.
Back cover
M1913 Accessory
Rail Mount
Windage
Adjustment Turret
Green Laser
3V CR123A
Lithium Battery
Elevation Adjustment
Turret
Remote Momentary
on/off Pressure
Switch
Constant
on/off
Pressure
Switch
Allen key