Setting up seashell housing, Waterproof test for seashell – SeaShell SS-i5 User Manual User Manual
Page 5
- 4 -
SS-i
SS-i5
iPhone 3G / 3GS
4
2
4
2
2
2
2
2
4
2
2
iPhone 4 / 4S
4
4
4
4
4
Pre-installed 2mm and 4mm spacers
f. Do not attempt to make any alteration to the Seashell housing as it may
affect its waterproof performance.
g. Do not apply excessive force to the Seashell housing, or to the controls, as this
may cause damage.
h. Backup the data in your iPhone before use to avoid any potential loss of
data.
In case a large temperature difference, condensation may occur in the seashell
housing, place a small bag of dry bead into the housing if necessary.
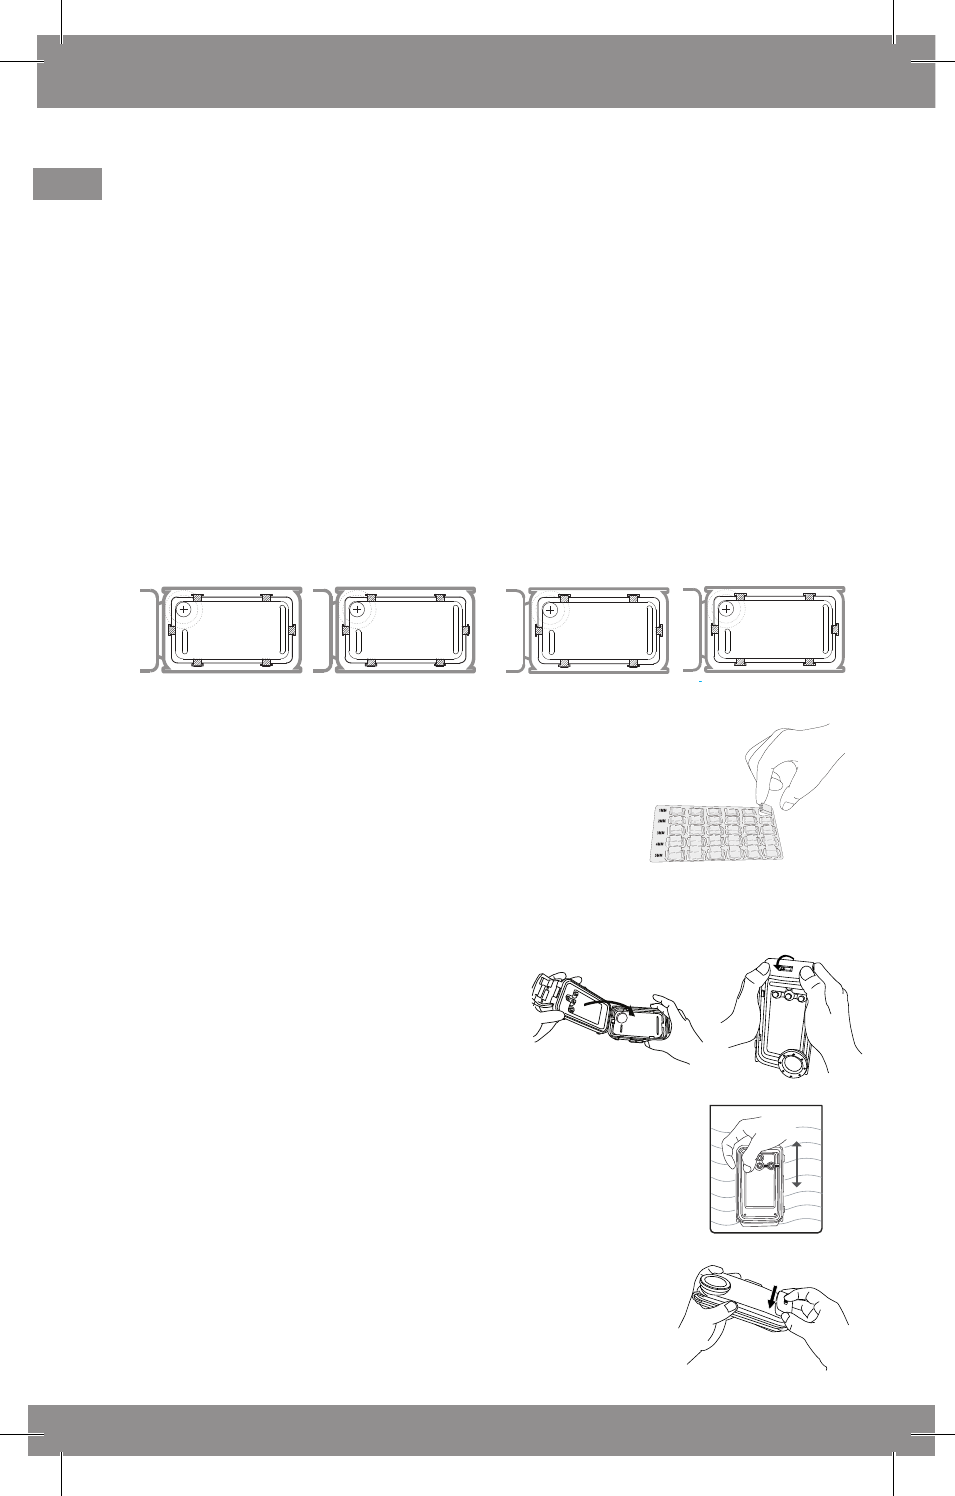
2.2. Setting up Seashell housing
a. Seashell housing SS-i is preset for iPhone 3G, 3Gs, 4 and 4S, while
Seashell SS-i5 is preset for iPhone 5 and iPhone 5S.
b. For iPhone 5C, replace the pre-configured 4mm side spacer next to the
closing hinge of the housing with a 3m side spacer. Replace the pre-
configured 2mm front cushions with the 1mm cushions.
c. The side spacers can easily be taken off by hand
without any tool.
d. Do not use the side spacers which hold the iPhone
too tight as they may damage the phone. If too tight,
replace them with smaller spacers.
e. SS-i: Front spacers and side spacers may also be
used for customizing Seashell housing to other
compatible iPhone models.
2.3. Waterproof test for Seashell
a. Close the Seashell housing without an
iPhone inside and lock securely.
b. Submerse the Seashell housing into water to a minimum
depth of 10 inches (200mm) for at least 5 minutes.
c. Remove the housing from the water. Check if there
is any water inside the housing. If not, the housing is
leak proof.
d. Dry the Seashell housing with cloth or paper towel
completely.
e. Open the Seashell housing by lifting the sliding knob
at the lock.
f. Use tissue paper to adsorb, but mot to wipe the
residue water at the edge of the housing
4
4
4
4
4
4
2
2
iPhone 5/5S
4
4
4
4
4
3
1
1
iPhone 5C
20cm