AquaCraft Paradise User Manual
Page 7
❏
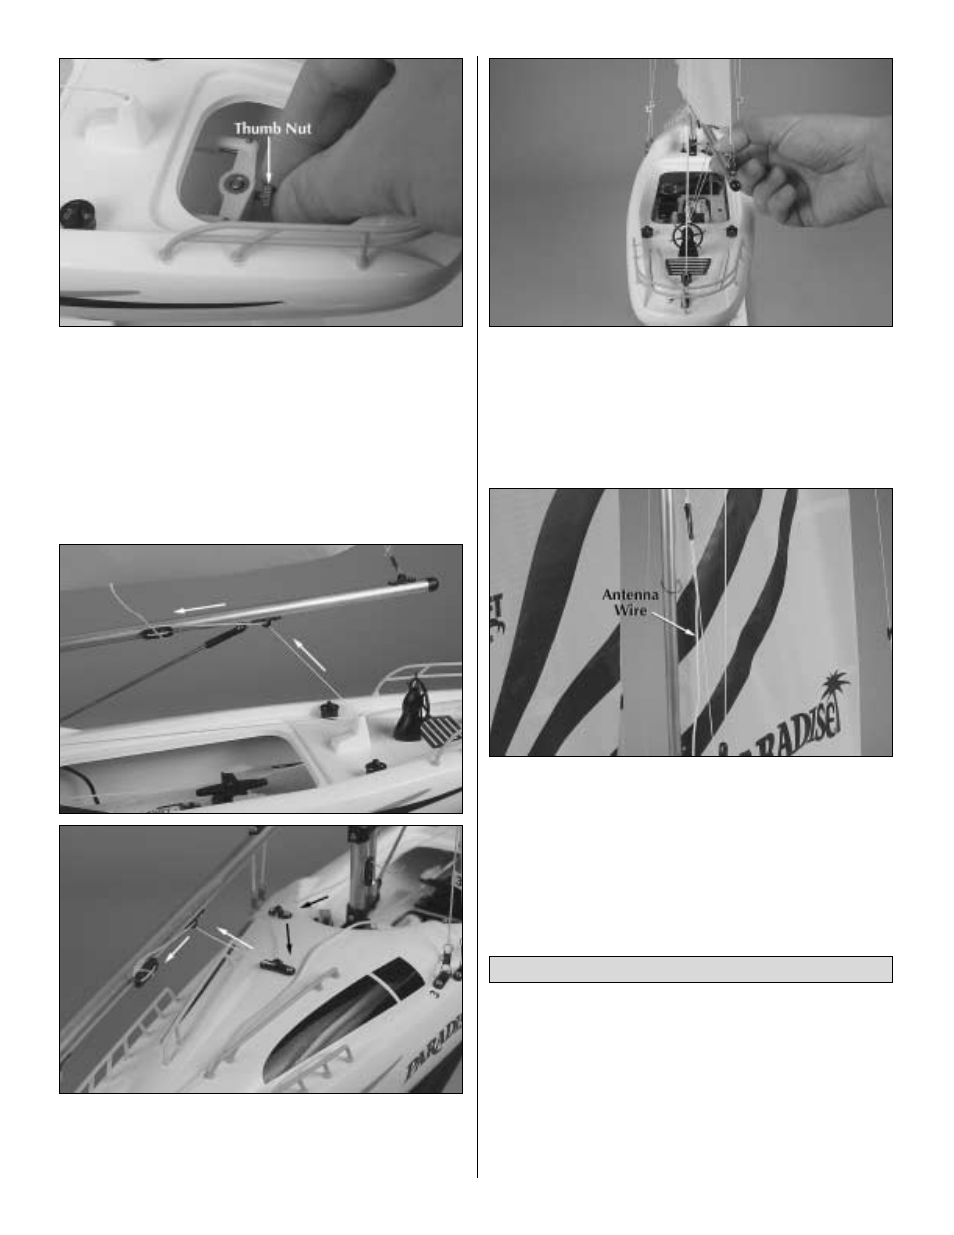
5. Tighten the thumb screw on the rudder control arm
firmly making sure that it contacts the flat spot on the rudder
shaft. Replace the rear hatch.
❏
6. Standing behind the boat with the radio system turned
“ON”, move the rudder control stick (right stick) to the right. This
should cause the back of the rudder to move to the right.
Moving the rudder control stick to the left should cause the back
of the rudder to move to the left. If this is not the case, simply
move the rudder servo reverse switch to the other position.
❏
7. Thread the jib and mainsail control lines through the
eyelets as shown. Attach the end of the jib control line to the
jib boom cleat by coiling the line around the cleat several times
and tucking the end of the line through the coils as shown.
NOTE: Since it is necessary to adjust the sail control lines
depending on wind conditions, they should not be
permanently attached. A good starting point is to pull the left
stick of the transmitter all the way down and attach the lines
so that the booms have about 2" of play as shown. When the
sail control stick (left stick) is moved up, you should be able
to open the sails.
❏
8. Run the antenna up one of the mast guidelines and
secure it with a small piece of electrical tape as shown.
❏
9. Replace the forward hatch and twist the hatch lock knob
to secure it.
❏
10. Turn the power “OFF” to your boat and then your
transmitter (in that order).
SAILING 101
Unlike propeller driven boats that you basically point and
accelerate, sailboats present an interesting challenge. Sailing
requires constant reaction to water movements, any wind
gusts, and any wind direction changes. These reactions then
require adjustment of the rudder and sails in order to find the
best possible course. In some cases transmitter adjustments
are sufficient but at other times it will be necessary to make
SAILING THE PARADISE SAILBOAT
7