Acronis® true image wd edition, Install the hard drive, Acronis – Western Digital WD VelociRaptor User Manual User Manual
Page 4: True image wd edition
-2-
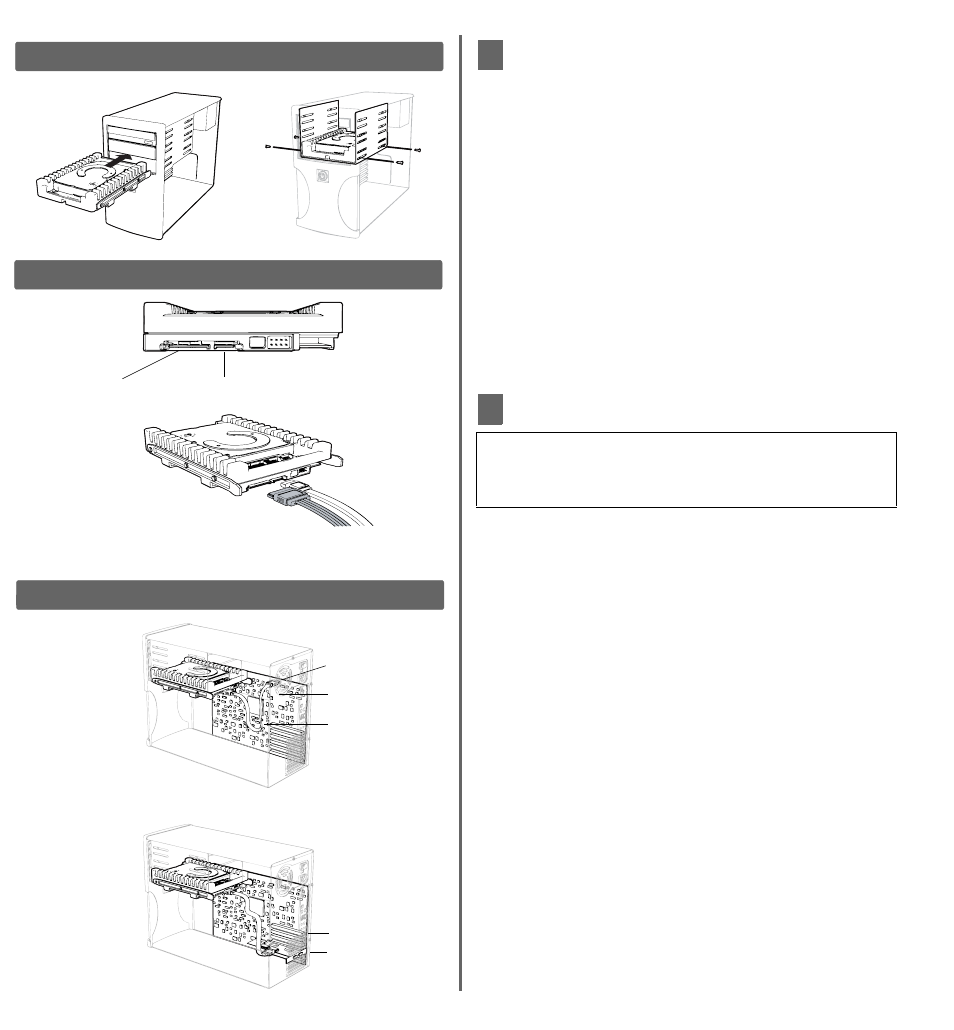
Install the Hard Drive
1. Slide the hard drive into an available 3.5-inch drive bay and
secure the drive with the four mounting screws (two on each
side). For proper grounding, install the screws in the hole
positions (Figure 1).
2. Attach one end of the SATA cable to the SATA interface on the
WD drive (Figure 2). SATA connectors are keyed to ensure
proper insertion.
3. Connect the SATA power cable to the SATA interface on the
drive (Figure 2).
4. Connect the SATA cable to the SATA connector on the
motherboard or the SATA controller card (Figure 3).
Note: If using a SATA controller card, be sure to follow the
instructions that came with the card to install the SATA host
drivers.
5. Verify all cable connections. Replace and secure the system
cover. Reconnect the power cord and power on the computer.
6. Follow the instructions below for your Windows operating
system.
Acronis
®
True Image WD Edition
Acronis True Image WD Edition is a software that assists you with
your hard drive installation and management. Its features include
cloning, drive migration, drive deployment, image backup, and
recovery. In addition, Acronis True Image WD Edition allows you to
create bootable recovery media and full drive image backups that
can be used to recover your entire system or to simply restore a file
or folder. For further information, download the software and its
corresponding user manual at http://support.wdc.com/retailkit.
Important: You can obtain the latest version of Acronis True
Image WD Edition from our website (requires a WD drive serial
number). To install your drive(s) without using this software, follow
the “Alternate Instructions for Installing a Drive” on page 3.
Figure 1
Figure 2
SATA device plug
power connector
SATA device plug
interface connector
SATA power
receptacle
connector
SATA receptacle
interface connector
Figure 3
SATA cable connection
Motherboard
Expansion slot
SATA controller card
SATA Motherboard
Configuration
SATA Controller
Card Configuration
SATA cable
or
2
3