Setting up your pc to work with audacity – Audio-Technica AT-LP2D-USB User Manual
Page 20
20
Setting up your PC to work with Audacity
(See Setting up your PC to work with AT-LP2D-USB Turntable on page 6.)
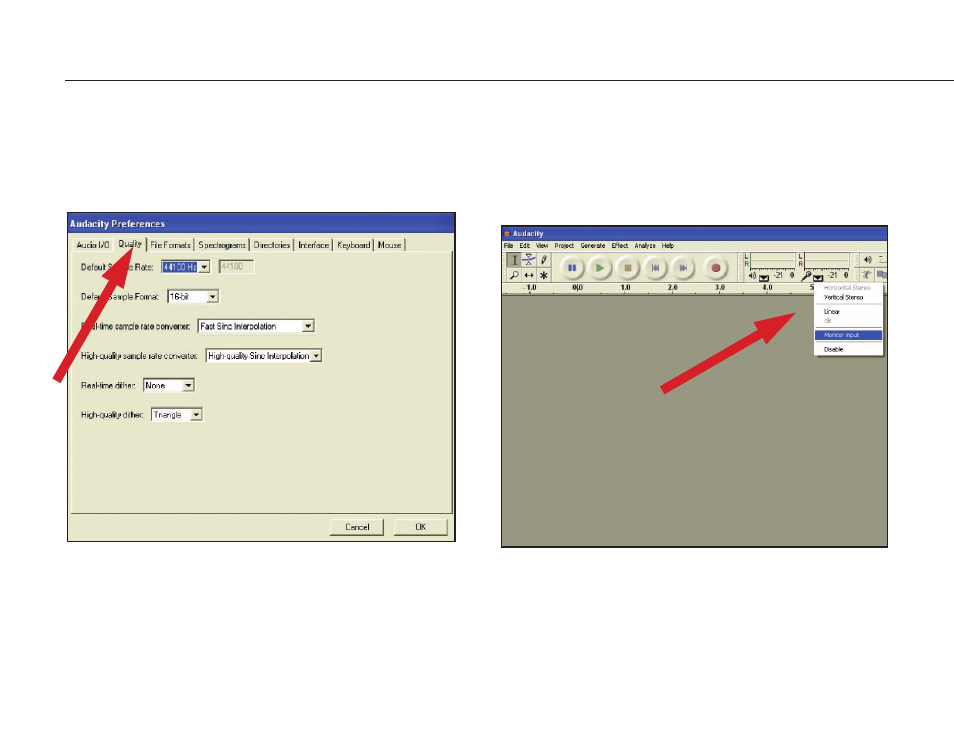
4. Next, select
Quality
tab at the top.
• Default Sample Rate:
44100 Hz
.
• Default Sample Format:
16-bit
.
• Real-time sample rate converter:
Fast Sinc Interpolation
.
• High-quality sample rate converter:
High-quality Sinc Interpolation
.
• Real-time dither:
None
.
• High-quality dither:
Triangle
.
• Select
OK
to save settings and exit Preferences menu.
5. Next, from the main Audacity window, select the drop-down box (arrow
pointing down) next to the microphone near the middle of your screen.
• If you don't see the drop-down box or the microphone pictured above, return
to Preferences Menu (see step 2, page 19). Select the Interface tab.
Check
Enable Meter Toolbar
. This will allow you to see the microphone with the
drop-down box on your main screen.
• Select
Monitor Input
from the drop-down menu.
NOTE:
You will need to
select this setting every time you launch Audacity. The other settings selected
above will be saved when you exit the program.