Old hdd new hdd, Hdd disassembly) steps 8-13 – Sony VGN-NW150J User Manual
Page 2
VGN-NW Series Hard Disk Drive
Replacement Instructions
P/N 989200137
Rev. B
2/3
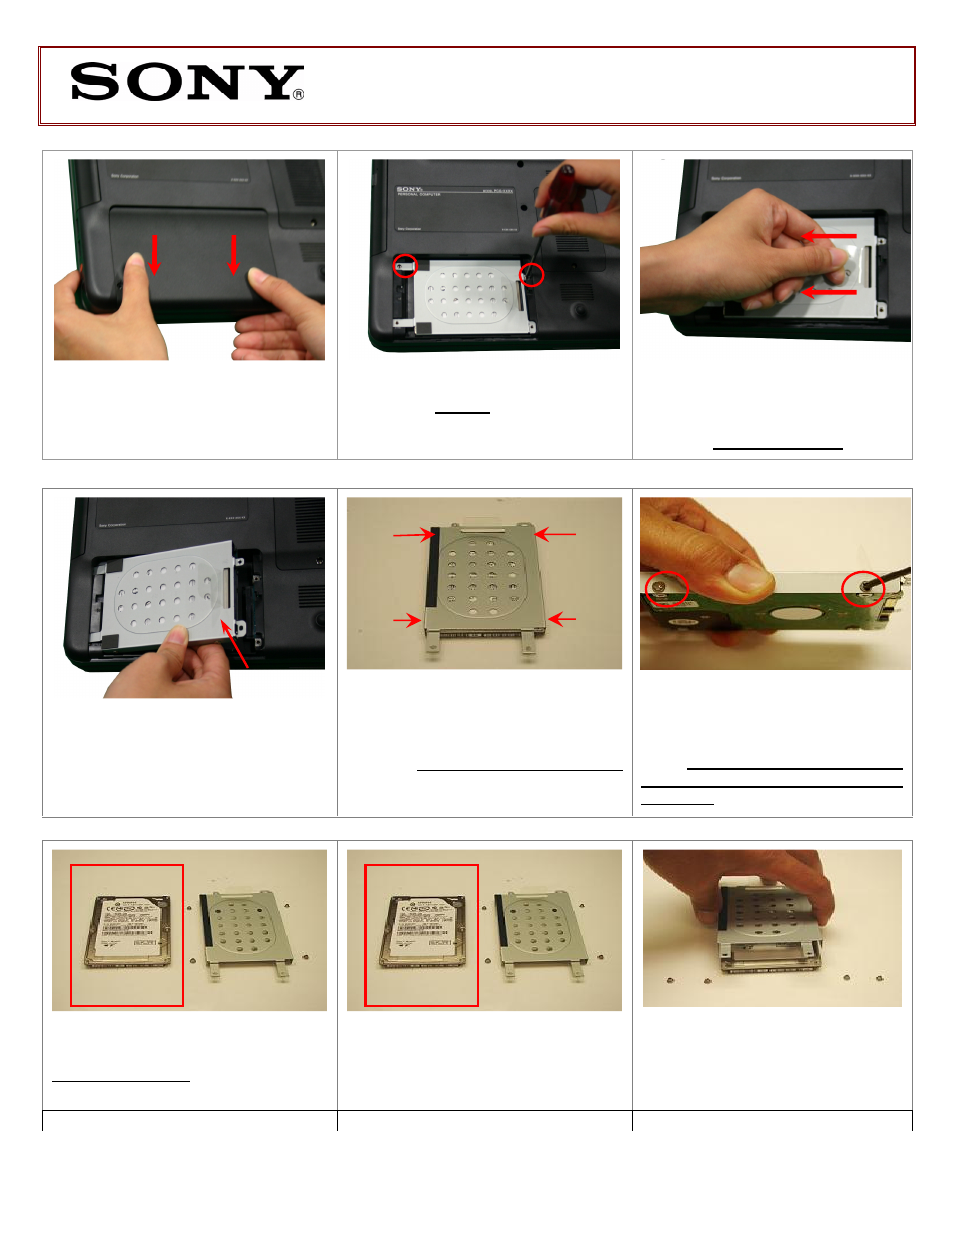
Step 4. To remove the HDD access
cover, slide the cover in a downward
direction and lift the cover.
Step 5. Using the enclosed magnetic
screwdriver, remove the two (2) screws
securing the HDD assembly.
Step 6. Detach the HDD assembly
from the HDD connector by pulling
the clear plastic tab in the direction of
the arrows (slide to the left).
Step 7. Carefully lift the HDD assembly
from the unit to completely remove the
old part.
Step 8. After the HDD is completely
removed, identify the (4) side screws
that mount the HDD bracket to the
HDD.
Step 9. Holding the edge of the HDD,
remove each screw and set the screw
aside. These screws will be used to
mount the HDD bracket onto the
new HDD.
Step 12. Place the HDD bracket over
the new HDD.
Step 10. All (4) screws and bracket
should now be removed from old HDD.
Set old HDD aside.
Step 11. Prepare the new HDD
provided for assembly.
(HDD Disassembly) Steps 8-13
Lift To Remove
OLD HDD
NEW HDD
- VGN-NW305F VGN-NW160J VGN-NW130J VGN-NW330F VGN-NW360F VGN-NW242F VGN-NW235F VGN-NW238F VGN-NW230G VGN-NW100J VGN-NW140J VGN-NW180J VGN-NW105J VGN-NW228F VGN-NW250F VGN-NW345G VGN-NW120J VGN-NW220F VGN-NW115J VGN-NW275F VGN-NW320F VGN-NW240F VGN-NW380F VGN-NW100 VGN-NW226F VGN-NW265F VGN-NW370F VGN-NW270F VGN-NW280F VGN-NW135J VGN-NW225F VGN-NW310F VGN-NW350F VGN-NW125J