Tri-daddy, Instructions, Step 1 step 3 step 2 – Izzo Golf tri-daddy-hitting-net User Manual
Page 2: Set up instructions, Key: includes
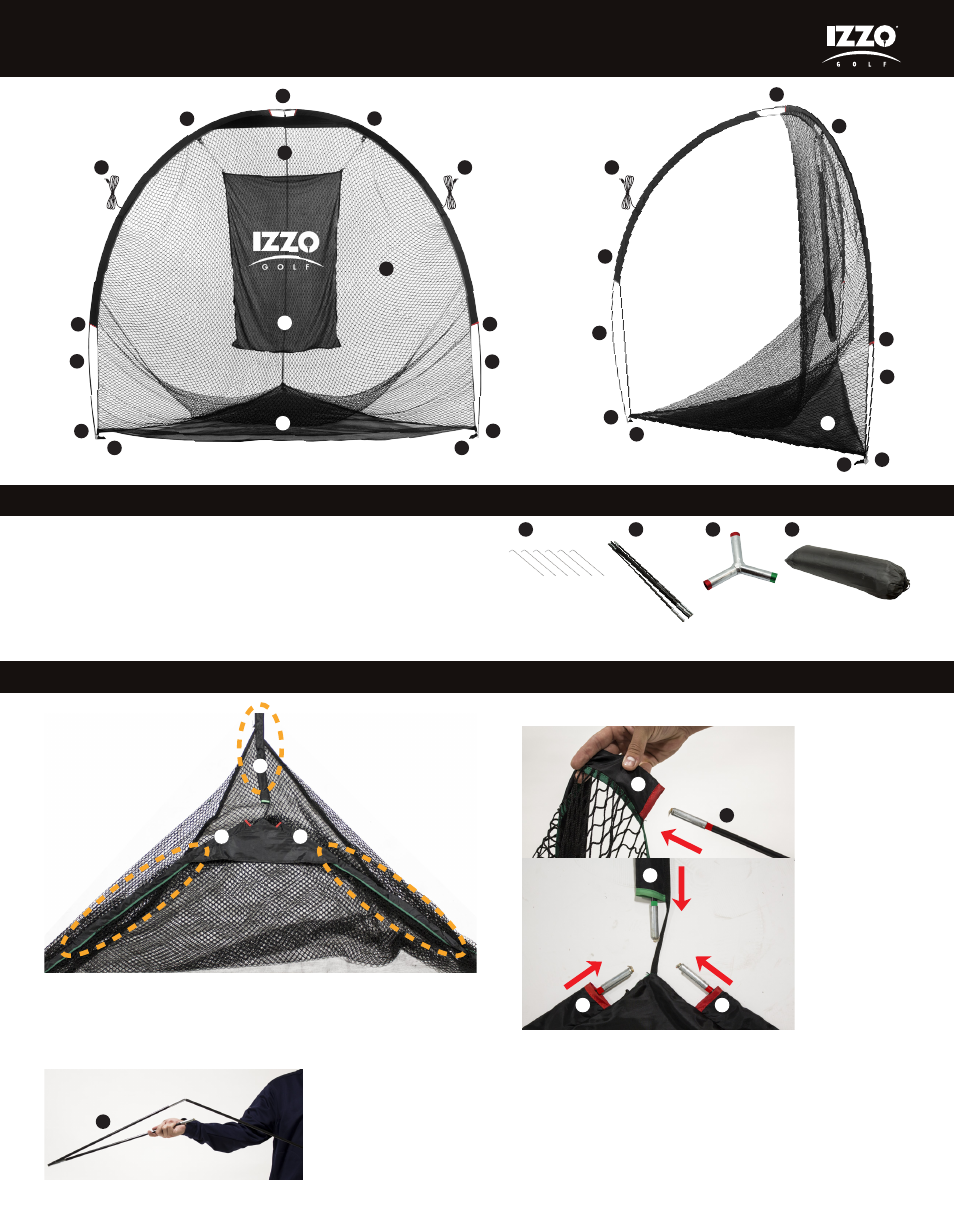
TRI-DADDY
™
INSTRUCTIONS
Unroll hitting net and lay flat on floor. Make sure
Sleeves (C)(G)
are on top of net. Align sleeves to form a triangle shape as
shown above in the orange circles.
Assemble all three
Frame
Poles ( I ) by interlocking
shock-corded poles.
A. Hitting Target
B. Mesh Base
C. Front Pole Sleeves (2)
D. Target Grommets (2)
E. Anchor Stake Loops (3)
F. Anchor Stake Draw Strings (3)
G. Spine Pole Sleeve
A
B
C
D
E
F
L
H
I
I
J
K
C
D
E
F
F
H
I
I
I
B
G
E
E
H
H
C
D
M
L
M
I
H. Corner Pins (3)
I. Frame Poles (3)
J. Hitting Net
K. Stakes (6)
L. Pole Connector
M. Carry Case
KEY:
INCLUDES:
C
C
G
I
step 1
step 3
step 2
SET UP INSTRUCTIONS
I
C
C
C
G
Image 1
Image 2
Center of Net
Slide one
Frame Pole ( I ), RED end first, through each of
the opposite ends of the RED marked
Pole Sleeves (C),
toward the center of the triangle shape formed in Step 1
(Image 1). You should be able to see both ends of the pole
now. Repeat step for 2nd RED labeled
Frame Pole ( I ).
Now insert the GREEN labeled
Frame Pole ( I ), GREEN
end first, through the GREEN marked
Spine Pole Sleeve
(G) of the hitting net. All color labeled ends of the poles
should meet in the center (Image 2).