Hinges standard lock plates dead bolt lock plates – Milescraft 1293 - InteriorDoor Kit User Manual
Page 2
© 2008 Milescraft • www.milescraft.com
2
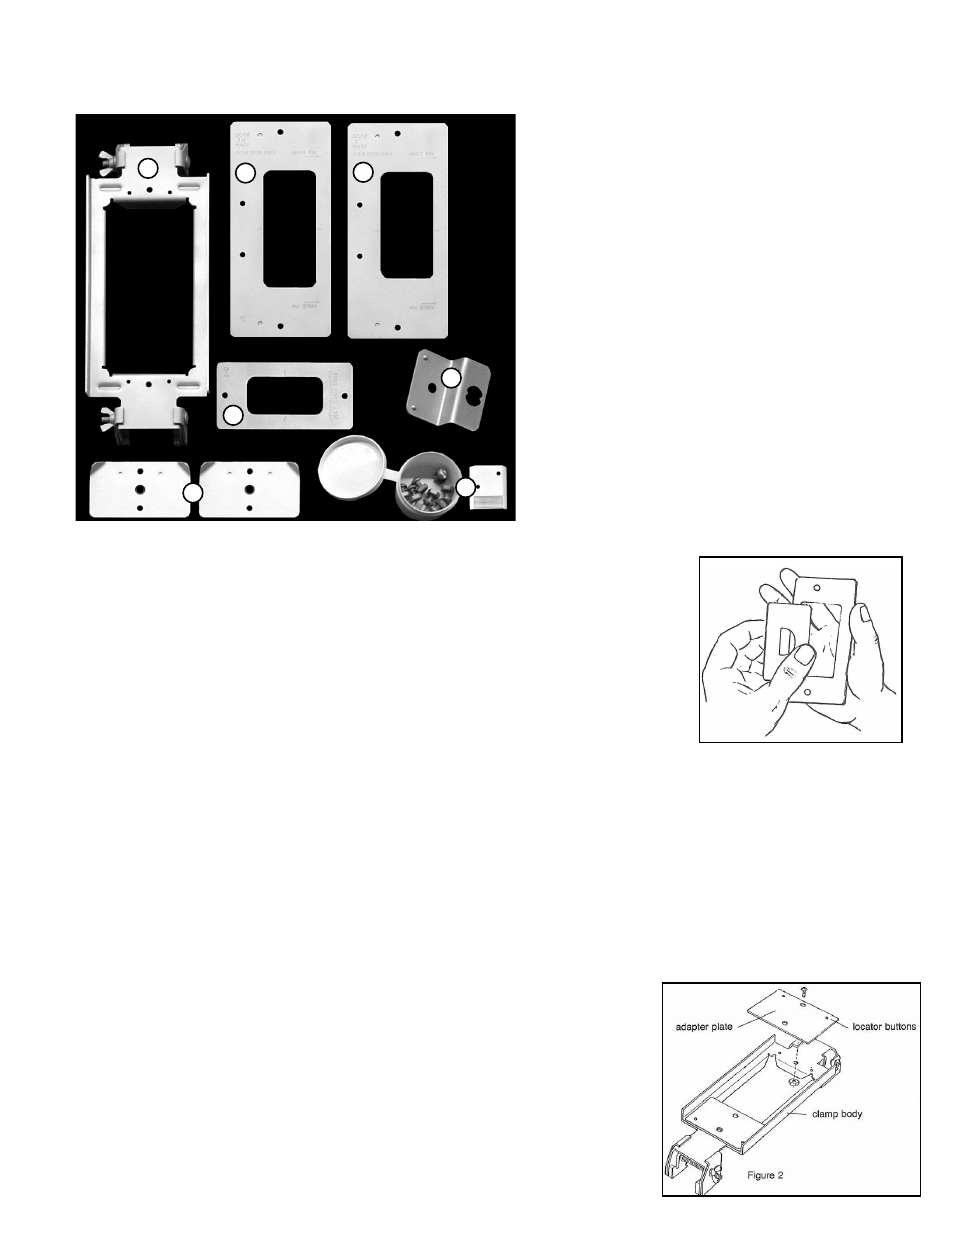
1. Door Clamp Assembly
2. Template for 3.5” Hinge
3. Template for 3” Hinge
4. Template for 1“ x 2.25” Standard Lock
& Deadbolt
5. Template Positioner
6. Adaptor Plates
7. Template Fasterners/Door Shim
1
2
4
5
6
3
7
DOOR MORTISING INSTRUCTION BOOK
Items Needed That Are Not Supplied
1. Router equipped with a 5/8 inch Diameter TurnLock or other
guide bushing and a 1/2 inch Diameter cutting bit.
2. Tape measure.
3. Sharp pencil or knife for making accurate positioning marks.
4. Corner chisel.
5. Screw driver (Blade Type and Phillips).
CAUTION: Always use protective eye goggles when
operating power or striking tools.
Door Mortising
1. Select the proper template required.
Note: Although each template is identified, it is recommended you place whatever plate or hinge for which
you are mortising into the window of the template and check for proper fit: (See Fig. 1)
A) Door Lock Plates: Look for a 1/16 inch gap on all four sides of the template window.
B) Hinges: Look for a 1/16 inch gap on top and bottom of hinge.
2. Attach the selected template onto the door holding clamp with screws and
nuts provided.
Note: For lock plate templates, you must first attach 2 adaptor plates with
screws and nuts provided (See Fig. 2). Make certain the adaptor* plate locator
buttons are positioned properly in the holding clamp holes before tightening
the screws.
Note: It is not necessary to excessively tighten the nuts with a wrench.
*Do not use adaptor plates with hinge templates.
Figure 1
Section I
Door Mortising System For:
• Hinges Standard Lock Plates
Dead Bolt Lock Plates
•
•
Figure 2