Rear panel, Default settings – XiNCOM Twin WAN XC-DPG402 User Manual
Page 10
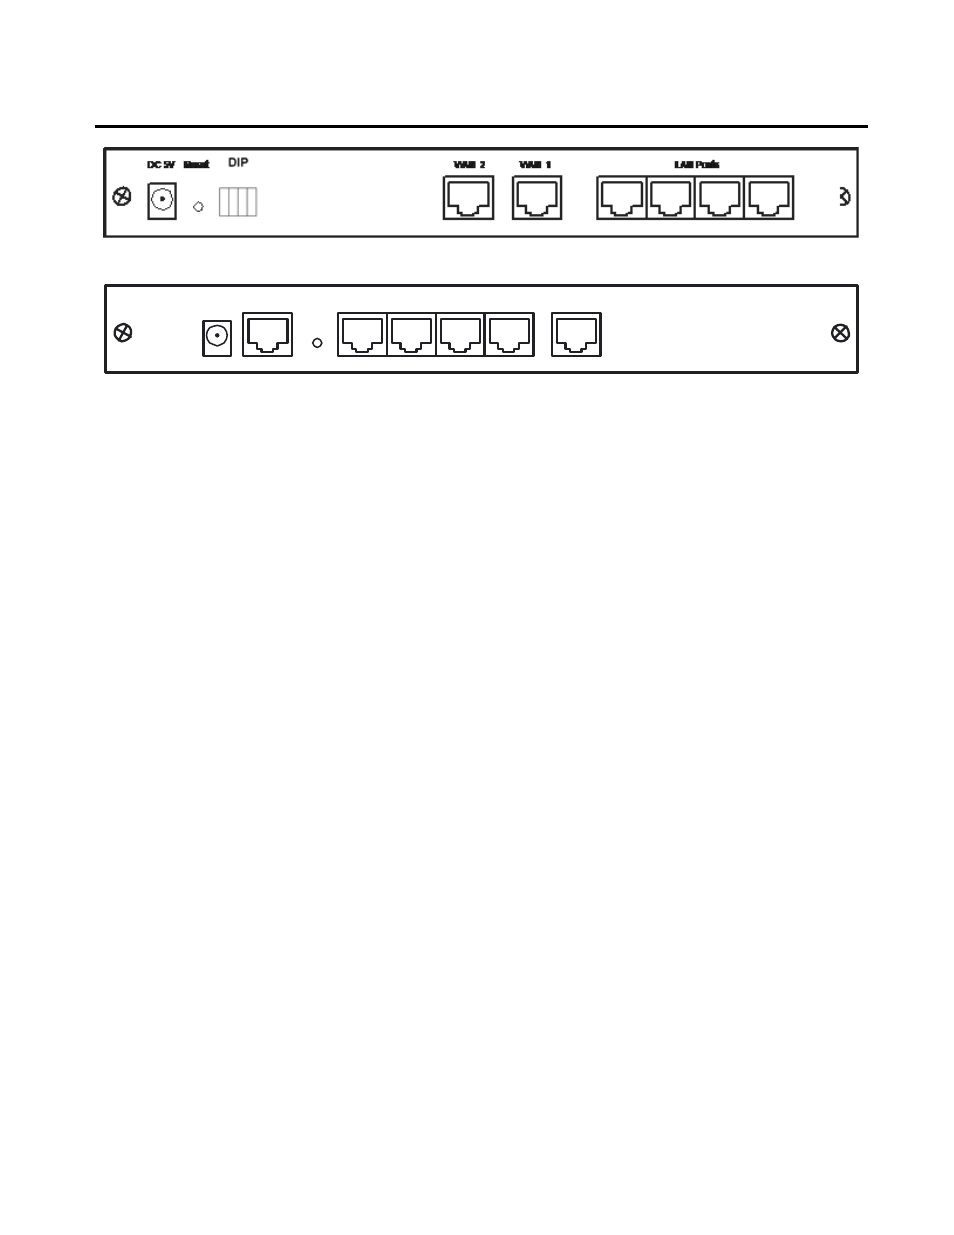
Rear Panel
Figure 1: Rear panel of XC-DPG402 shown
LAN Ports
WAN 1
WAN 2
Reset
DC 5V
Figure 2: Rear Panel of XC-DPG502 and 602 shown
WAN 1
Connect the broadband modem here. If not available contact your ISP.
WAN 2
Connect the 2
nd
Broadband Modem here, if available.
LAN Ports
Connect the PCs to these ports. Both 10BaseT and 100BaseT connections can
be used simultaneously.
Note:
Any port will automatically operate as an "Uplink" port if required. Just use a
normal LAN cable to connect to a normal port on another hub or switch.
DIP Switches
See the following DIP switch table (402 only).
Reset Button
When pressed and released, the XC-DPG Twin WAN Router will reboot
(restart) within 1 second. It resets to default configuration when it is held for
more than 5 seconds.
DC 9V 1A
Connect the supplied power adapter here (402 only).
DC 5V 1.5A
Connect the supplied power adapter here (502 and 602 only).
Default Settings
When the XC-DPG Twin WAN Router has finished booting, all configuration settings will be set to
the factory defaults, including:
• IP Address set to its default value of 192.168.1.1, with a Network Mask of 255.255.255.0
• DHCP Server is enabled (FOR 402 ONLY: Used DIP switches on the back to disable the
DHCP Server if needed, refer to page 8)
• User Name: admin
• Password is cleared (no password)
Page 8