Kawasaki 840444 User Manual
Page 8
M
MA
AIIN
NT
TE
EN
NA
AN
NC
CE
E A
AN
ND
D C
CL
LE
EA
AN
NIIN
NG
G
A
Allw
wa
ayyss rre
em
mo
ovve
e tth
he
e b
ba
atttte
erryy p
pa
acckk b
be
effo
orre
e a
atttte
em
mp
pttiin
ng
g cclle
ea
an
n--
iin
ng
g o
orr m
ma
aiin
ntte
en
na
an
ncce
e..
D
Do
o n
no
ott u
usse
e p
pa
aiin
ntt tth
hiin
nn
ne
err o
orr a
an
nyy o
otth
he
err cch
he
em
miicca
allss tto
o cclle
ea
an
n tth
he
e vva
accu
uu
um
m cca
asse
e.. Harsh
solvents may damage the plastic. Use only mild soap and water for cleaning.
H
Ho
olld
d tth
he
e ffiilltte
err b
brra
acckke
ett o
ovve
err a
a ttrra
assh
h cca
an
n tto
o kkn
no
occkk llo
oo
osse
e a
an
nyy d
de
eb
brriiss cca
au
ug
gh
htt iin
n tth
he
e
ffiilltte
err.. If the filter is really dirty, wash with warm water and mild soap.
C
Clle
ea
an
n cca
asse
e w
wiitth
h a
a d
da
am
mp
p ccllo
otth
h.. Paper towels and wire brushes may scratch the
plastic.
T
To
o p
prre
evve
en
ntt rriisskk o
off e
elle
eccttrriicc ssh
ho
occkk,, m
ma
akke
e ssu
urre
e tth
ha
att a
allll p
pa
arrttss a
arre
e cco
om
mp
plle
ette
ellyy d
drryy
b
be
effo
orre
e u
usse
e..
F
Fo
orr m
me
ecch
ha
an
niicca
all p
prro
ob
blle
em
mss,, cco
on
nssu
ulltt a
an
n a
au
utth
ho
orriizze
ed
d tte
ecch
hn
niicciia
an
n.. Do not attempt to
repair the vacuum yourself.
A
AC
CC
CE
ES
SS
SO
OR
RIIE
ES
S
U
Usse
e o
on
nllyy a
acccce
esssso
orriie
ess tth
ha
att a
arre
e rre
ecco
om
mm
me
en
nd
de
ed
d b
byy tth
he
e m
ma
an
nu
uffa
accttu
urre
err ffo
orr yyo
ou
urr m
mo
od
de
ell..
Accessories that may be suitable for one tool may become hazardous when used on
another tool.
A
Allw
wa
ayyss a
atttta
acch
h g
grro
ou
un
nd
de
ed
d ((3
3--p
prro
on
ng
g)) e
exxtte
en
nssiio
on
n cco
orrd
dss tto
o g
grro
ou
un
nd
de
ed
d ((3
3--h
ho
olle
e)) o
ou
uttlle
ettss..
IIff yyo
ou
u m
mu
usstt u
usse
e a
an
n e
exxtte
en
nssiio
on
n cco
orrd
d,, b
be
e ssu
urre
e tth
ha
att tth
he
e g
ga
au
ug
ge
e iiss lla
arrg
ge
e e
en
no
ou
ug
gh
h tto
o cca
arrrryy
tth
he
e a
am
mo
ou
un
ntt o
off ccu
urrrre
en
ntt n
ne
ecce
essssa
arryy ffo
orr yyo
ou
urr p
po
ow
we
err tto
oo
oll.. If not, your tool may experi-
ence a loss of power, excessive voltage drop or overheating. The smaller the gauge
number, the heavier the cord (see table below).
R
RE
EC
CO
OM
MM
ME
EN
ND
DE
ED
D S
SIIZ
ZE
ES
S O
OF
F E
EX
XT
TE
EN
NS
SIIO
ON
N C
CO
OR
RD
DS
S 1
12
20
0 V
VO
OL
LT
T A
AC
C 6
60
0 H
HZ
Z T
TO
OO
OL
LS
S
T
TO
OO
OL
L C
CU
UR
RR
RE
EN
NT
T R
RA
AT
TIIN
NG
G
C
CO
ON
ND
DU
UC
CT
TO
OR
R S
SIIZ
ZE
E IIN
N A
A..W
W..G
G
AMPERE
10FT.
25FT.
50FT.
100FT.
3-6
18
18
18
18
6-8
18
18
18
16
8-10
18
18
18
14
10-12
16
16
14
14
12-16
14
12
12
-
16-20
12
12
12
-
14
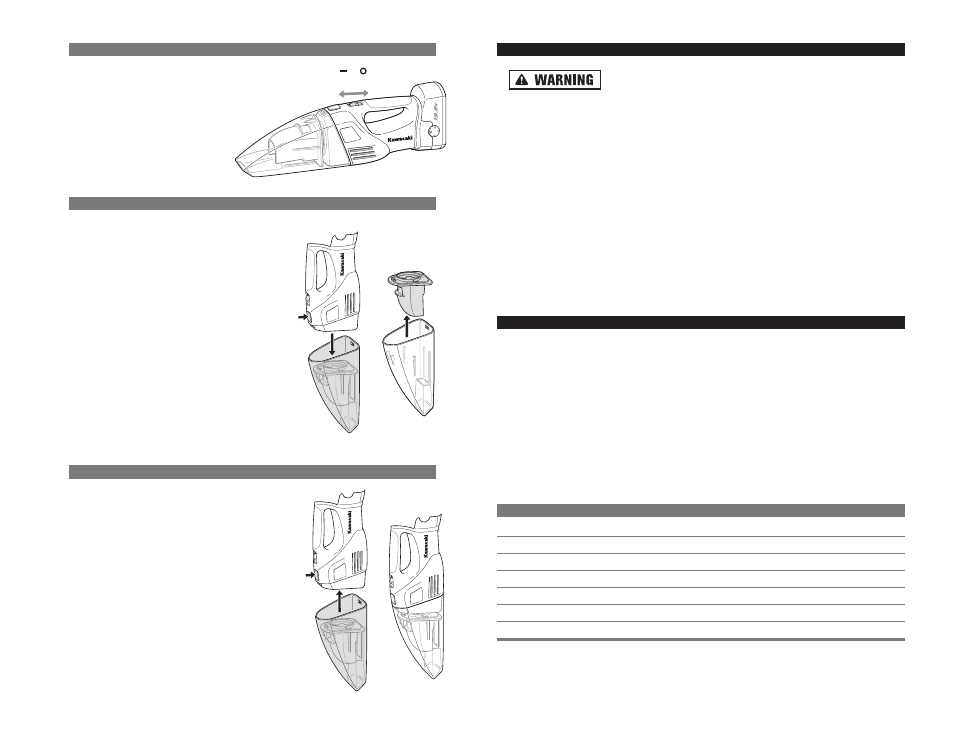
O
OP
PE
ER
RA
AT
TIIN
NG
G T
TH
HE
E O
ON
N//O
OF
FF
F S
SW
WIIT
TC
CH
H
Push the O
ON
N//O
OF
FF
F switch forward
to turn the vacuum O
ON
N.
Release the O
ON
N//O
OF
FF
F switch to turn
the vacuum O
OF
FF
F.
C
CL
LE
EA
AN
NIIN
NG
G T
TH
HE
E D
DU
US
ST
T C
CU
UP
P
T
TO
O R
RE
EM
MO
OV
VE
E T
TH
HE
E D
DU
US
ST
T C
CU
UP
P::
• Hold the vacuum vertically with the handle
pointed up to prevent dust from spilling out.
• Push on the dust cup release button and pull
the dust cup free.
• Reach inside the dust cup and remove the
filter bracket.
• Clean out the dust cup. If necessary, wash
with mild soap and water.
• Put the filter back into the top of the dust cup.
• Make sure filter and cup are both completely
dry before reattaching the dust cup.
• Empty the dust cup after each use.
R
RE
EA
AT
TT
TA
AC
CH
HIIN
NG
G T
TH
HE
E D
DU
US
ST
T C
CU
UP
P
T
TO
O A
AT
TT
TA
AC
CH
H T
TH
HE
E D
DU
US
ST
T C
CU
UP
P::
Hold down the dust cup release button while
pushing the dust cup back onto the vacuum.
Once the dust cup is properly seated, release
the button and the dust cup will lock into place.
ON OFF
13