Installing the low-voltage 3-button switch option, Preparing the connection, Making the connection – Stewart Filmscreen Corp CM-1005 User Manual
Page 9
Visionary Electriscreen: Owner’s Manual
7
Installing the low-voltage 3-button switch option
The optional Stewart Filmscreen low-voltage control allows the use of low-
voltage wire to connect to the supplied 3-position 24V momentary wall
switch.
Preparing the connection
Before making the electrical connections, you need:
An available AC constant power source
A 4-conductor switch hook-up cable (4-conductor bell wire or
category 5 cable is typically used for long runs)
Cat 5, multi-conductor unshielded, or similar type electronic cable
can be used to connect the 3-button switch to the LVC. The
recommended wire gauge is 20 to 24 AWG. Use plenum-rated
cable when required.
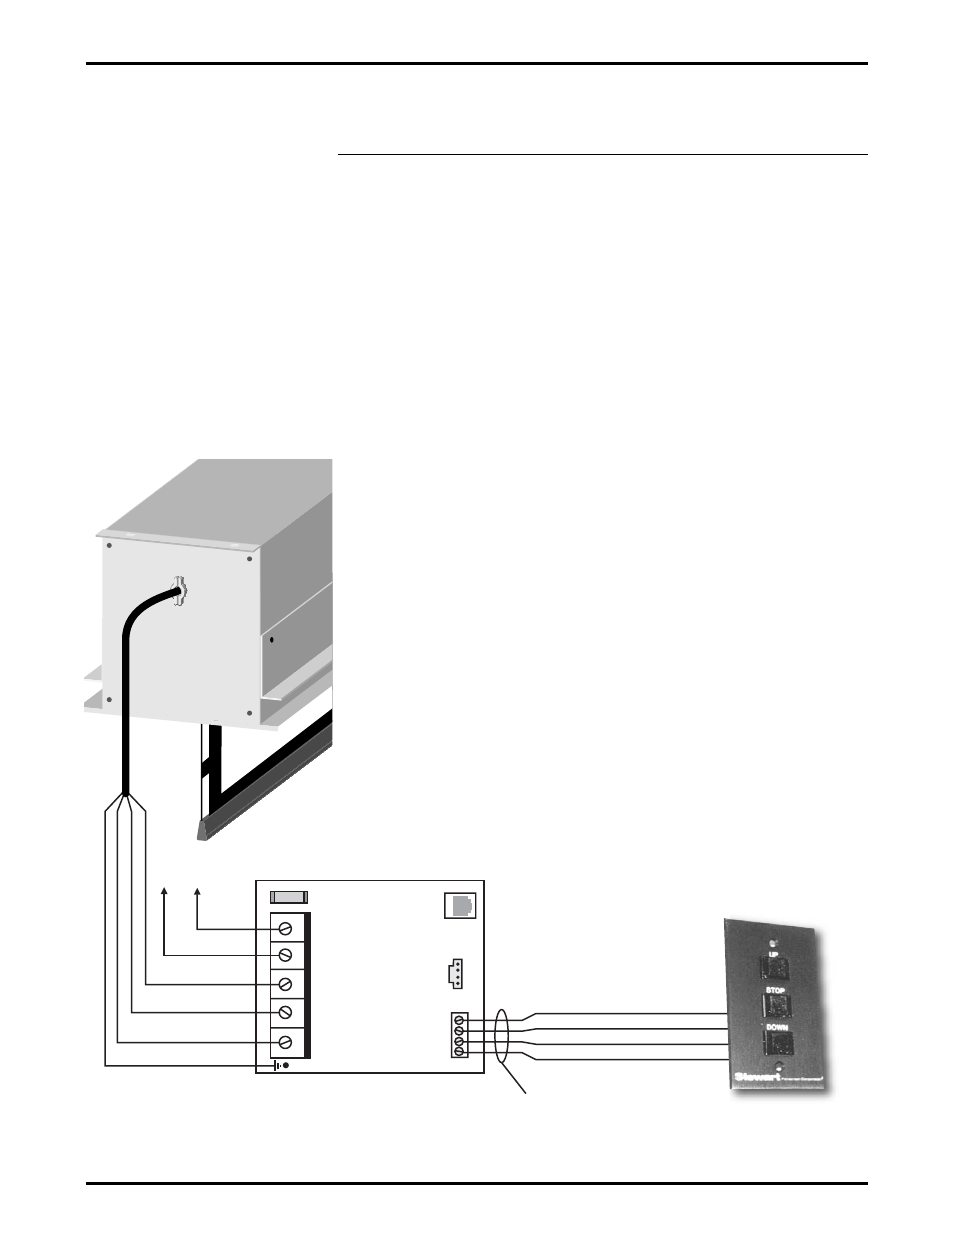
Making the connection
Figure 5 illustrates the connection.
1. Mount the low-voltage control box near the screen.
2. Connect the low-voltage control box to the screen by connecting
the screen motor power leads to the power strip terminal block
located on the circuit board of the control box.
3. Connect the low voltage control box to the AC power source by
connecting the AC line voltage to the power strip terminal block
located on the circuit board of the control box.
4. Connect the switch to the low-voltage control box.
5. A parallel connection to an outboard audio-visual switching
network can be made at this time. (optional)
Figure 5: Low voltage 3-button switch wiring
AC
Line
R/F Input
InfraRed Input
Low Voltage
Switching
Neutral
COMMON-White
UP-Red
DOWN-Black
GROUND-Green
STOP-Yellow
COMMON-White
UP-Red
DOWN-Black
4 Conductor Hook-up Cable—20-24ga Recommended
Category 5 Typically Used (NOT Supplied)
Low Voltage Control Box
3-button
Momentary Switch