Turning on your camcorder for the first time, Initial settings, Recording a movie – Insignia 1080p HD Digital NS-DV1080P User Manual
Page 11: Viewing movies
7
1080p HD Digital Camcorder
www.insigniaproducts.com
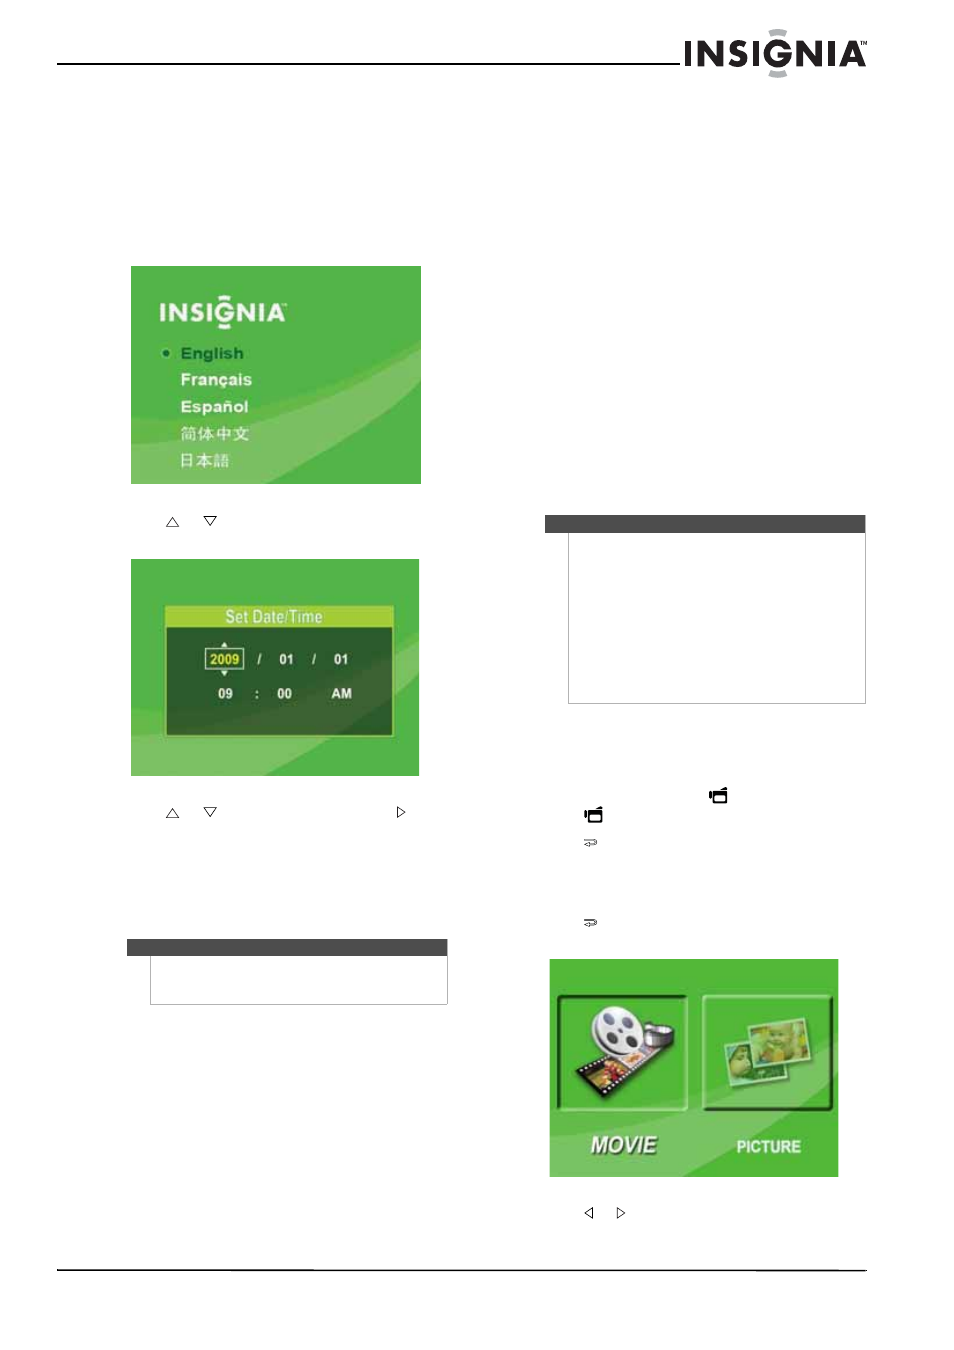
Turning on your camcorder for the first time
When you turn on your camcorder for the first time,
you need to choose a menu language and set the
date and time.
To choose a menu language and set the date and
time:
1 Turn on your camcorder. The language screen
opens.
2 Press
or
to select a language, then press
SET. The Set Date/Time screen opens.
3 Press
or
to set the year, then press to
move to the month field.
4 Repeat Step 3 to enter the day, hour, and
minute, and to select AM or PM.
5 When you are finished, press SET.
Initial settings
When you turn on your camcorder for the first time,
your camcorder will be in Simple Mode. Simple
Mode hides advanced settings and makes your
camcorder easier to operate.
Your camcorder's default settings are:
• Video Format: HD (1440x1080p, 30 fps). This is
the highest quality video resolution that your
camcorder offers. You can switch it to SD (640 x
480p, 30 fps) mode. SD mode is preferable when
the movies you capture will only be watched on a
standard definition TV. SD mode also uses less
memory than HD mode.
• Stabilization: Off. Image stabilization is ideal for
reducing blurred images that may be caused by
shaky hands or low-light conditions. Turn off
Stabilization when using a tripod.
• Sounds: On. When sounds are turned on, an alert
is heard when key functions are accessed.
Additional settings become available when Simple
Mode is turned off. To turn off Simple Mode, see
“Turning Simple Mode off” on page 10.
• Simple Mode: On. Turn off Simple Mode to access
advanced settings.
Default advanced settings:
• Motion Detection: Off.
• Scene Mode: Auto.
• Color Balance: Auto.
• Time Stamp: Off.
• Help Text: On.
• TV Format: NTSC.
• File Format: AVI.
A brief description of what the advanced settings
do is provided by the viewing help text at the
bottom of the screen. To view the help text,
highlight any menu option.
Recording a movie
To record a movie:
1 Turn on your camcorder.
2 Aim the lens, then press
to start recording.
Press
again to stop recording.
3 Press
to view the recording.
Viewing movies
To view movies:
1 Press
to switch to playback mode. The
playback mode main menu opens.
2 Press or to highlight MOVIE, then press SET
to go to movie playback mode.
Note
If you reset your camcorder to the default settings,
you will have to select the menu language and set
the date and time again.
IMPORTANT
Your camcorder ships with the default file format set
to AVI. AVI is ideal for users of Windows® XP, Windows
Vista®, and Windows® 7 computers. You can view and
edit AVI files with the included ArcSoft
MediaImpression software.
If you are a Mac™ user, you should change the default
file format to MOV. MOV files may be easily viewed
and edited on Mac computers using QuickTime™ or
iMovie™ (not included).
The file format cannot be changed after a recording
is created. You should select the file format before
you start recording.