If installing only new tank, If installing only new faucet – InSinkErator 1100 User Manual
Page 10
10
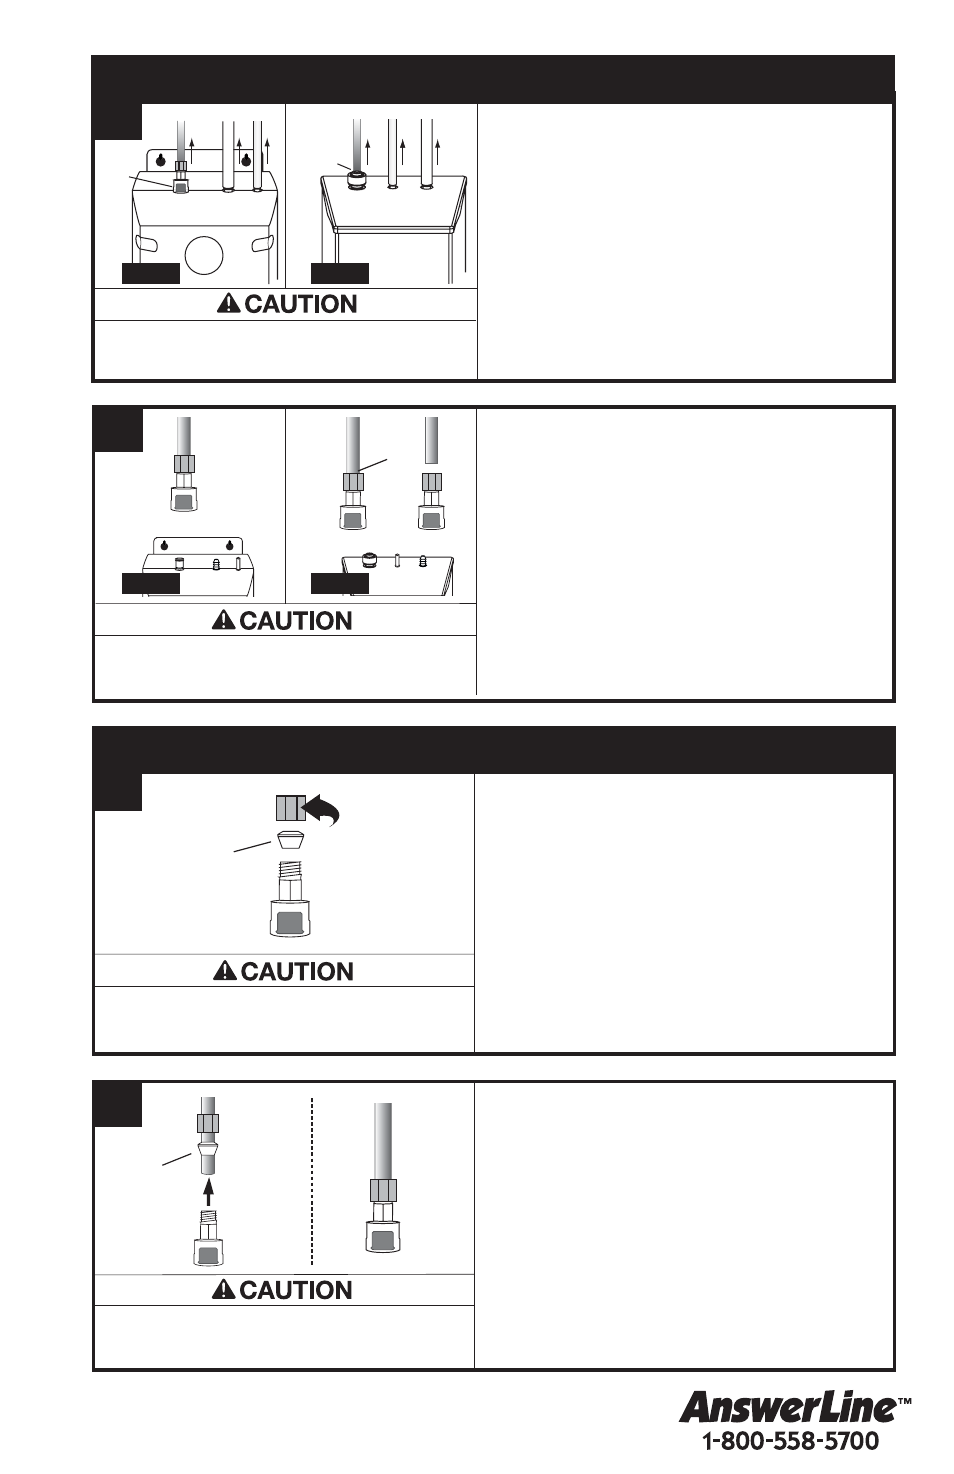
B
■
■
At tank top, depress release ring or gray
release tab into quick-connect fitting
securing blue or copper 1/4" tube and
gently pull line off tank fitting. Pull white
7/16" tube and clear 5/16" tube off fittings.
■
■
If not already equipped, the included
snap-connect fitting must be installed.
■
■
To install snap-connect fitting, unscrew
brass mounting nut and remove snap-
connect fitting, brass ferrule and nut.
A
■
■
Slide brass nut and plastic ferrule
onto the 1/4" blue or copper tube
running from the faucet.
■
■
Insert blue or copper tube into snap-
connect fitting and tighten brass nut
with a wrench, 1 to 2 turns clockwise.
■
■
You may elect to use existing tank
mounting bracket.
■
■
Refer to Page 7, Steps 3-4 for
complete installation instructions.
A
■
■
Determine if your existing tank is A, gray
plastic shell, or B, white metal shell.
■
■
At tank top, depress gray release tab
(if A) or release ring (if B) into quick-
connect fitting securing blue or
copper 1/4" tube and gently pull line
out of fitting. Pull white 7/16" tube
and clear 5/16" tube off fittings.
■
■
Remove existing faucet.
Blue Tube
Property Damage:
Do not over tighten brass nut.
Property Damage:
Turn off water & unplug tank.
Property Damage:
Unplug tank before connecting faucet.
Tank A
■
■
The snap-connect fitting will be
attached directly to the tank.
Tank B
■
■
Cut off snap-connect fitting at the
end of the blue 1/4" tube. Ensure
that cut is straight and burr free.
■
■
Insert blue tube into fitting on tank.
■
■
Skip to Step 2 (pages 7-11) for
complete installation instructions.
Property Damage: Do not pinch or break copper
tubing. Do not distort the last 1 inch of tubing.
IF INSTALLING ONLY NEW TANK
B
Release
Tab
1/4"
blue
7/16"
white
5/16"
clear
Release
Ring
1/4"
blue or
copper
7/16"
white
5/16"
clear
Cut
here
Check
orientation
of ferrule
Make note of
orientation
of ferrule
IF INSTALLING ONLY NEW FAUCET
Tank A
Tank A
Tank B
Tank B