Audio dubbing – Hitachi VM-8400LA User Manual
Page 46
AUDIO DUBBING
46
AUDIO DUBBING
The audio dubbing feature lets you record new audio (sound) on a previously recorded tape
without erasing the original video (picture).
When you audio dub a tape, the previous audio is erased and replaced with new sound.
NOTES:
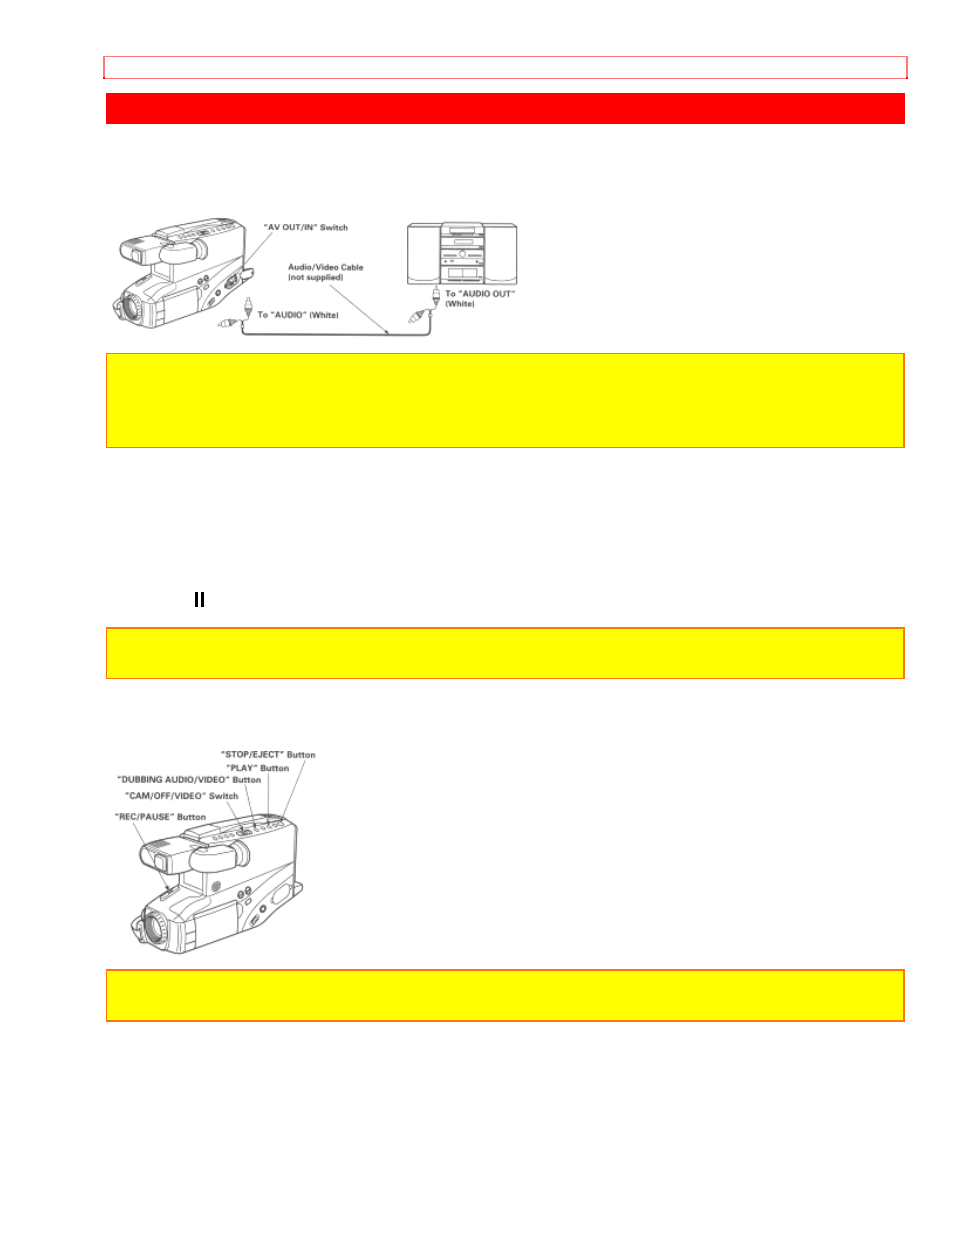
• Sound from the built-in microphone and the AUDIO jack can be dubbed.
• When dubbing audio from the built-in microphone, set "" OUT/IN" to "OUT" and do not
connect the "AUDIO" jack. When dubbing audio from the "AUDIO" jack, set "" OUT/IN" to "IN".
1. Insert a recorded tape.
Be sure that the record safety tab is not missing.
2. Place "CAM/OFF/VIDEO" to "VIDEO" position.
3. Play the tape and press "REC/PAUSE" where you want to dub audio.
• The camcorder enters the still play mode.
4. Press "DUBBING AUDIO/VIDEO" and "PLAY" at the same time.
• "A.DUB " appears in the viewfinder or LCD monitor.
NOTE:
If "DUBBING AUDIO/VIDEO" and "PLAY" are pressed twice, audio and video dubbing
will start. In this case, press "STOP/EJECT" to release the dubbing mode.
5. Press "REC/PAUSE" to start audio dubbing.
6. Press "STOP/EJECT" to stop audio dubbing.
NOTE:
If "DISPLAY" is pressed so the display appears in the viewfinder or LCD monitor, the
tape stops automatically at the reading of "0000M" and audio dubbing stops.