Installation, Fan & cast faceplate installation – Hampton Direct Wood Insert HI200 User Manual
Page 12
HI200 Hampton Wood Cast Insert
12
FAN & CAST FACEPLATE INSTALLATION
INSTALLATION
Stop! Read Carefully.
Enamel & Cast components are very fragile. Use extreme care when handling.
Note: The liner and fl ue adaptor should be installed prior to
reading these instructions.
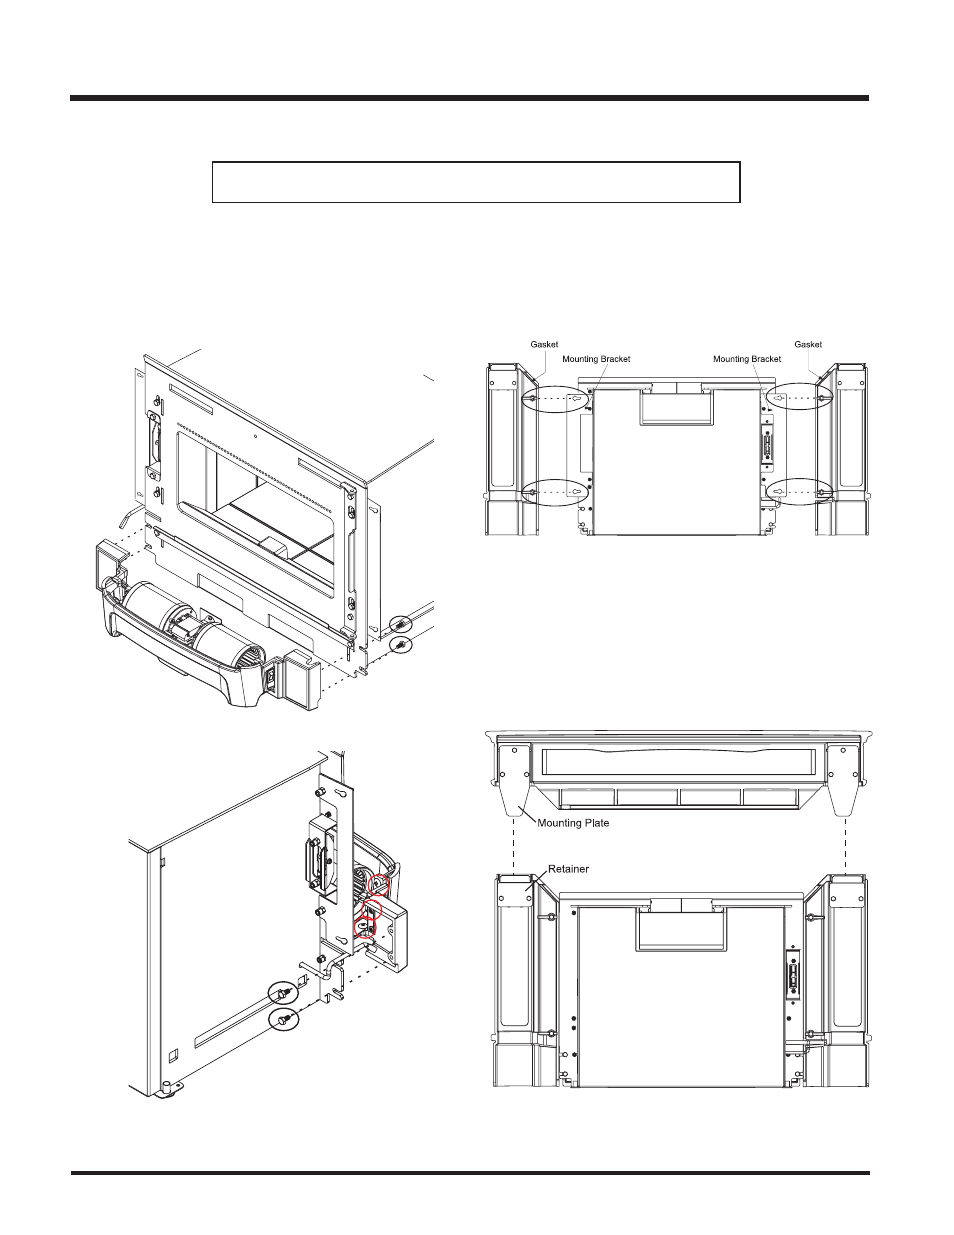
1) With door already removed, install fan to the unit using 2 screws on
both the left and right side. See Diagrams 1 & 2.
2) Slide the unit into position leaving partially out to allow for installation
of the left and right side surrounds.
3) Install the left and right side surround to the mounting brackets on
the unit using 2 bolts per side. See Diagram 3.
Diagram 1
Diagram 2: Back View of
Fan Installation
Diagram 3
Note: If screws do not lineup, loosen the 2 screws per side as shown in
Diagram 2 and adjust left side and right side facia. Tighten the 2 screws
per side and install the fan on the unit.
Diagram 4
4) Place a strip of gasket on top of the left and right side surround on
the front lip o f the side castings. See Diagram 3.
5) Carefully slide the top surround in place by aligning the mounting
plates with the two retainers in the left and right side surrounds.
See Diagram 4.